• Scam Alert. Members are reminded to NOT send money to buy anything. Don't buy things remote and have it shipped - go get it yourself, pay in person, and take your equipment with you. Scammers have burned people on this forum. Urgency, secrecy, excuses, selling for friend, newish members, FUD, are RED FLAGS. A video conference call is not adequate assurance. Face to face interactions are required. Please report suspicions to the forum admins. Stay Safe - anyone can get scammed.

DMC2 Mini Mill - build and review

I can't really comment on Mach3 - never used it. But fundamental troubleshooting techniques apply.
Start with just one axis plugged in and powered on. Try to get it going. Any movement at all or moves and then faults? How did you configure the drives, and Mach3?
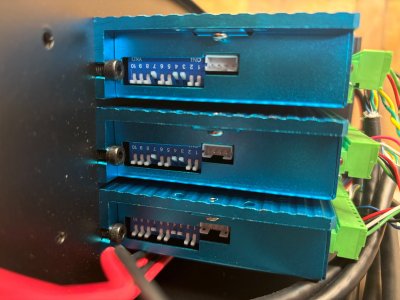
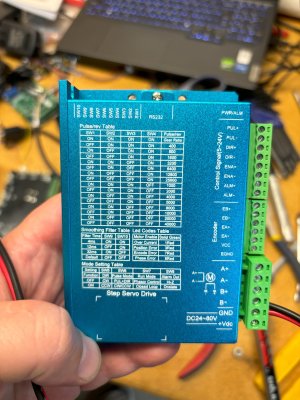
If I recall correctly - I think my stepper motor wires were not the same color coding as the manual and I had to figure that out myself, basically find the 2 pair - ensure they are wired to A+ A- as one pair and B+ and B- as the other pair. If it still doesn't move swap the polarity of one pair.
IMG_1334.jpgIMG_1357.jpg
Have you reached out to Shariff? He was pretty responsive to my requests (usually just a few hours). I can take a picture of my rats nest / wiring if that helps....the pictures here are before I was done.
 
New follower: Have purchased same DMC2mini - got it all together but issues with no movement at all.
Using the mach3 board and software... Not sure if your familiar with long mill - but have put 2 of them together with
no issues - work beautiful... Any ideas what might be the issue? Seeing a lot of issues with mach3 -- Any improvements would be great!
Thank you
Mine had no movement just hummed here is what he told me to correct. The humming sound means the motors are wired wrong - double check the encoders are wired correctly (the color coding at the green plugs) and that the motors are wired correctly (you didn't solder any extensions wrong or wrong order at the green plug).

If all three are wired ok and all 3 have this same problem then the issue is that the encoders are wired wrong internally. Basically the manufacturer has sent us some motors and extension cables that have different pinouts.. You will need to unscrew the top cap of the Z axis motor carefully (don't damage the fragile encoder wheel), and use a multimeter to carefully check that EA+ at the encoder goes to EA+ at the motor driver, EB- at the encoder goes to EB- at the driver.. etc. Most likely you will find that the blue and white or the green and yellow wires need to be swapped.
 
OK, I just used the machine to try and make my first real part. Found a few bugs - quick and not so quick fixes needed
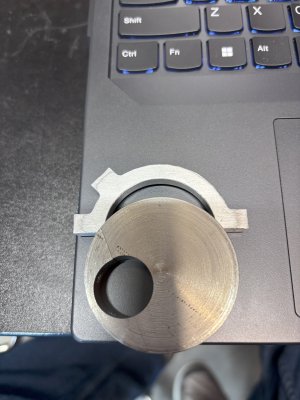
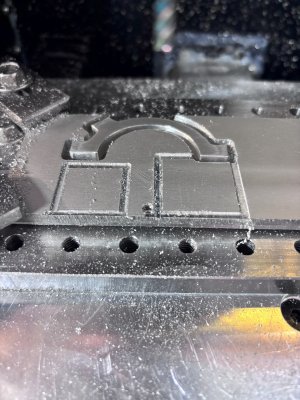
First a picture to tell the story. Trying to machine a strap for a water pump on a 5" gauge steam locomotive. The strap is 2 pieces - top and bottom and clamps around an eccentric to drive the ram of the pump.

Anyways, its going to be brass but as that stuff costs like gold and I have aluminum coming out my whazoo, test piece is aluminum.

Sooo - I programmed the part in Fusion, copied it to the mill and pressed start and after about 1 min it just started bogging the spindle and the cut was getting way too deep. I was trying to run without coolant. broke the endmill (only a 3mm one) and also realized it was a 4 flute but should have been a 3 flute.
So reprogrammed to use a lot shallower cut, turn on flood, and have at it.
It Worked!
sort of. My enthusiasm was tempered by the part not coming free from the stock, it should have cut through. Looked like it may have been only a tiny amount left so I readjusted Z and did it again (and again) - half a mm at a time lower and it came free. OK now celebrate. Nope.

Take the part over to what its supposed to fit on and no way its going. Ran a quick 25mm square in the aluminum - 19. some mm.
I assumed the ballscrews were 5mm pitch and never double checked the motion. Turns out they are 4mm. Easy enough to fix but a bit time consuming editing a bunch of parameters in the controller (knock on effect - changed the total travel as measured by the machine, changed soft limit positions, etc.) . Also, looks like l don't really need to do a proper set of test cuts to measure the real motion versus the math version - at least not yet. Second test square of 25mm is very close (±0.01 or 0.02mm).

The other issues that are harder to fix,
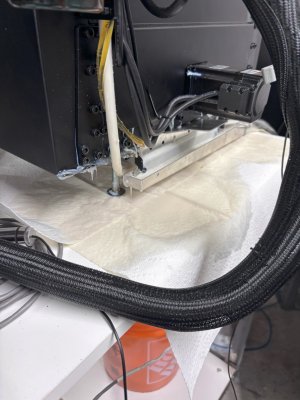
1. is the enclosure / whole machine leaked like a sieve, at the back. I had the flood running full tilt, which also may not have helped but I wanted to find out now where all leaks are, not 1 by 1 over the next 20 times I use it.
Looking at the design and what other people have done, it may be easier and better to just put a big baking pan under the machine and let that catch it all, instead of (or in addition to) more silicone.

2. The last issue is a clicking noise from the Y ballscrew assembly (once per rev). Going to drive me nuts til I find out what is causing it. IMG_1718.jpgIMG_1721.jpgIMG_1720.jpg
 
Hey Mike happy New Year’s glad to hear you got your machine up and running hope all is going well

I was wondering if you could share a copy of the PDF file manual so I could take a look and see how hard this thing is to assemble I’m considering buying one thanks!
 
Quick update.
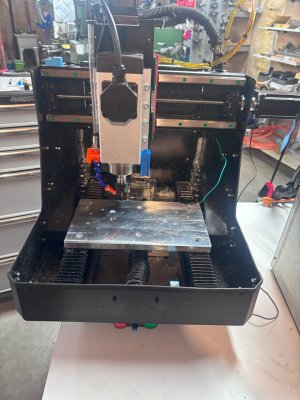
I found the Y-axis clicking. The stepper motor was not aligned well with the ball screw. By placing washers under the top mounting screws that has aligned it properly and got the noise to go away. I added more silicone, mostly better but still a few small leaks.
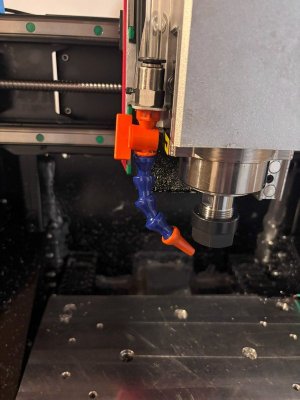
I also wired the coolant pump to the potentiometer to be able to adjust the flow rate, and I added a little bit of length to the coolant nozzle line to give a wee bit more adjustability in where the coolant is directed.
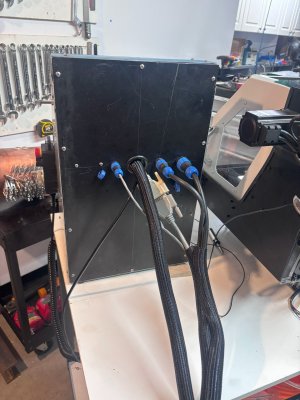
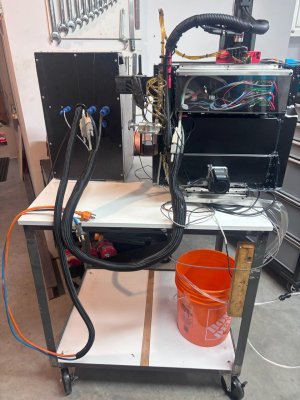
I added connectors to the back of the control cabinet and redid the wires - I wasn't happy with my initial selection from my collection. A parallel printer cable had enough conductors for all the signal wires greatly cleaning up the connections. Now the wires from the control cabinet are:
- Signal cable (XYZ stepper driver - step and direction and error, XYZ home/limit, touch probe)
- Spindle motor power
- 36VDC Stepper driver power
- Coolant pump power (internally switched in the control cabinet by a relay, speed control is potentiometer on the mill)
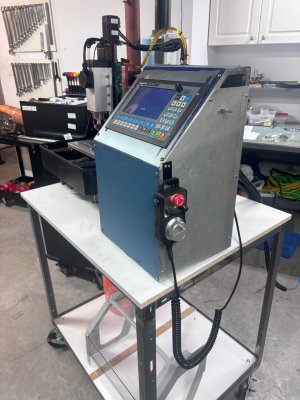
- hand pendant
This makes it actually relatively easy to move the machine as 2 separate pieces - coolant pump with main machine, and the control cabinet.
I also forgot to mention that I made a cart for the machine to try and keep it mobile and out of the way.

Lastly after all that:

I've decided to sell it. As mentioned before I had ordered this and it was still shipping when a Tormach PCNC 1100 series 3 with all the bells and whistles became available at a ridiculous price close to me. I don't need 2 cnc mills. I don't have enough time to keep 1 machine fed with projects, never mind 2. The Tormach has been tested with down to 3mm end mills and has worked great. The only reason to keep the DMC2 is to use it with tiny end mills that the Tormach isn't suited for (~1mm and smaller). I should try the Tormach with the really small stuff to be sure but a 5100rpm spindle is just too slow for those and I'd really need to strap a high speed spindle on the side of the head for those. The other thing is backlash. The Tormach is quite good, but may be just a tad too much backlash for a tiny endmill.

IMG_1746.jpgIMG_1747.jpgIMG_1748.jpgIMG_1750.jpgIMG_1753.jpg
 
Back
Top