• Spring 2024 meetup in Calgary - date Saturday, April 20/2024. discussion Please RSVP Here to confirm and get your invitation and the location details. RSVP NOW so organizers can plan to get sufficient food etc. It's Tomorrow Saturday! you can still RSVP until I stop checking my phone tomorrow More info and agenda
  • We are having email/registration problems again. Diagnosis is underway. New users sorry if you are having trouble getting registered. We are exploring different options to get registered. Contact the forum via another member or on facebook if you're stuck. Update -> we think it is fixed. Let us know if not.
  • Spring meet up in Ontario, April 6/2024. NEW LOCATION See Post #31 Discussion AND THE NEW LOCATION

Ditron DRO Finally Installed on Mill

Hacker

Super User
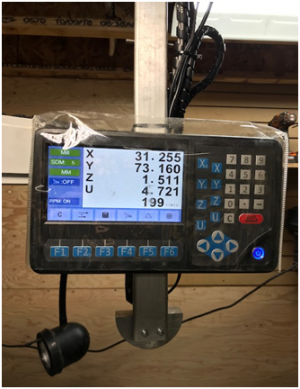
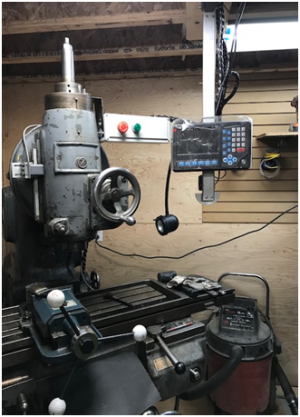
I finally got around to installing the DRO on my mill. The read out is mounted to the ceiling as the start panel was in the way and I didn't want to relocate it. It is a Ditron unit and the scales are magnetic.
1646319144787.png
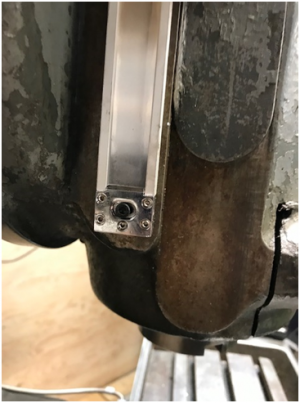
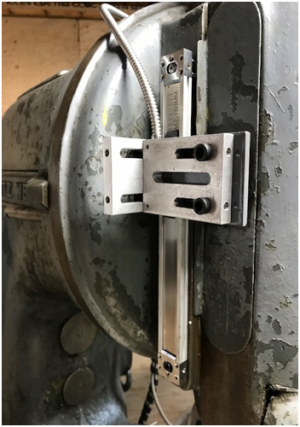
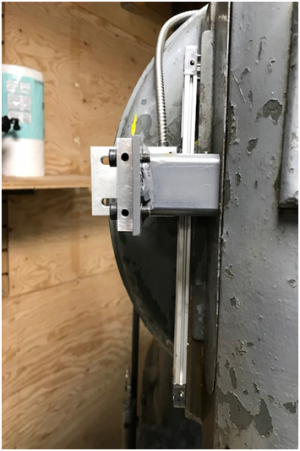
The installation was a bit of a challenge on the Y and Z axis. The left side of the machine has mechanical trips for the Y and Z so the scales could not be mounted there. The right side Y there is a gearbox and drive so there is no place to attach the scale directly to the table. In the end I ended up making a bracket and mounting it to the drive and table.
1646319791975.png
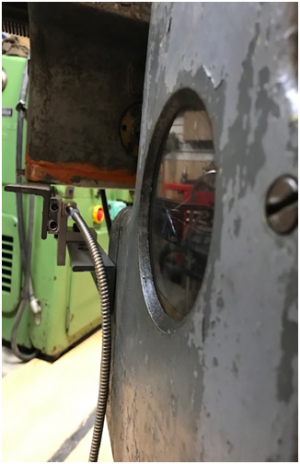
The Z axis is tucked in by the drive shaft. I am not totally happy with the location but it have to do. I don't like the reader and cable being that close to moving parts.
1646320093972.png
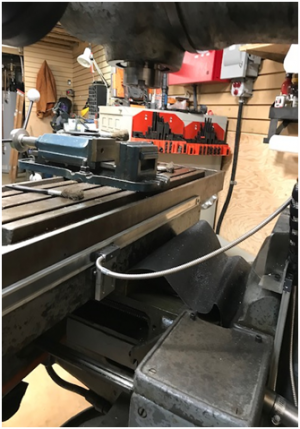
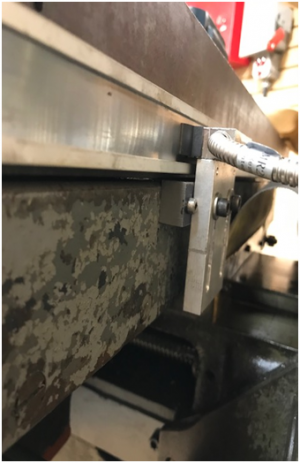
I offset the X axis reader and scale so I was not restricting travel on the Y axis.
1646320247551.png
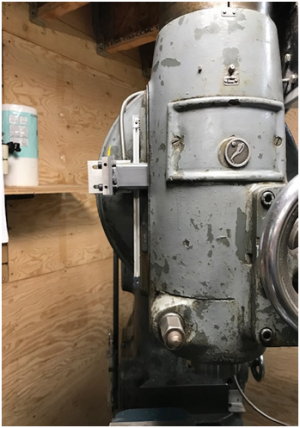
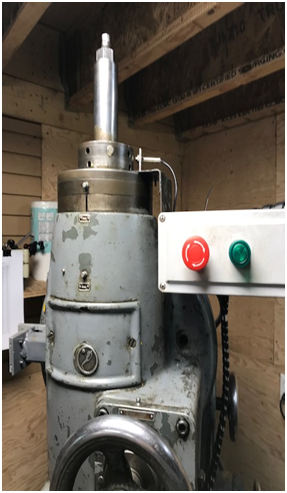
I had to build a bracket to mount the reader for the quill.
1646320373930.png
Also made a small bracket for the RPM sensor and epoxied the magnet to the collar. I learned you must have the correct orientation on the magnet for the sensor to work.
1646320484536.png
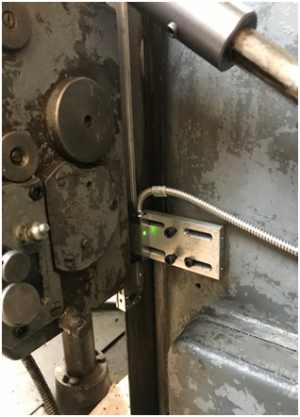
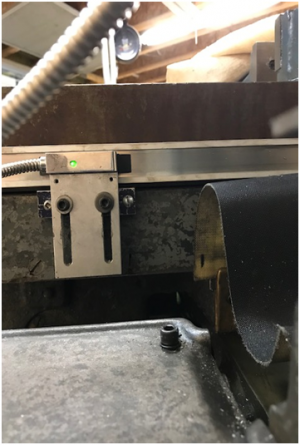
I really like these scales. There are five small Allen screw on each cap at each end that allow you to install these on uneven surface and make the adjustments so they are square to the reader. They are easy to cut to length, by removing the cap and foil and cutting them on the band saw.
1646320853397.png
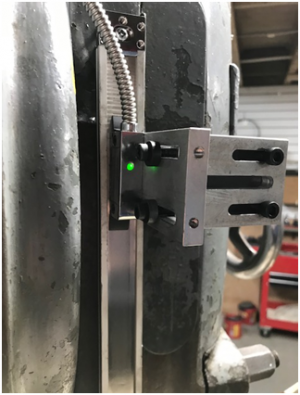
Also there is a light on each reader that lets you know when you are within tolerances. When the green light is on across the whole scale then everything is good. You don't have spend a bunch of time with a dial indicator truing everything up. Very fast and easy.
1646320093972.png
Readout with everything functioning.
1646321401615.png
I still have to check the calibration, but from a few test cuts it seems to be very close. I would like to that Ian Moss for taking the time to come over and helping with figuring out the location of the scales and readers.
 

RobinHood

Ultra Member
Premium Member
Nicely done on a challenging scale install!

That is the set-up I am looking for for my BP.

Do you happen to have a link to the seller? Thanks.
 

Susquatch

Ultra Member
Administrator
Moderator
Premium Member
Thanks Rob.
Hey RobinHood. I bought exactly the same system (4-axis, magnetic, 1 micron, w Hall Effect RPM) directly from the Ditron store through AliExpress. It was about $300 less than Amazon. But prices seem to jump around a lot depending on the phase of the Moon, your first initial, and random luck - in other words it makes no sense.

I don't know what your risk tolerance is, mine is quite low but the agent was successful at talking me into a purchase anyway. Nonetheless mine arrived in good shape in good time. I'm quite happy with it and I have done some simple testing to make sure everything works.

I'm a fair bit slower than @Hacker at installing it though. I don't have anyone to come over and help me out. All I have done so far is to work out the monitor mounting system. The scale install is on hold till I investigate and determine the best install I can do on my Hartford Bridgeport Step Pulley Clone.
 

Susquatch

Ultra Member
Administrator
Moderator
Premium Member
I still have to check the calibration, but from a few test cuts it seems to be very close.

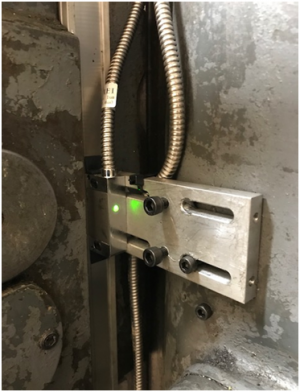
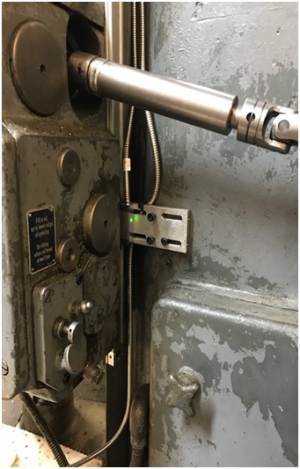
Hi @Hacker would you mind taking a closeup photo of the way you mounted the reader heads for the scales? I have the almost identical DRO system as yours but my mill is a bit different. It's a Hartford Clone of the Bridgeport Step Pulley Mill. The mounting for the reader heads seems to be quite critical. And I can't really see what you did.
 

Hacker

Super User
Hi @Hacker would you mind taking a closeup photo of the way you mounted the reader heads for the scales? I have the almost identical DRO system as yours but my mill is a bit different. It's a Hartford Clone of the Bridgeport Step Pulley Mill. The mounting for the reader heads seems to be quite critical. And I can't really see what you did.
I will do that today.
 

Hacker

Super User
These are beautiful shots! This is an awesome install!

I'll post a link to them on my own dro install thread here:

Thread 'Installing a DRO on a Hartford Bridgeport Clone.' https://canadianhobbymetalworkers.com/threads/installing-a-dro-on-a-hartford-bridgeport-clone.4852/

Please reply there with any suggestions to deal with the questions I posted.

Again, thanks for the photos and VERY WELL DONE!
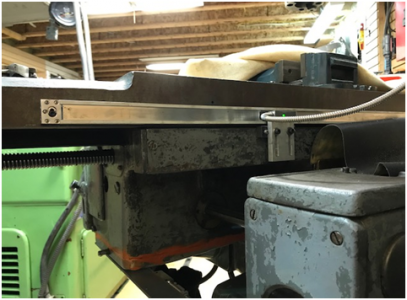
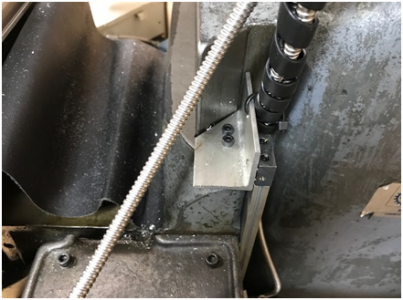
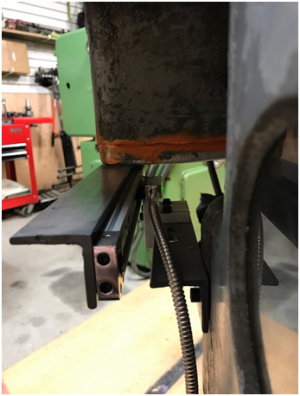
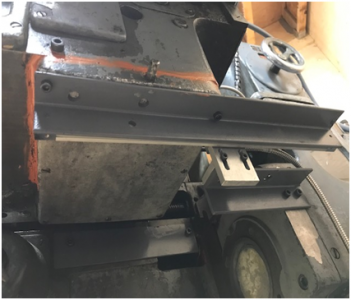
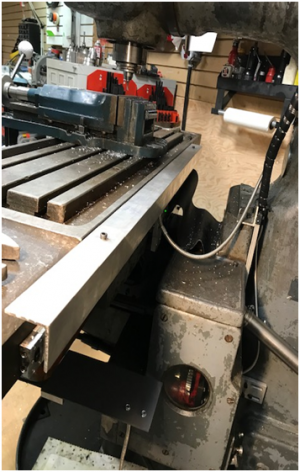
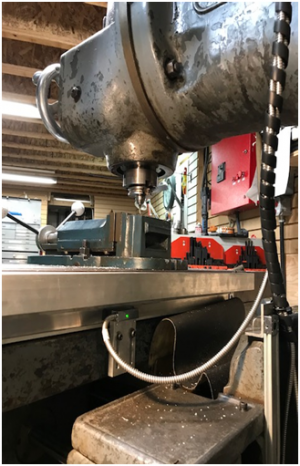
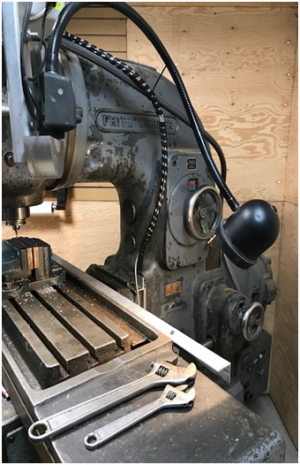
After reading your Hartford Clone post I went back and had another look at mine. Initially I was going rotate the X axis scale 90 degrees but realized that would make it difficult to check it and it required another bracket in the middle due to the length of the scale. I decided to install a cover made of aluminum angle that I had laying in around. Here are a few pictures of the end result.
I tested it out this evening I when I took 6 mm off a couple of insert holders for my lathe. Lots of chips and none ended up on the scales.
1646625422148.png
1646625463172.png
1646625626617.png
 

Susquatch

Ultra Member
Administrator
Moderator
Premium Member
After reading your Hartford Clone post I went back and had another look at mine. Initially I was going rotate the X axis scale 90 degrees but realized that would make it difficult to check it and it required another bracket in the middle due to the length of the scale. I decided to install a cover made of aluminum angle that I had laying in around. Here are a few pictures of the end result.
I tested it out this evening I when I took 6 mm off a couple of insert holders for my lathe. Lots of chips and none ended up on the scales.
View attachment 21734
View attachment 21735
View attachment 21736

Your timing is perfect. I'm re-evaluating the whole thing from that perspective right now.

Something I have not covered in the discussion is that they gave me the all new "slim" scales. 9mm thick and 20mm wide. (roughly 3/4" x 3/8"). They dont have a lot of bending resistance and are pretty easily bent. So I'm reluctant to mount them hanging out in the air. For the longer ones, I think it's better to mount them flat against the table.

I have some nice aluminium angle bar I could use as a shield or even as backing to support the scales.

I plan to do some flex measurements to evaluate the situation a bit better.

Much as I want to get this done and start using them, it's still winter out there and I'm in no real rush. My next train stop is the graveyard anyway.
 

Hacker

Super User
Your timing is perfect. I'm re-evaluating the whole thing from that perspective right now.

Something I have not covered in the discussion is that they gave me the all new "slim" scales. 9mm thick and 20mm wide. (roughly 3/4" x 3/8"). They dont have a lot of bending resistance and are pretty easily bent. So I'm reluctant to mount them hanging out in the air. For the longer ones, I think it's better to mount them flat against the table.

I have some nice aluminium angle bar I could use as a shield or even as backing to support the scales.

I plan to do some flex measurements to evaluate the situation a bit better.

Much as I want to get this done and start using them, it's still winter out there and I'm in no real rush. My next train stop is the graveyard anyway.
I have the same scales and the same concerns. The concern I have with mounting them with the face down is it exposes them to accidental bending when putting heavier items on the table. That is why I went with the aluminum angle and supported it on the ends and in the middle so it will take the abuse and not the scale.
I have used the mill a couple of times yesterday and am very happy with how much easier it is to use. I have a lot of backlash on the Y axis and this helps with hitting tolerances. I now have to learn how to use the functions and how to navigate my way around the he

I know that feeling, having been redundant for 9 years. I hope my train ride is long and slow.
 
Top