• Scam Alert. Members are reminded to NOT send money to buy anything. Don't buy things remote and have it shipped - go get it yourself, pay in person, and take your equipment with you. Scammers have burned people on this forum. Urgency, secrecy, excuses, selling for friend, newish members, FUD, are RED FLAGS. A video conference call is not adequate assurance. Face to face interactions are required. Please report suspicions to the forum admins. Stay Safe - anyone can get scammed.

Checking out the Happy Vise

Mcgyver

Ultra Member
I said I'd do a quick survey of the happy vise, here are the results. Whats acceptable to someone is variable thing but for me and imo its a poor show putting out tooling like this. What should be universal though is disdain for false claims. I've had roles in two business that exposed me to manufacturing in the China and 10 years ago vendors filling in a certificates was simply a marketing exercise....the certificates function is to tell the customer what they want to hear and if they don't notice, win! I was hoping things had changed as they start to discover branding. Anyway, I really dislike that style of commerce.

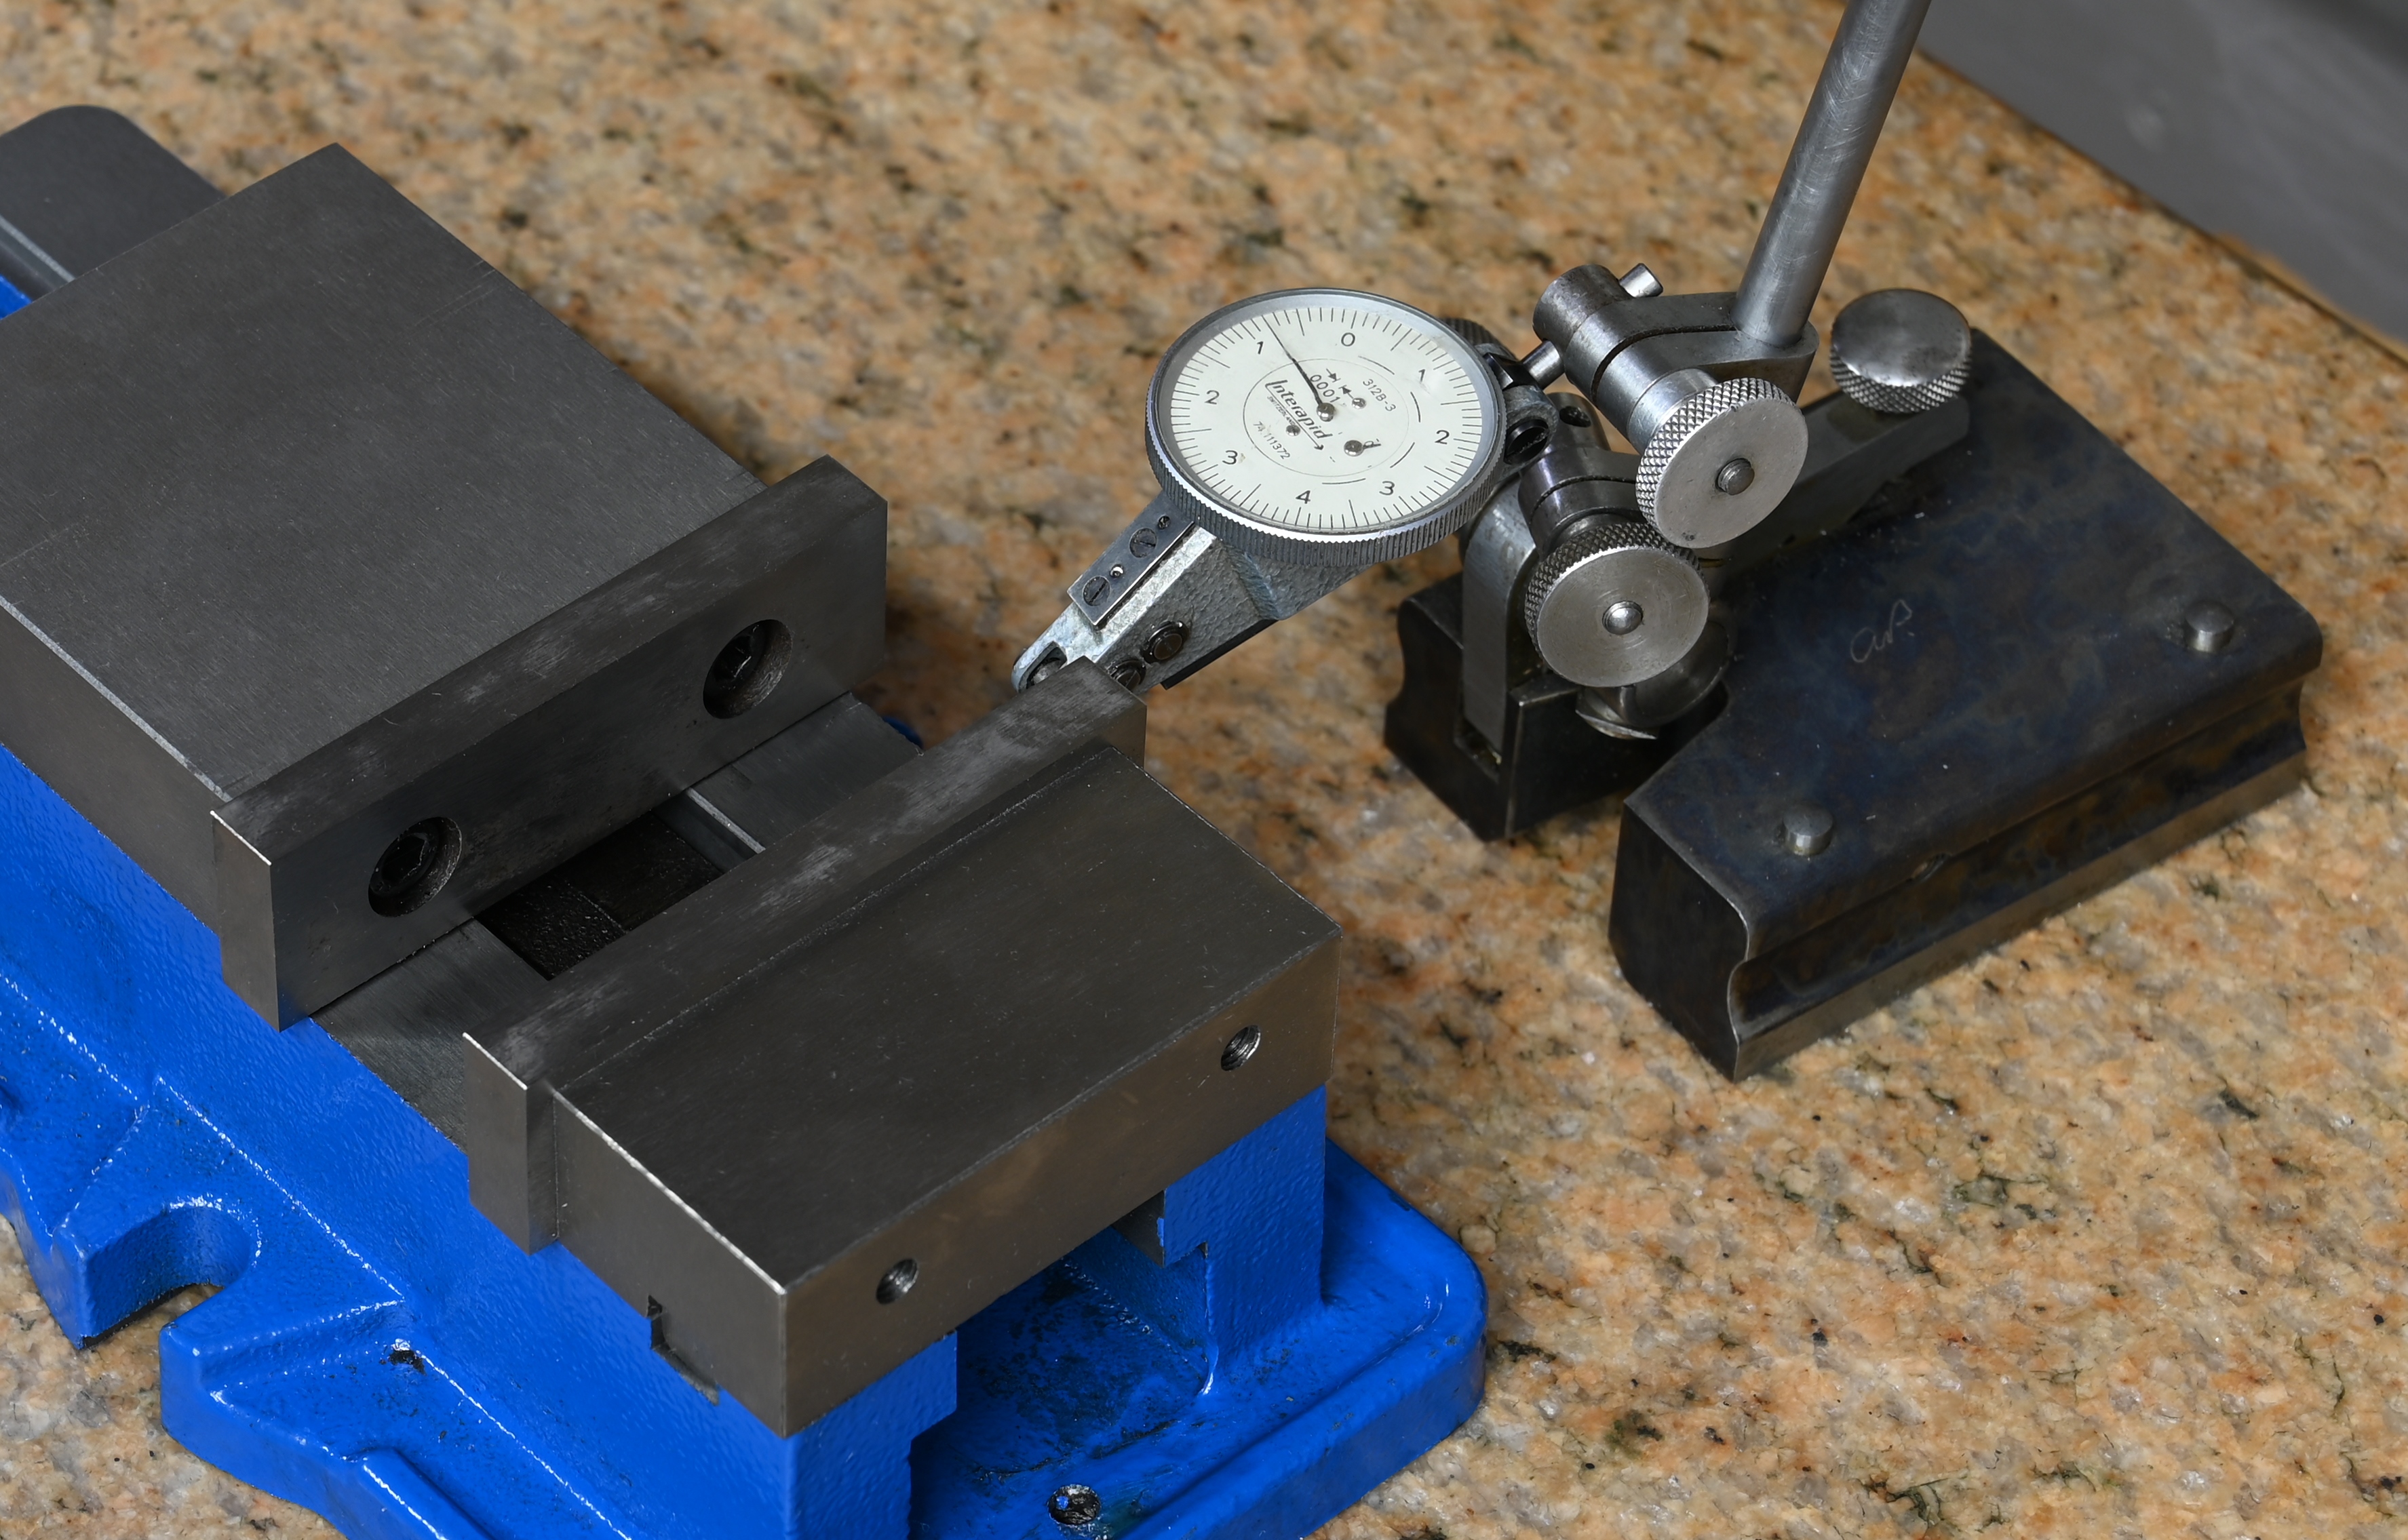
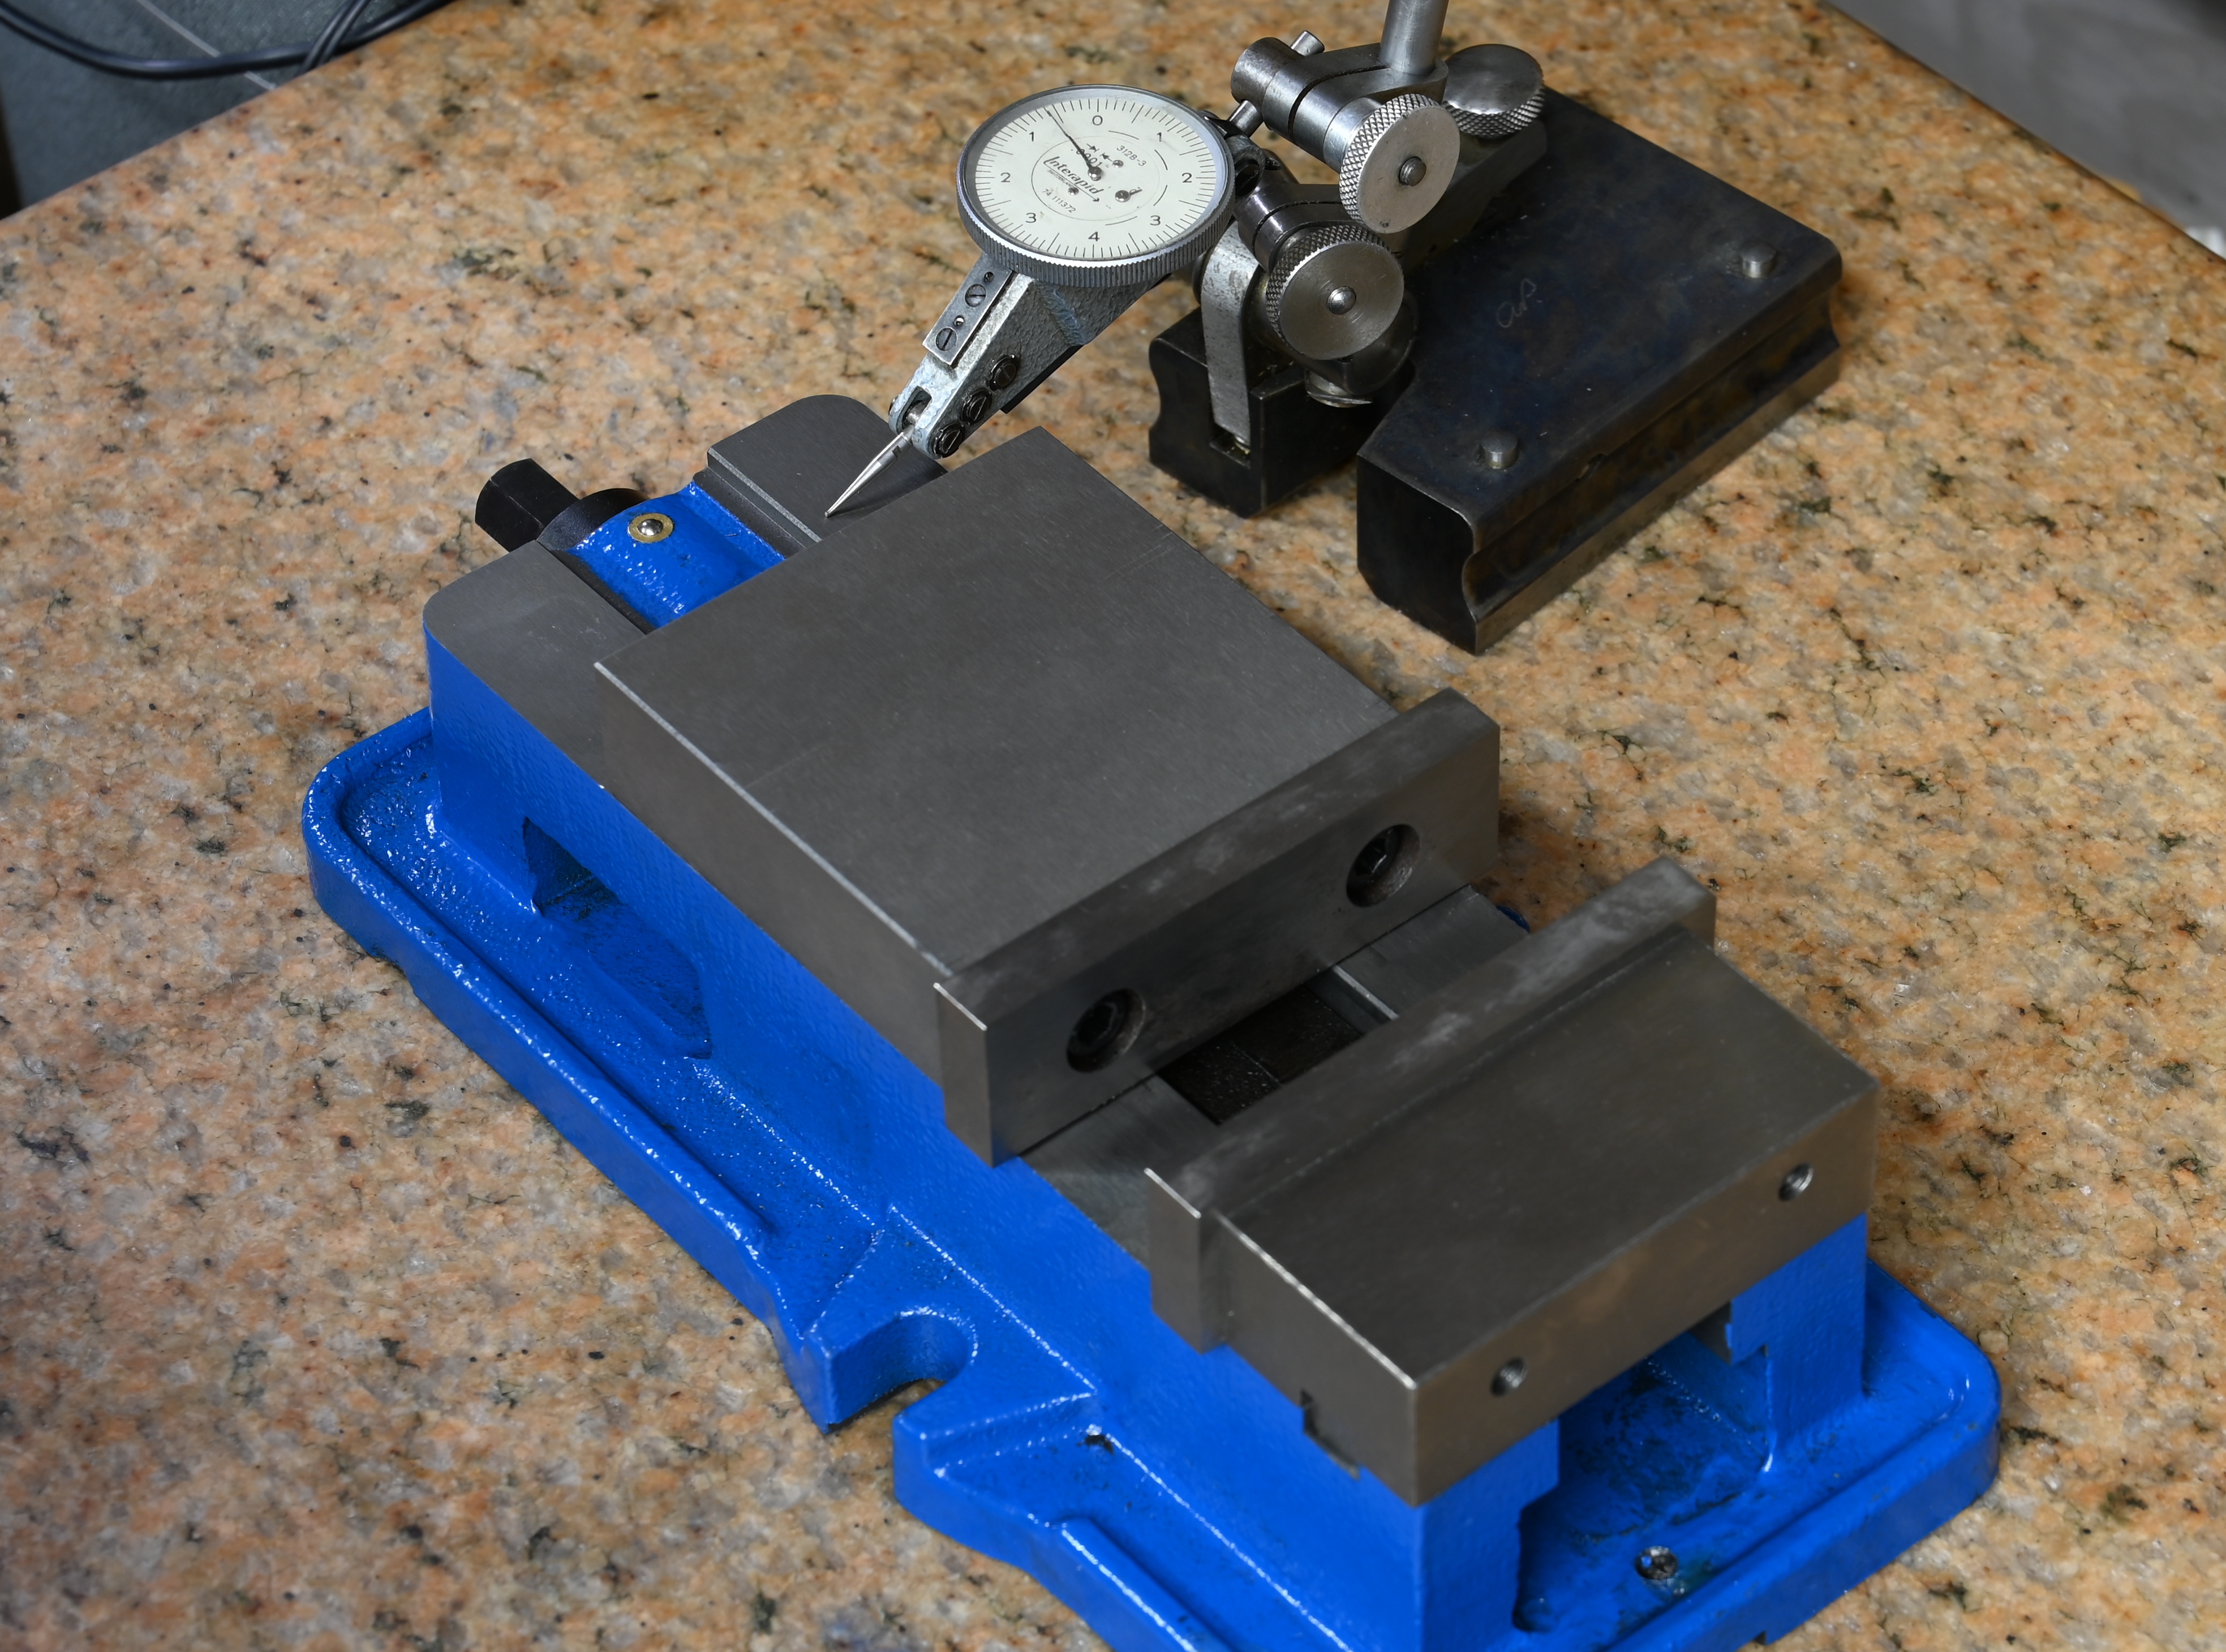
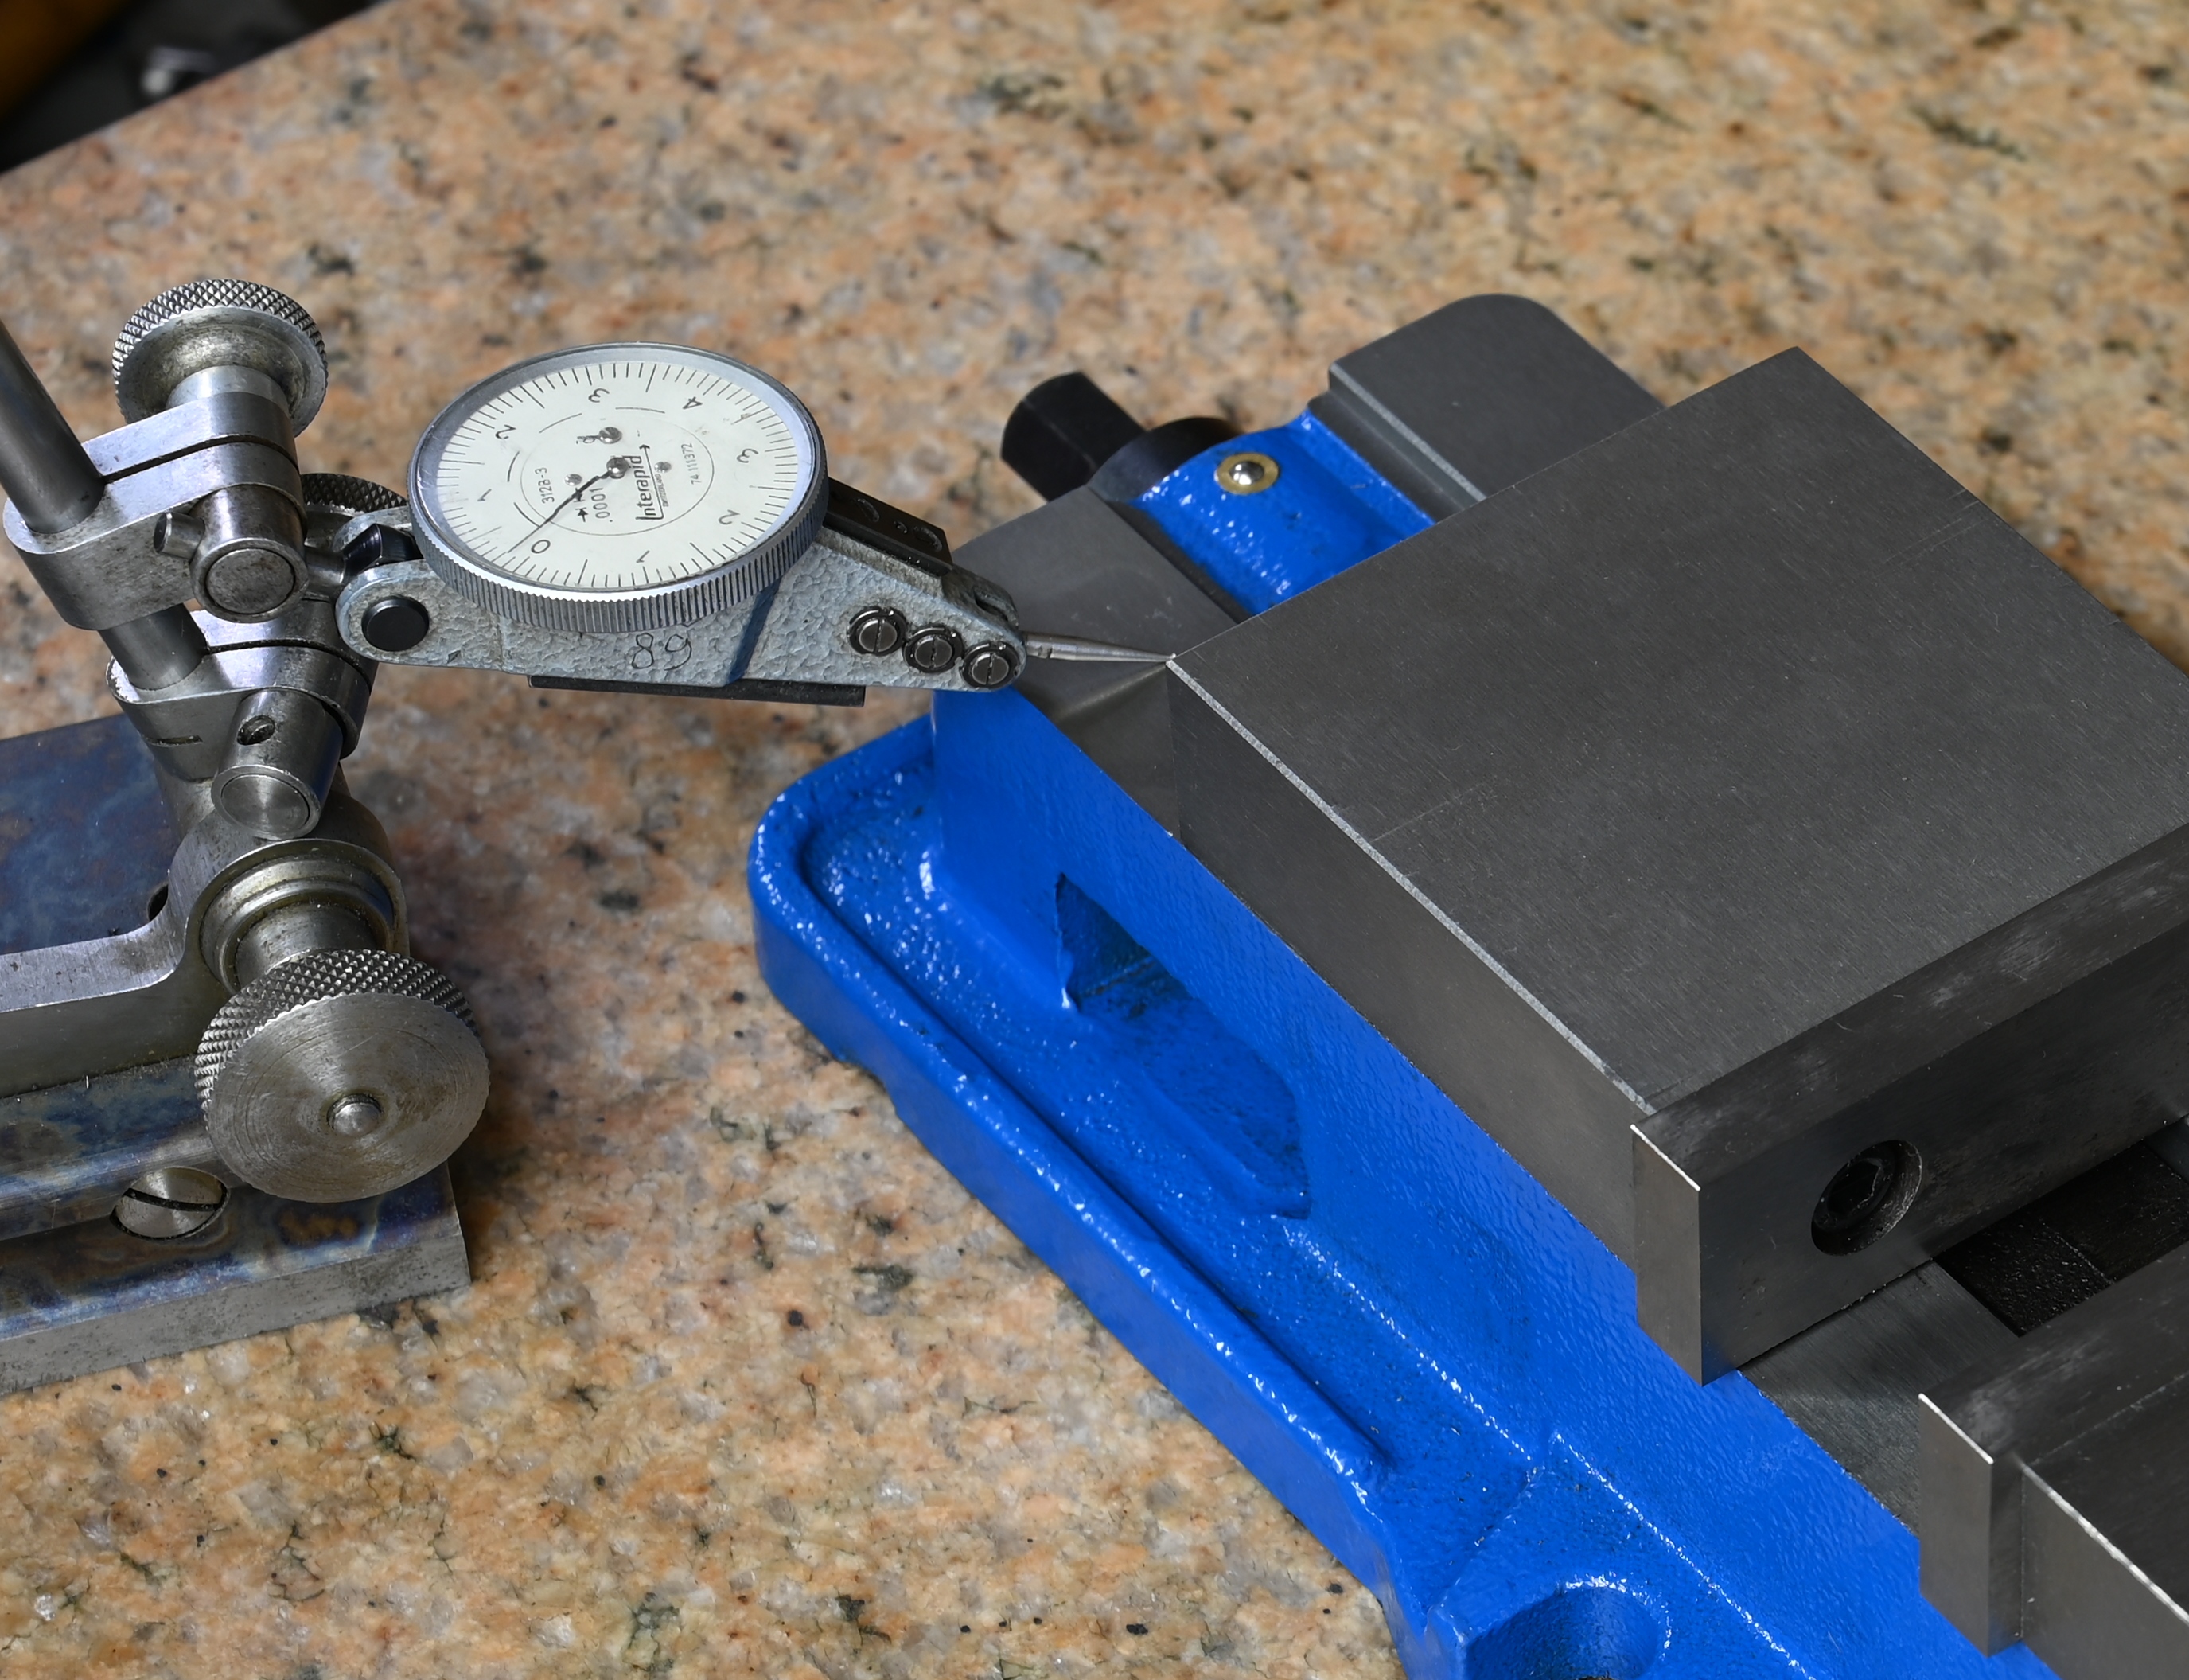
Test were done a pristine Starrett grade A inspection plate using a interapid 10ths indicator. The parallels are proven and everything was repeated several times to check for dead on repeatability

Indicating the four corners of vise ways shows that they are close to within tolerance
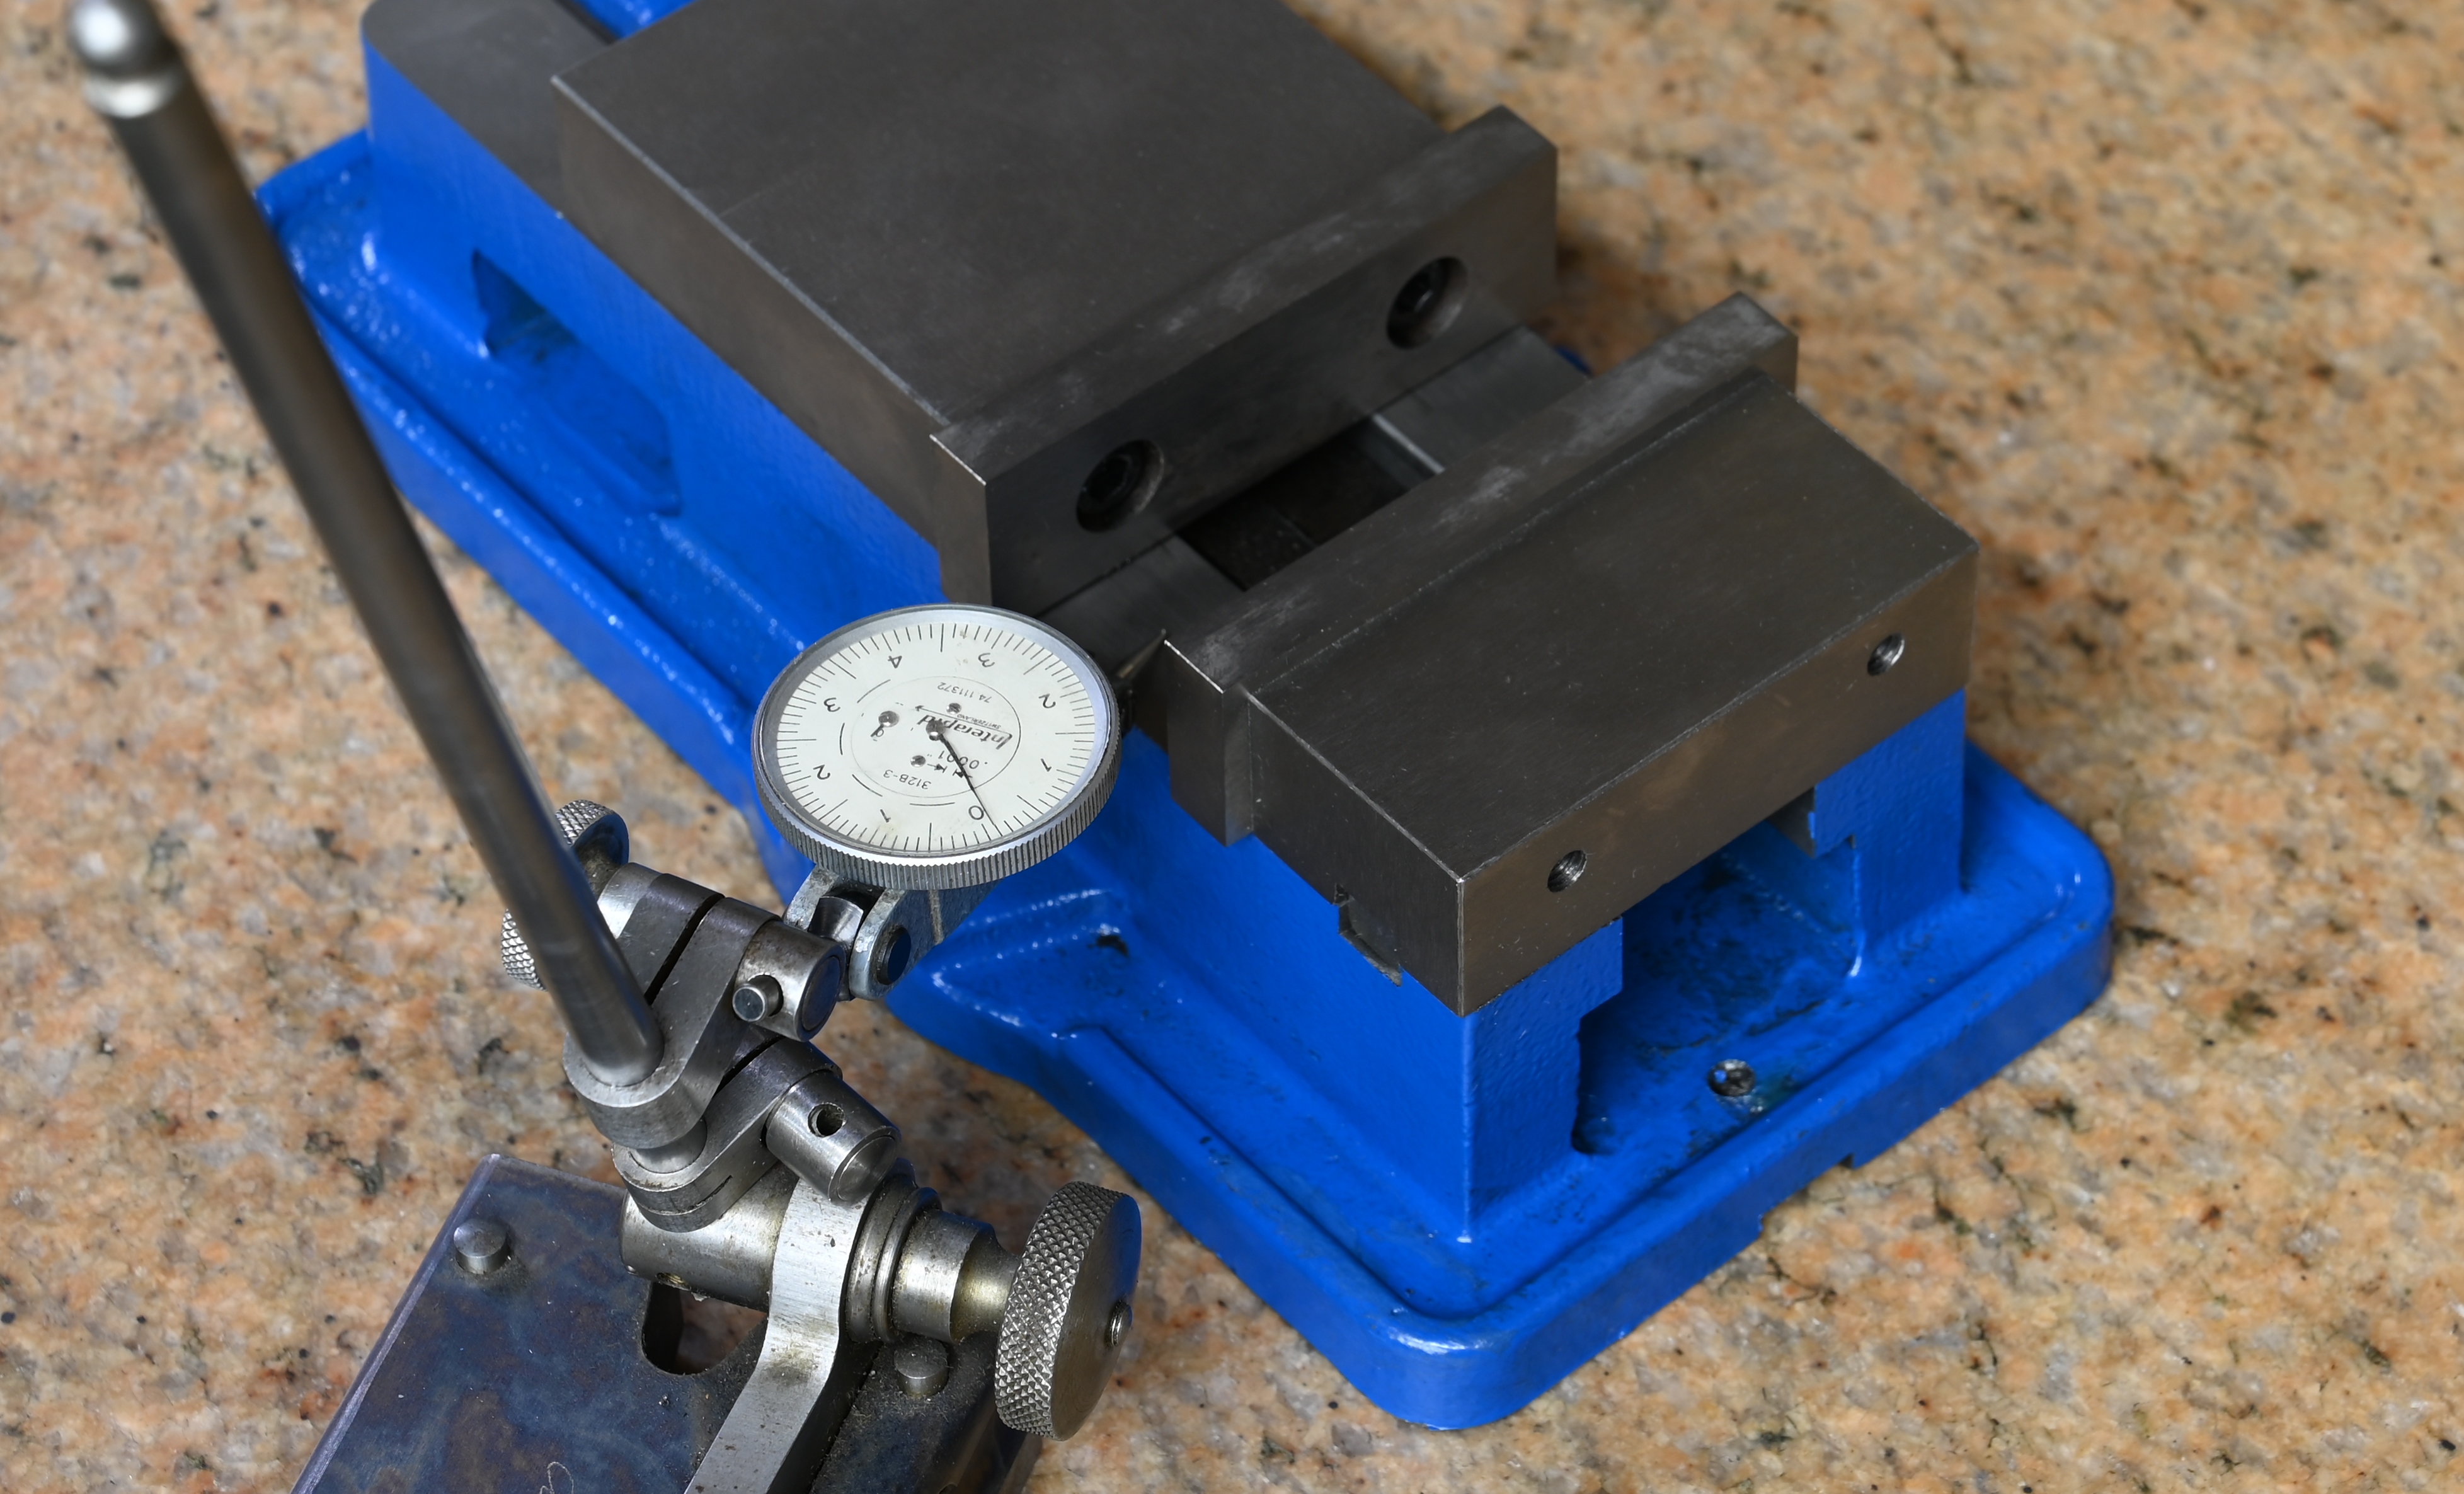
NrkCXkH.jpg


RPCzNwF.jpg


rUkgsBE.jpg


AdpRq5l.jpg


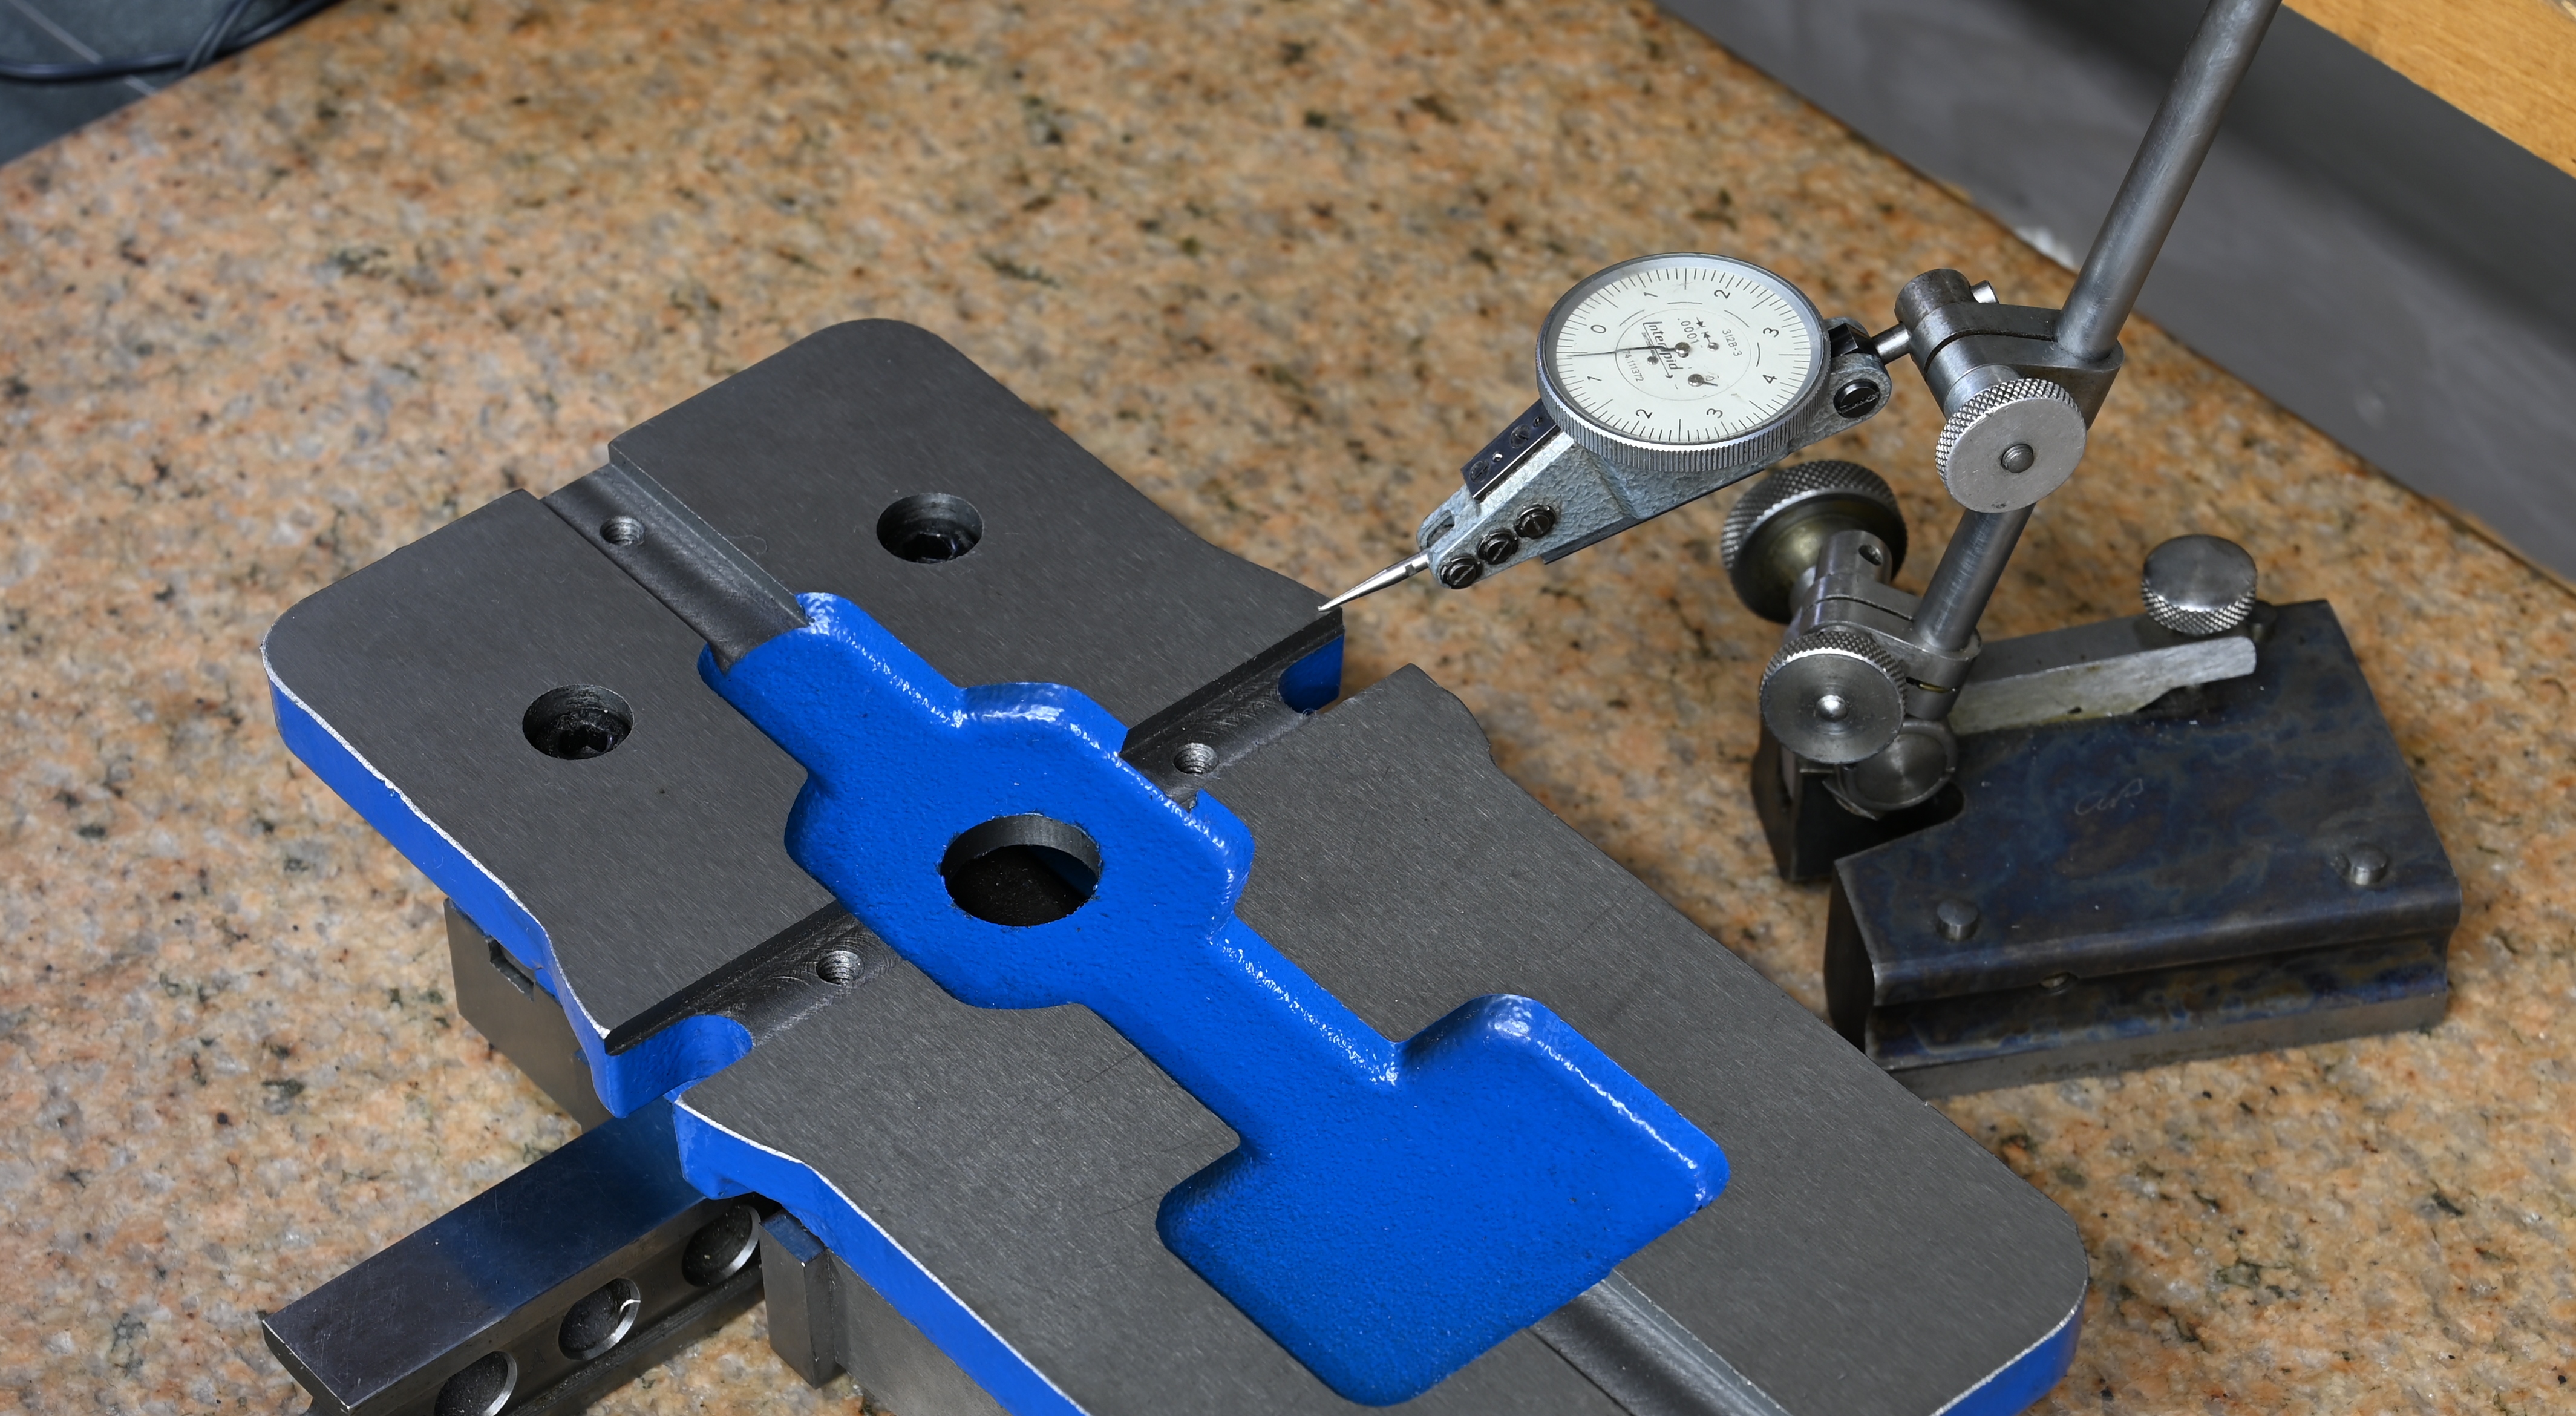
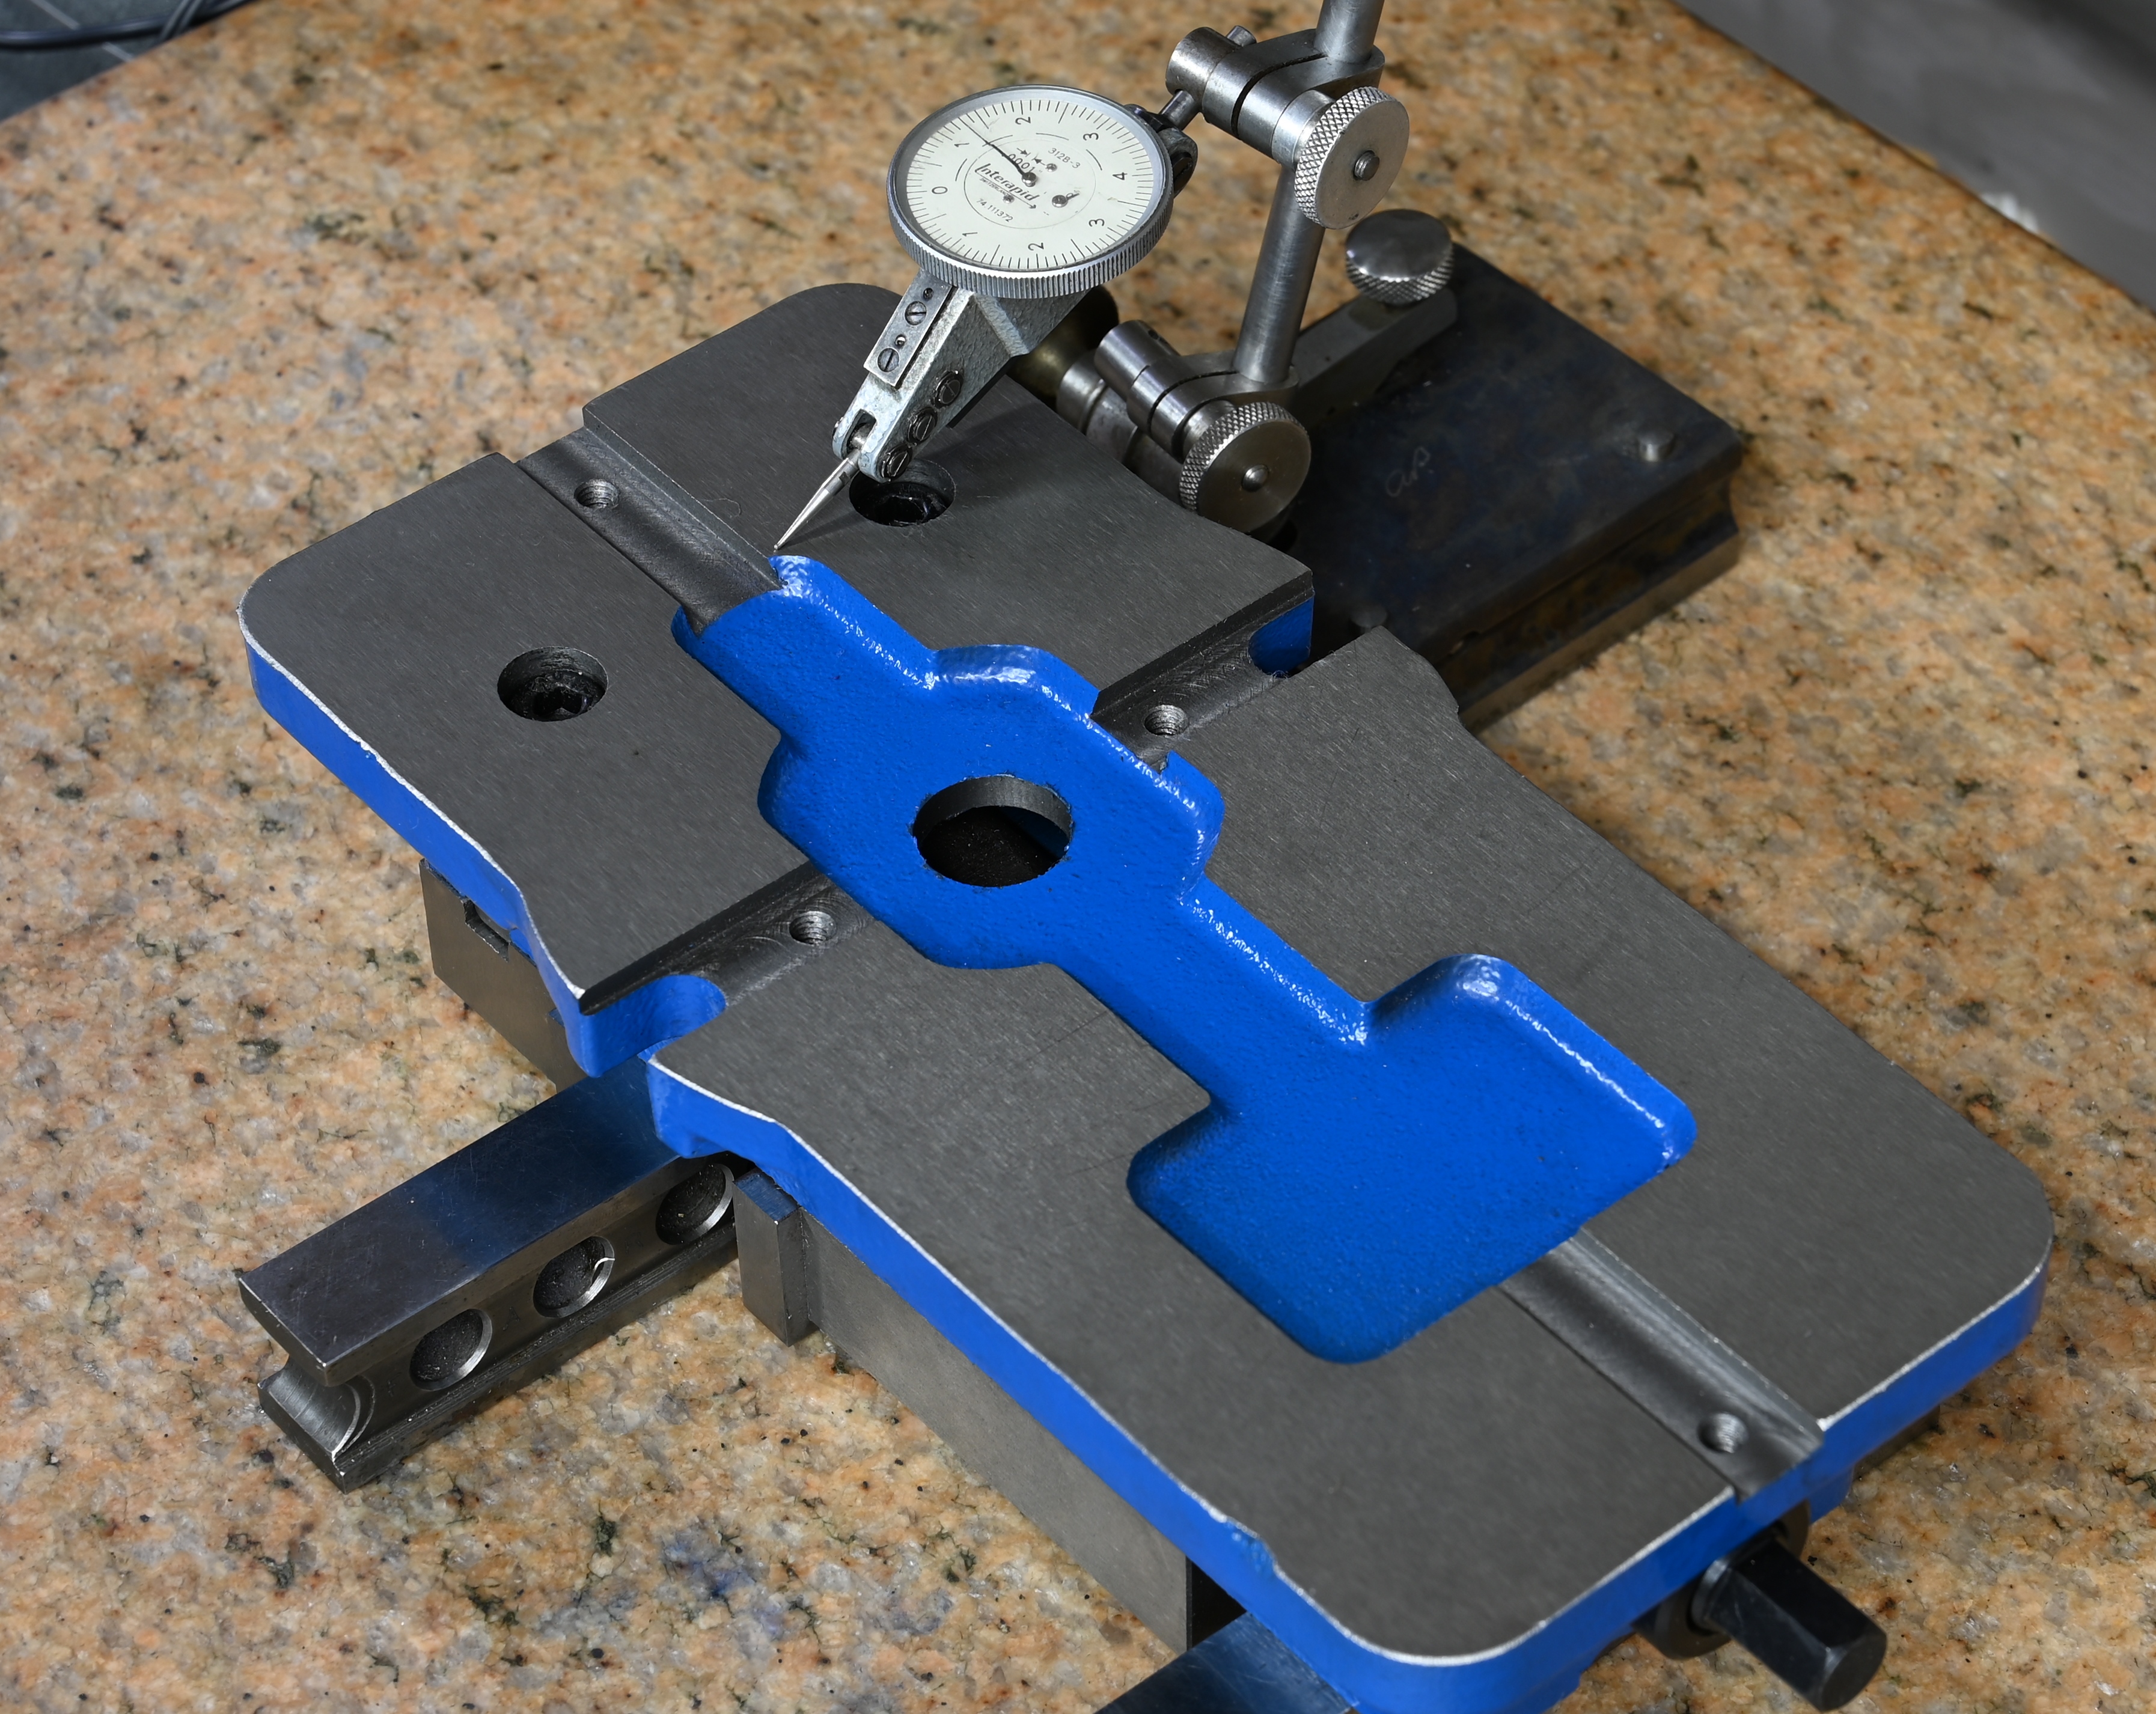
However on flipping the vise over and checking for parallelism, there is lots of variance across the surface. As much 002" over a few inches. That seems like a huge amount for a ground surface and as soon as you bolt it to something, the base will distort and would put the ways out of tolerance (the already are but just a wee bit)

you can see across this short area there is a 2 thou variation. At first I thought the fixed jaw must be warped and is pulling the base out of shape, but then the first test would have mirrored this, but those top surfaces were close to ok.
7Mry7U3.jpg


87cxAok.jpg


LVLk3ze.jpg


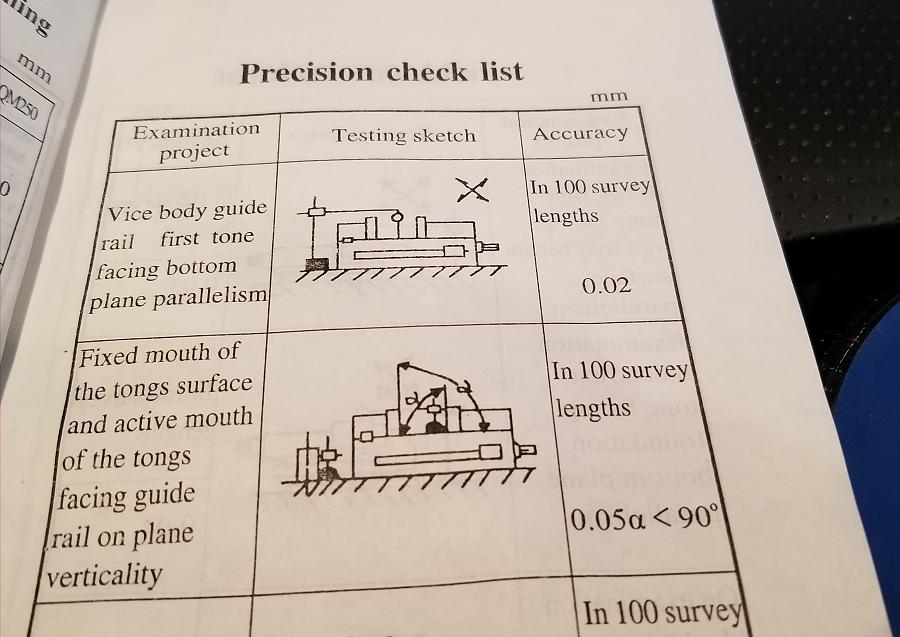
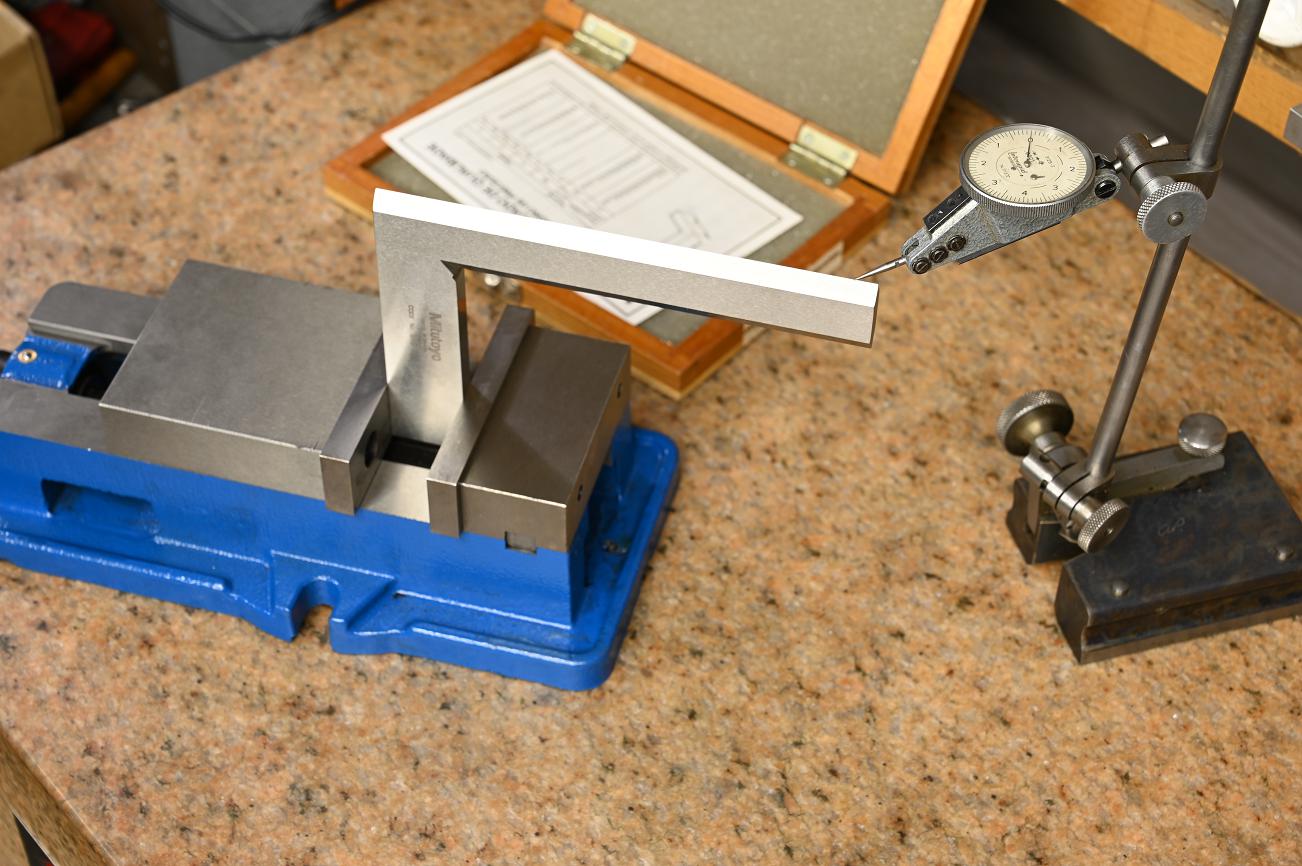
Where there is no doubt as to false claims is squareness. They claim its certified to .05mm per 100mm. I measure 8.5 thou over 6" which equates to .096mm over 100m! That square is mitutoyo certified grade 00, bought new by yours truly and only used very rarely and only for inspections. certified to 5 microns or 150mm. That is very loose standard by tooling standards, and this one is almost twice that
LVWgbtU.jpg


Everyone has to decide for themselves what they want and whats acceptable, but go in eyes wide open. If there was ever any doubt about the credibility of certificates and claims of these manufacturers, hopefully this shows what we're up against

Here's a short video of the tests.

 
Last edited:
Thanks for showing all your testing setups. Very interesting. Sooner or later I intend to get a granite plate & DTI stand setup.

One thing I was wondering on the jaw test. Could you grip your square with something like soft copper wire on one jaw so the square is seeing effect of only one jaw at a time (where fully mated) - take a reading off your square, then flip to wire to other jaw. Maybe hey are both canted or maybe you are seeing a combined effect?

Do you have grinding/scraping provisions to get that vise up to snuff? Maybe not as simple as it sounds but treating these like a semi finished kit might be worth it.
 
Hi Peter,

I didn't do the test you describe, To my knowledge when grinding a vise, you square the fixed jaw and not worry about the floating jaw.

A bit of something between the moving jaw isn't a bad idea; it would remove any doubt as to the source of error to the fixed jaw. However, just like when milling, you'd expecting the work to be located by the fixed jaw not the moving one which has enough play to conform. The test as done show the vises current condition, it replicates holding a work piece.

when it comes to grinding each part a lot more effort will be made to quantify exactly what is out where, part by part. I would probably start by scraping the bottom of the base and then grind as I move upward....that way you get a flat and reliable datum surface to put on mag chuck (if not, the mag chuck will distort the work)

I do lots of scraping and have a surface grinder that sees a lot of use and I've ground vises before so getting it in shape isn't a problem. With the bolt on fixed jaw they're an easy style to grind, provided you're taking off so much you mess up the screw alignment. I'll probably do that to this vise just for kicks (like I need another project). My reluctance is that it's too tall to be ideal for my purposes; I wish the designer scaled down the base along in the same proportions....so I keep thinking of making one...but it would a D2" (2" copy of a kurt).

A kit is a good way to look at it......for that much material from the other side of the world, $100 delivered is a bargoon
 
Last edited:
My Son worked several years as a Machinist for a large oil Industry player. He took me on a few tours through one of their biggest shops.
They were buying some of their large pumps (about the size of a VW beetle) from China, completely stripping them down before ever being used. They re-did all the bores, replaced all the bearings and anything else sub-standard before ever using them.
I can only assume that even after a complete blueprint / rebuild prior to putting them into service, it was still cheaper to go that route than purchase domestically produced. Kind of a sad situation that's evolved over the years.
 
I said I'd do a quick survey of the happy vise, here are the results.


A big part of me wishes you didnt do this.......

I have a Grizzly 4" vise that I believe was made by the same outfit that makes the Happy Vise. It came with a similar certificate.

I've used it quite successfully for over a decade on my basket case mill/drill. I dialed in the fixed jaw when I mounted it on the table and never moved it again. It was deliberately mounted slightly left of center so I had room to mount other fixtures on the right side of the table. It may not be perfect, but it met my needs for the time that I have had it.

After reading your post, I find myself wondering about it. I already knew that the mill drill was marginal at best. But maybe it's performance was really a collection of other marginalities.

My biggest complaint about the mill/drill has always been the flaky table dials. But right after that is its lack of reasonable rigidity. The vise plays a major role in the rigidity of any setup.

In the process of acquiring a better mill, I also got a used GS vise. I only used it to make some vise clamps, but they turned out great despite other problems which conspired to ruin my work. But one thing became instantly clear. The GS Vise is clearly superior to my Grizzly/Happy vise.

But is it really? It certainly should be if one goes by the new price for one.

I have bookmarked your thread and added a todo to my project list to qualify both vises (and maybe a few others) the same way (or at least similar) to the way you did. I do have a granite surface plate, 10th indicators, etc. But my machinists squares are of dubious precision. Maybe I'll begin with qualifying them.

I believe that what you have done is really worthwhile and valuable both for yourself and for the rest of us. But I also have two contradictory beliefs. 1. We should never let the perfect be the enemy of the good. 2. Continuous improvement is what separates the best from the mundane.

Those are both a way of saying that the Happy Vise is a LOT of vise for the money. The fact that it isn't perfect shouldn't negate its appreciation. Especially since you can so easily improve it!
 
Those are both a way of saying that the Happy Vise is a LOT of vise for the money. The fact that it isn't perfect shouldn't negate its appreciation. Especially since you can so easily improve it!

For sure, I tried to clearly convey we all have to decide whats ok for us and whats not.....tolerance wise. Its the BS/deceitful nature of these certs and manufacturers claims that is imo the real problem.
 
Mcgyver, thanks for the clarification on the fixed/moving jaw, makes sense. I (selfishly) hope that you do take the next step one day & show what is required to blueprint it. I'm guessing the CI surfaces could be hand scraped but no getting around surface grinder for hardened parts. I like the idea of blueprinting import tooling like this. Some of my favorite Stefan videos are where he improves on otherwise so-so offshore tooling/machines, leveraging off the low price but making a very acceptable end result. But I think like the vise, that typically requires the right tools & equipment (with experience & skill), which is probably represents a much smaller percentage of typical home machinists. I'd like to get there one day.

I think your presentation illustrated an example where included spec sheets should be viewed with a critical eye. They are in fact, pardon the pun, not in 'alignment' with actual measurements which is, well... either a lie or factory boo-boo. The problem is that some offshore products are OK & others are not, you just cant tell until you have it in your hands which is of course too late & kind of defeats the purpose of a spec sheet.
 
Last edited:
Did the same as you, You should mount the DTI on the fixed jaw and clamp something, And watch the DTI move around as you apply pressure to the part being clamped, I laughed my self into the liquor cabinet and cried my self to sleep.
The underside of my vise shows the same 2 or 4 thou dips here and there.

But then again this is a hobby, and I will not - Ever - Spend 600$ + on a kurt vise. Not unless I am a profiting business or find one cheap.

I would like to hit mine with a surface grinder, but that of course is another topic and project,
Thanks for posting your findings.
 
I said I'd do a quick survey of the happy vise, here are the results. Whats acceptable to someone is variable thing but for me and imo its a poor show putting out tooling like this. What should be universal though is disdain for false claims. I've had roles in two business that exposed me to manufacturing in the China and 10 years ago vendors filling in a certificates was simply a marketing exercise....the certificates function is to tell the customer what they want to hear and if they don't notice, win! I was hoping

I do QA for pipe fittings for industrial applications.Most mill test reports and certificates would be worth more if they were still blank pieces of paper. And this is true whether the product was made in China or in Germany, or anywhere in between..
 
Did the same as you, You should mount the DTI on the fixed jaw and clamp something, And watch the DTI move around as you apply pressure to the part being clamped, I laughed my self into the liquor cabinet and cried my self to sleep.

I wouldn't let this bother you. What you did is to repeat an experiment done by early engineers centuries ago. The yield strength of any material is basically how much it moves for a given force. Different materials and different steels have different yield strengths. But no matter how strong they are, they will yield in proportion to the strength of the force applied. Its also a very linear relationship. For any given material and size, twice the force = twice the movement. As you noted, a good dial indicator will easily show just how strong a human being is. Even a baby (or a grass hopper) can easily bend thick steel - albeit not very much. It isn't really can they, it's only how much. The stronger and bigger the material, or the less the force, the less the movement. But regardless of the size, the strength, or the force, it will always move!
 
Thanks for the review. I was tempted by this Happy vise as well. I'm just starting out and honestly just can't find myself spending $1000 on a vise as just a hobby to start. Maybe if I can make some money down the road things can change.
 
Back
Top