• Scam Alert. Members are reminded to NOT send money to buy anything. Don't buy things remote and have it shipped - go get it yourself, pay in person, and take your equipment with you. Scammers have burned people on this forum. Urgency, secrecy, excuses, selling for friend, newish members, FUD, are RED FLAGS. A video conference call is not adequate assurance. Face to face interactions are required. Please report suspicions to the forum admins. Stay Safe - anyone can get scammed.

Best Product to Use for Fillets and Curves in a Simple Aluminum Pattern

carrdo

Well-Known Member
Hi All,

I am making a simple pattern in aluminum (to produce several non ferrous - silicone bronze castings). It has several curves where I need to form a root fillet or blending radii. What is the best product to use here and one which will stand up to repeated and rough handling in a foundry? Also, is there any product which will stand up to light final contour shaping using a HSS ball end mill?
 
Last edited:
Not quite sure I follow, maybe a picture? Typically an external corner 'round-over or bullnose' is milled with a corner rounding profile cutter. An inside corner fillet like at the base of a pocket typically uses a ball ended end mill. Blending & smoothening is typically abrasive paper, rubberized abrasive wheels, Scotchbrite type pads.... those kinds of tools. But the aluminum is only as strong as the alloy itself in terms of rough handling. Nothing to do with the fillets, true for any of its surfaces.
 
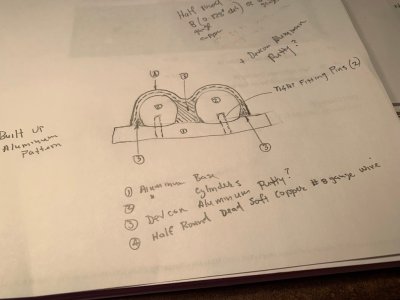
OK here is my crude sketch of what I am trying to do. The pattern is a uniform x-section and will be 1-1/16" long, 3" wide at the base and 1-1/4" high.

Is this feasible or am I out to lunch? I want to keep it as simple as possible so that I don't need to use both sides of a matchplate.
 

Attachments

  • 1241.jpg
    1241.jpg
    74.1 KB · Views: 18
Last edited:
Is the end result to make a female mold roughly like the red outline? Maybe it will be cast using a softer durometer silicone or urethane & the underlying 'male' pattern is what represents the finished product when poured into this female mold?

- if so, the tiny amount of datum contact area (yellow) may not warrant aluminum. Its just a flat surface. But considering all the other surfaces are shapes with filler & probably shiny top coat, why bother? Make it out of MDF or similar low cost & easy to cut material. Also if this mold represents one half & there is another half, you would need some kind of alignment fixtures on the yellow surface.

- I've shown blue circles representing a better plan for the circular sections. If you make them the full diameter then you don't need a relatively thick layer of putty filler whatever you were envisioning peripherally around it. That would be much harder to control thickness/accuracy. Now maybe I'm missing design intent & that added thickness is textured or engraved or the section twists in an axis into the page. Then the circular sections are basically a glorified 'filler' support. Is that the case?

- maybe your original question, if we are talking hand work to make these fillets, that's probably easier done with simple templates to basically 'screed' filler material. Think of a piece of 1/16" aluminum with a rounded corner. That would be the 'tool' to make the shape using an appropriate filler. One edge of the tool contacts the circle, the other the flat datum. Or a circular template contacs both of you rround (blue) circles in the middle. Bondo comes to mind as a filler, but I'm not sure about your end design. It will involve handwork & multiple progression steps to get it right. Then top coat finishing to a state where the mold could be poured, release agent, all that good stuff. Smooth-On has a really good video series on YouTube, might be worth watching as it kind of looks like what you are trying to do.

1744397709596.png
 
Hi Peter,

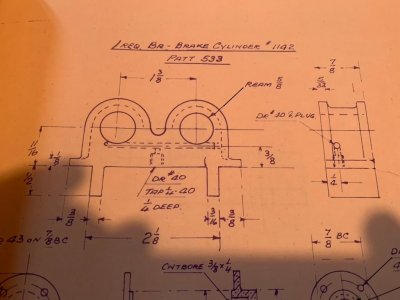
Attached is the drawing of a very similar part. I just want to make a fully male 3 degree taper mold where the flat bottom surface is attached to one side of a matchplate and the male outline is pushed into the sand to create the female cavity into which the molten metal will be poured (forget the bottom legs). I don't want to get into making cores or anything like that. Just keep it simple. It may be a waste of material but I don't really care about that. As you can see in the print, there are end ribs which I would like to have cast in as well. I could go with wood in place of aluminum also.

I am not experienced in the ways of pattern making so my thinking always has been, keep it as simple as possible. 3-5 cast parts are all I will ever need so no commercial foundry will ever take on this piddly "nuisance" job.
 

Attachments

  • 1242.jpg
    1242.jpg
    79.4 KB · Views: 7
Last edited:
I get you now. If its only purpose in life is to hold the shape of sand & its not too long, why not 3DP it? The CAD work for that is trivial. A few of us on the forum could do that. Even if you paid to have it printed by outsourcing probably would be cheaper than materials & runaround time, but I'm not sure what you have on hand vs need to buy.

I mean wood + filler is a perfectly viable way to go too. Requires hand work, sanding, finishing, attention to dimensional detail etc. (but do-able).
 
I am making a simple pattern in aluminum (to produce several non ferrous - silicone bronze castings). It has several curves where I need to form a root fillet or blending radii. What is the best product to use here and one which will stand up to repeated and rough handling in a foundry? Also, is there any product which will stand up to light final contour shaping using a HSS ball end mill?

There's always JB Weld ... bonds well, machines easily, easily smoothed with a damp finger and quite durable.
 
I second the JB weld idea, except I use Oatey fixit stick in the plumbing section. At $10 for a big stick it works well. It’s. Putty you cut off what you need, knead it, and it sets faster than most of the JB weld stuff. Probably because it has a lot of BPA in it…it sets quick and sands/machines well.
_Fix it stick - Oatey

If it’s not a big fillet, I use Dynapatch pro, much softer though, but holds up ok on my patterns.
 
Very difficult to help with details without a side and top view or standard 3 view drawing.
I think I know what you want but…..

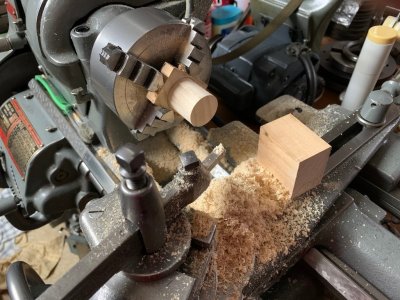
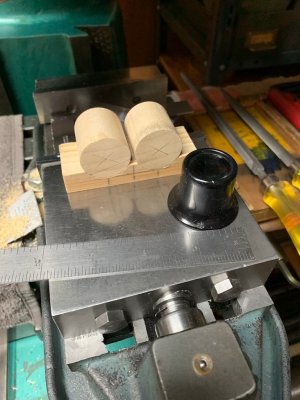
Personally for so few castings I would use solid hardwood like eastern maple but I have a full woodwork shop so it is pretty easy for me to do that. Most foundry patterns were made of wood back in the day.

So it depends on your skillset and what machines you have etc. I also like the idea of a 3d printed pattern. Easy to get the exact details you want with draft etc.

Just for your info the pattern is not pushed into the sand as that would be very difficult if not impossible. The pattern is attached to a larger plate and forms the bottom of a box then the sand is poured into the box and slowly tamped into place a layer at a time. Then the pattern is pulled out of the sand, this is the tricky part and why draft is needed. I am sure there are lots of videos on the process, sand mix etc.

Good luck,
Michael
 
Back
Top