• Scam Alert. Members are reminded to NOT send money to buy anything. Don't buy things remote and have it shipped - go get it yourself, pay in person, and take your equipment with you. Scammers have burned people on this forum. Urgency, secrecy, excuses, selling for friend, newish members, FUD, are RED FLAGS. A video conference call is not adequate assurance. Face to face interactions are required. Please report suspicions to the forum admins. Stay Safe - anyone can get scammed.

Tips/Techniques Bambu text

Tips/Techniques

PeterT

Ultra Member
Premium Member
(Bambu A1) Any idea why its not printing my extruded text? Blue = cad model (0.8mm high). Green = what Bambu sees on initial load. But when I slice it & Preview it becoms flat top (red). And thats also how it printed physically.
Have any Bambu-ites found a 3DP good forum to ask specifics like this?

1736374045431.png
 

Attachments

  • SNAG-08-01-2025 2.58.01 PM.jpg
    SNAG-08-01-2025 2.58.01 PM.jpg
    69.7 KB · Views: 3
  • SNAG-08-01-2025 3.03.50 PM.jpg
    SNAG-08-01-2025 3.03.50 PM.jpg
    36.1 KB · Views: 3
I'm not seeing that. This is sketch text, exploded, then extruded 0.8mm. As you can see there are four layers of text after slicing. How are you generating the extrusion?


1736374785010.png
 
Maybe a Solidworks thing? Its just a plain vanilla font. I increased size to 14 pt just now as a second test but the physical size should be sufficiently larger than the 0.2 step resolution. It looks correctly extruded & I confirmed its adding it onto the main block body. My point is that within Bambu Studio the initial green preview (prepare step) shows the STL just like the SW CAD file just fine. But when I invoke Slice, it planes the text off (red). And that's how it physically prints

1736375803872.png
1736375847461.png
 
oh nuts, cant upload STL file. If anyone wants to preview, PM me with email & I'll send that way.
 
Maybe a Solidworks thing? Its just a plain vanilla font. I increased size to 14 pt just now as a second test but the physical size should be sufficiently larger than the 0.2 step resolution. It looks correctly extruded & I confirmed its adding it onto the main block body. My point is that within Bambu Studio the initial green preview (prepare step) shows the STL just like the SW CAD file just fine. But when I invoke Slice, it planes the text off (red). And that's how it physically prints

View attachment 57489View attachment 57490
I'd like to try slicing and printing that. Can you post the stl?
Compress the file and post the zip.
 
can you create a 3MF file - that is the slicer's output format, then send that.
 
You can change or set the colour of features in 3 ways that I can immediately think of:
1. Pause at a certain layer, change the filament colour, print some more, repeat. It makes the entire layer that colour.
2. Use multiple objects inside your part and set the colour of those objects with the slicer. This is only practical if you have a filament switch AMS or what have you.
3. Use the painting features inside the slicer to "paint" colour onto your object.

You can do this in Bambu studio, or with Prusa slicer. I imagine with Cura too or whatever else you might prefer. Details differ but with a similar approach.

I'll post a few screenshots.
 
Last edited:
First option:
1. Pause at a certain layer, change the filament colour, print some more, repeat. It makes the entire layer that colour. I did that with the below example.

IMG_6558 Large.jpeg


To do this in Bambu studio:
1. Add 'filaments" to your project by pressing the + button next to "Filament" see below. I'm assuming you have an AMS. You don't have to have one, if not, in step 2 pick "Add Pause" and then when the printer gets to that layer it will stop, you can switch filaments, and keep going.
1737487160335.png
1737486893352.png

2. in the "preview tab" slide down the layer view slider to the layer where you want to change the colour, right click, and pick the filament you want. The printer will switch at that layer and everything on and above this layer will be the new colour.

I'll post about the other 2 ways but I need to run now. :cool:

1737486763889.png
1737486704387.png

1737487064921.png
 

Attachments

  • 1737486874925.png
    1737486874925.png
    92.1 KB · Views: 8
Last edited:
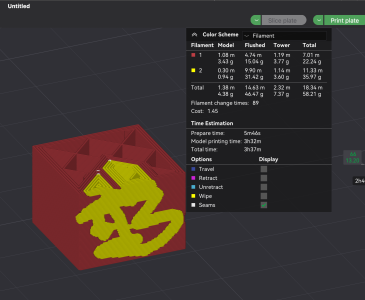
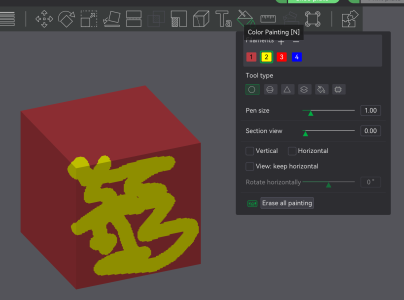
I'll show the third option now: 3. Use the painting features inside the slicer to "paint" colour onto your object.

Here I used the tool in the slicer called "Color Painting" to add a different colour to the object.

Two shots. the 1st is the prepare tab showing the paint, the 2nd is the preview tab showing the yellow and the red filaments.
 

Attachments

  • Screenshot 2025-01-21 at 8.41.28 PM.png
    Screenshot 2025-01-21 at 8.41.28 PM.png
    546.9 KB · Views: 2
  • Screenshot 2025-01-21 at 8.39.35 PM.png
    Screenshot 2025-01-21 at 8.39.35 PM.png
    167.9 KB · Views: 2
Last edited:
Ok so here is the second way: 2. Use multiple objects inside your part and set the colour of those objects with the slicer. This is only practical if you have a filament switch AMS or what have you.


Screenshot 2025-01-21 at 8.45.08 PM.png

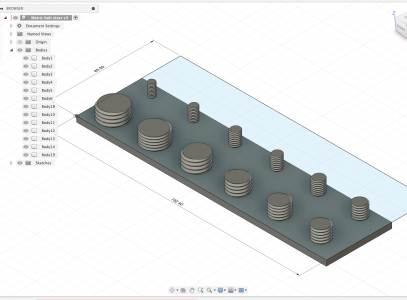
This is a metric bolt sizer. Each post is a different body, and in the slicer you can set the color of each body. Send this model to the slicer as a 3dmf file. a 3dmf file supports multiple objects whereas a stl only has one object. Note the settings in 3D print dialog in Fusion. 3DMF specified, and all bodies selected in the model.

Screenshot 2025-01-21 at 8.47.51 PM.png

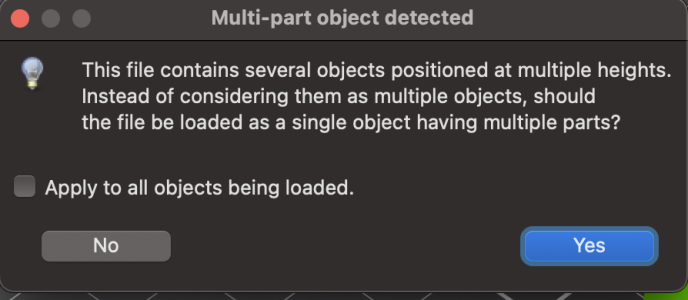
When you send it to the slicer it will ask this: say yes. a single object with parts.


Screenshot 2025-01-21 at 8.49.19 PM.png

You can then set the color of each body (object) in the slicer. I'll try to post a picture of this. Right now I have to watch some squid people getting shot.
 
Last edited:
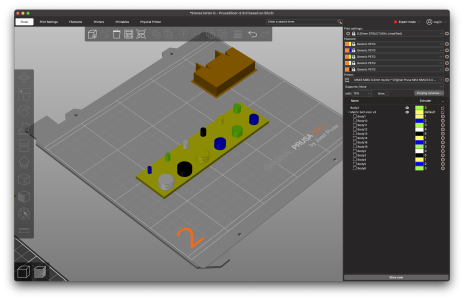
Here in the Prusa slicer you can see the part with all the separate objects (the bodies in Fusion). And there is a colour assigned to each body. It's very similar in Bambu Studio. Each object can have the colour assigned to which ever filament you want.
 

Attachments

  • Screenshot 2025-01-21 at 10.06.09 PM.png
    Screenshot 2025-01-21 at 10.06.09 PM.png
    1.8 MB · Views: 3
Here in the Prusa slicer you can see the part with all the separate objects (the bodies in Fusion). And there is a colour assigned to each body. It's very similar in Bambu Studio. Each object can have the colour assigned to which ever filament you want.
You can also do a mass update on a bunch of objects. Shift click the objects and then Right click to set a filament to all selected. Saves a lot of tedium. Prusa and bambu need to work on the filament selection UI - I find it extremely fiddly.
 
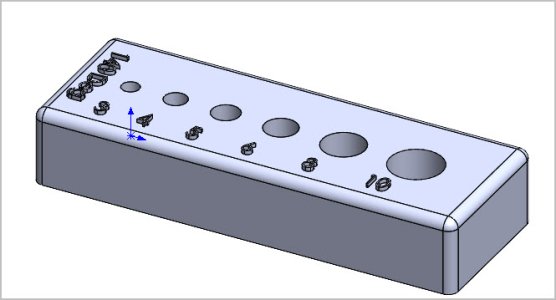
Good stuff, John. FYI specific to my original raised text issue, sorry I ended up dealing with it off line & should have closed the loop here It had nothing to do with my cad model or text size or any thing like that. It simply required a setting tweak inside Bambu Studio slicer whereas I was using entirely default settings at that point. Easily resolved once you know what setting to twiddle. I can't say if this has parallels to other slicer apps or different parameter terminology. My exposure is confined to Studio & not much of that. But another nice thing is if you have a collection of settings that work for certain kinds of models, you can save that as a named preference & just use it again or as a starting point to further tune. I've watched some videos of very simple parts but have say certain angles. Once you see a single layer greatly magnified it makes perfect sense why it just cant squirt something out poorly supported or out in space. Then the settings or orientations or support start to make sense. But this is also where judgement & experience probably comes into play. Fortunately there are good resources out there.


Attachments

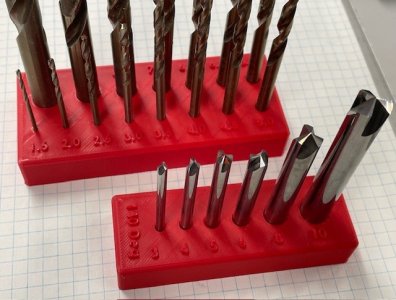
  • drill storage blocks.jpg
    drill storage blocks.jpg
    84.5 KB · Views: 2
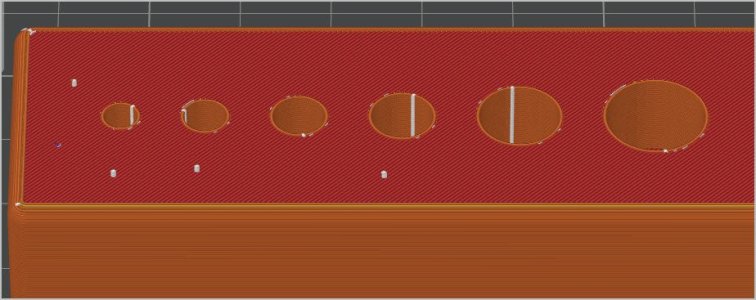
Another learning: .STL is a common 3DP format, but its not the only format. Apparently .STL is a rather older format & in some instances more limited. I had some other (circular/arc related) print issues where someone suggested .STEP would be better. Bambu Studio accepts .STEP. My CAD exports to that so gave it a try with same print settings, much better.
 
Another learning: .STL is a common 3DP format, but its not the only format. Apparently .STL is a rather older format & in some instances more limited. I had some other (circular/arc related) print issues where someone suggested .STEP would be better. Bambu Studio accepts .STEP. My CAD exports to that so gave it a try with same print settings, much better.
show us the difference in the print?
 
Back
Top