• Spring 2024 meetup in Calgary - tentative date Saturday, April 20/2024. Other regions are also discussing meet ups. If you want one in your area get going on organizing it! discussion
  • We are having email/registration problems again. Diagnosis is underway. New users sorry if you are having trouble getting registered. We are exploring different options to get registered. Contact the forum via another member or on facebook if you're stuck. Update -> we think it is fixed. Let us know if not.
  • Spring meet up in Ontario, April 6/2024. NEW LOCATION See Post #31 Discussion NEW LOCATION

B&S #13 grinder followed me home

garageguy

Super User
Premium Member
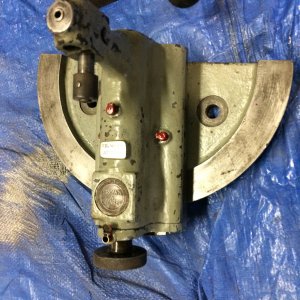
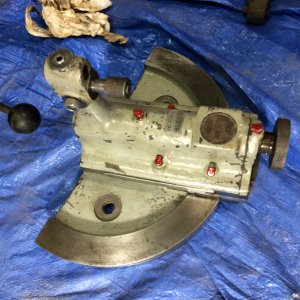
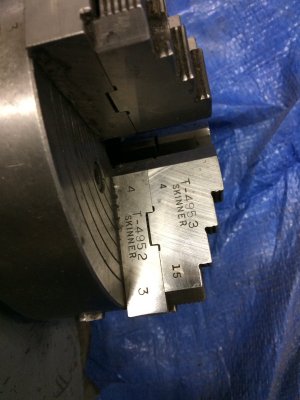
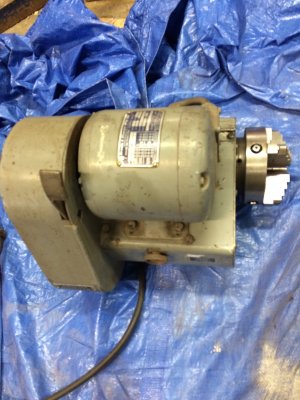
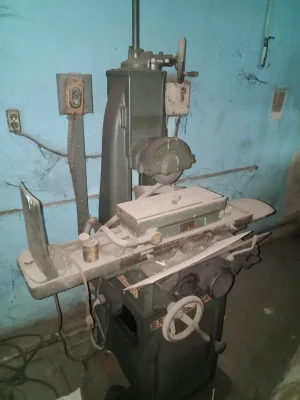
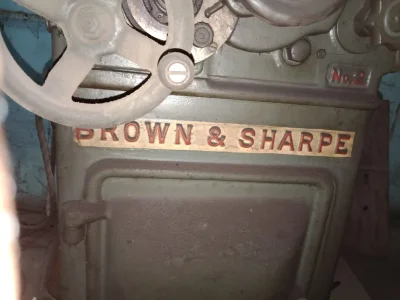
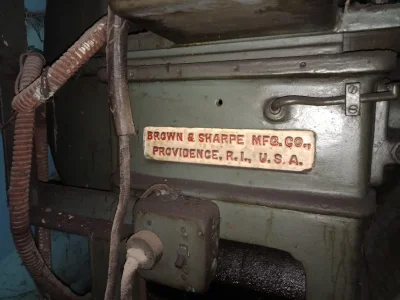
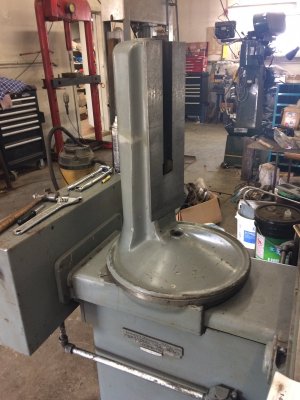
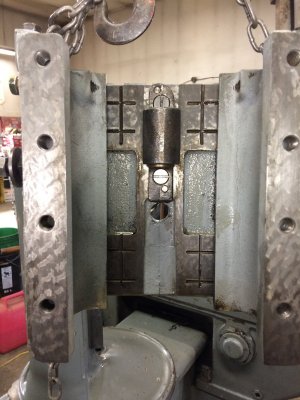
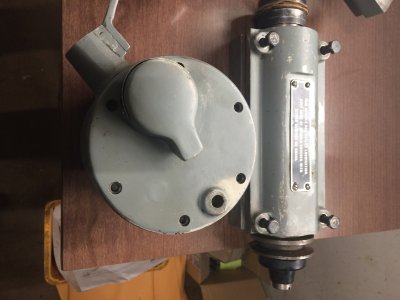
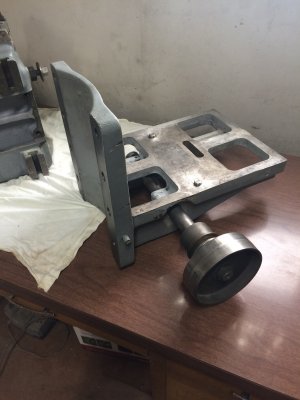
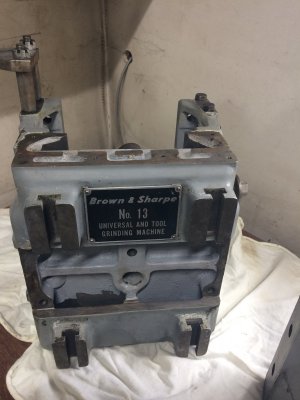
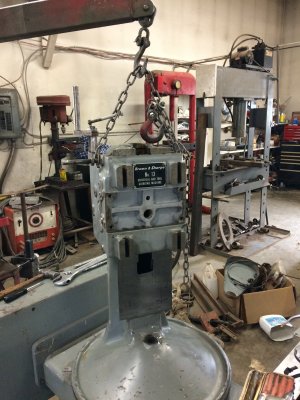
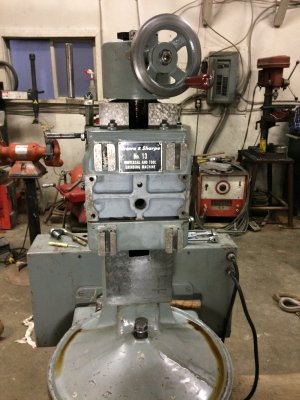
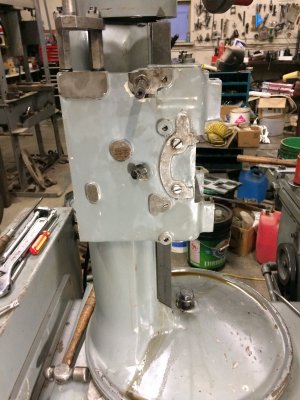
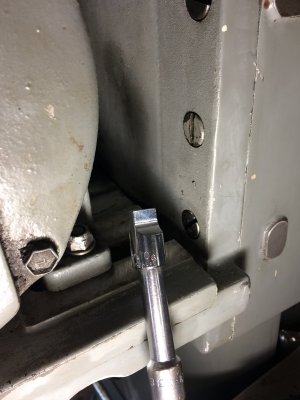
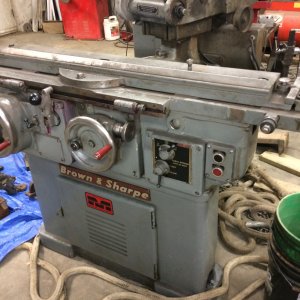
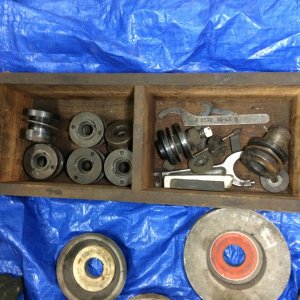
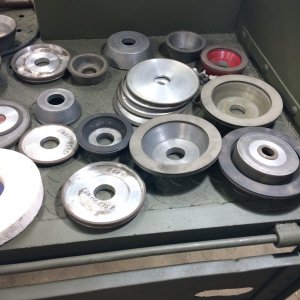
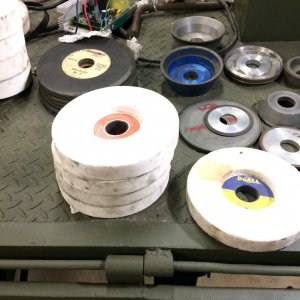
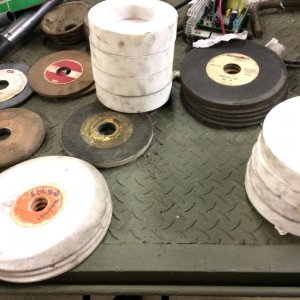
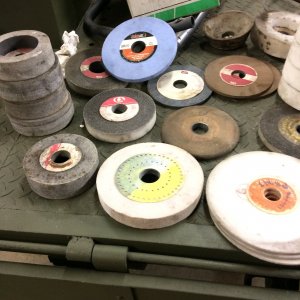
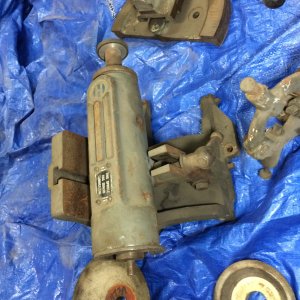
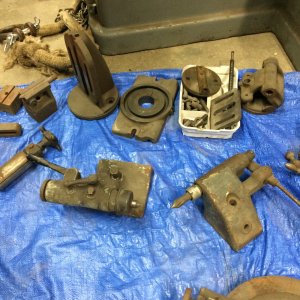
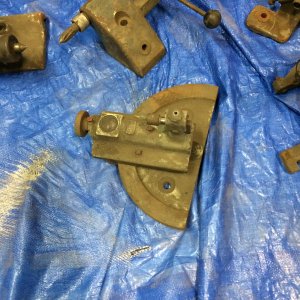
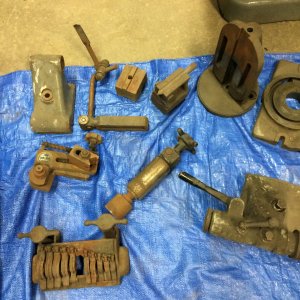
I think it was @Mcgyver who posted a kijiji add about a #13 grinder for sale in Yorkton.I can blame him for costing me money. (thanks Mcgyver). Anyhow, it seems to be in great condition so far, all the scraping marks are basically unworn and everything seems tight . I am going through the attachments now to figure out what is here and what is missing. One item I have is a Radius Wheel Truing Attachment that fits a #2,3, or 4 Grinder. It does not fit a #13 unless a person built an adaptor plate. I am missing the wheel truing attachment that the #13 would have come with. Anybody have a truing attachment for sale or trade to fit a #13? I have taken a few pics that I will try to attach. I don't have a pic of the headstock right now but it has a 4 jaw chuck on it. If there is anyone here who is familiar with these grinders and would be OK with sharing info,I may be interested in chatting. Pretty steep learning curve here.
 

Attachments

  • IMG_0986.JPG
    IMG_0986.JPG
    719.7 KB · Views: 33
  • IMG_0985.JPG
    IMG_0985.JPG
    753 KB · Views: 29
  • IMG_0984.JPG
    IMG_0984.JPG
    682.3 KB · Views: 29
  • IMG_0982.JPG
    IMG_0982.JPG
    606.5 KB · Views: 29
  • IMG_0968.JPG
    IMG_0968.JPG
    487.6 KB · Views: 27
  • IMG_0969.JPG
    IMG_0969.JPG
    439.5 KB · Views: 26
  • IMG_0970.JPG
    IMG_0970.JPG
    476.7 KB · Views: 25
  • IMG_0971.JPG
    IMG_0971.JPG
    454.3 KB · Views: 26
  • IMG_0980.JPG
    IMG_0980.JPG
    609.6 KB · Views: 30
  • IMG_0988.JPG
    IMG_0988.JPG
    501.5 KB · Views: 33

garageguy

Super User
Premium Member
Thanks for the heads-up on it Mcgyver, I may not have seen it otherwise. It's a very well made machine. As I clean things up I am constantly impressed by the workmanship put into the fitting and design of these things.
 

garageguy

Super User
Premium Member
Took a few more pics today. Got the wheel truing attachment cleaned up and took a few pics of the headstock. They used a Skinner 4 jaw independent chuck. Forgot to measure it but likely 4".
 

Attachments

  • IMG_1013.JPG
    IMG_1013.JPG
    603.8 KB · Views: 14
  • IMG_1014.JPG
    IMG_1014.JPG
    575.2 KB · Views: 13
  • IMG_1010.JPG
    IMG_1010.JPG
    350.4 KB · Views: 13
  • IMG_1007.JPG
    IMG_1007.JPG
    404.6 KB · Views: 14

garageguy

Super User
Premium Member
@Cryoine ,nice score. Do you have any more info on it yet? Dabbler, I was doing more cleaning on my #13 and am wondering how to remove the chuck on the headstock spindle. Is there a spindle lock anywhere?
 

Cryoine

Active Member
@Cryoine ,nice score. Do you have any more info on it yet? Dabbler, I was doing more cleaning on my #13 and am wondering how to remove the chuck on the headstock spindle. Is there a spindle lock anywhere?
the best information i have on these is this from this YouTube channel
I'm not sure about the spindle locks
 

garageguy

Super User
Premium Member
Been doing lots of clean-up on the grinder lately. The main spindle that is mounted on the upright was leaving a lot of crud on the vertical ways when I cranked the spindle up and down so I figured I better take it apart and clean it up. Fear and common sense were holding me back so far, but a guy's gotta do what a guy's gotta do. Can't run it like that! So here's some pics of the disassembled main spindle.
First pic is the upright that the spindle housing slides on, 2nd is the inside of the housing, 3rd is the gear and screw that raise and lower the spindle and the spindle cartridge, 4 is the motor mount, and 5 is the spindle housing outside.
 

Attachments

  • IMG_1043.JPG
    IMG_1043.JPG
    403 KB · Views: 8
  • IMG_1052.JPG
    IMG_1052.JPG
    424.9 KB · Views: 9
  • IMG_1050.JPG
    IMG_1050.JPG
    274.2 KB · Views: 9
  • IMG_1041.JPG
    IMG_1041.JPG
    280 KB · Views: 9
  • IMG_1040.JPG
    IMG_1040.JPG
    297.3 KB · Views: 9

garageguy

Super User
Premium Member
I took the motor off and used the engine hoist to lift the main housing up off the upright ways. backed off the gib adjusters 1/2 turn each and it slid off nicely. Everything looked real good except for some stains on the ways from sitting for so long. The stains were from the oil channels in the housing ways and I cleaned them up easily with a 3M pad. You may be able to see some in the pics.
 

Attachments

  • IMG_1053.JPG
    IMG_1053.JPG
    460.2 KB · Views: 8
  • IMG_1049.JPG
    IMG_1049.JPG
    326.1 KB · Views: 8

garageguy

Super User
Premium Member
Going back together was pretty simple. The gib snaps into place in the left dovetail way and the engine hoist worked perfectly to slide it down onto the upright. Set a block of wood under the housing to hold it part way up so I could install the screw and gear set that make it go up and down. Adjusted the gib screws and removed the block and we were good to go. Cranked the housing up and down a few times and it was silky smooth! I wasn't keeping track of time but prolly took 1 1/2 hrs. Then things went slightly south.
 

Attachments

  • IMG_1056.JPG
    IMG_1056.JPG
    428.1 KB · Views: 6

garageguy

Super User
Premium Member
In the middle of this housing is a black 3/8 bolt that locks the spindle housing by tightening the gib to the way. Not a big deal except that there is a little brass cylindrical plug that goes between the end of the bolt and the back side of the gib. Of course it is too big to fit through the threaded hole and must be installed BEFORE you snap the gib into the housing and spend a couple hours assembling everything. At least it is all easier the second time around. Sorry for the multiple posts but I don't know how to insert pics into text.
 

Attachments

  • IMG_1055.JPG
    IMG_1055.JPG
    425.1 KB · Views: 5

garageguy

Super User
Premium Member
45 yrs as an auto tech and I've never seen what I would call a beautiful bolt . They hold the motor mount to the main spindle housing. Is this a good looking fastener or what!
 

Attachments

  • IMG_1057.JPG
    IMG_1057.JPG
    310.3 KB · Views: 11
  • IMG_1058.JPG
    IMG_1058.JPG
    335.6 KB · Views: 11

Bandit

Well-Known Member
Yes, that is a dam fine looking fastener, however it might be time to take a small break.LOL.
That going to be a fine machine.
 

Susquatch

Ultra Member
Administrator
Moderator
Premium Member
45 yrs as an auto tech and I've never seen what I would call a beautiful bolt .

Good thing it's not 45 years as a gunsmith. The heads on many screws are even engraved and clocked to fit an overall pattern.
 

Mcgyver

Ultra Member
45 yrs as an auto tech and I've never seen what I would call a beautiful bolt . They hold the motor mount to the main spindle housing. Is this a good looking fastener or what!

Back when things were made as nice as they could make them.

You probably know this already, but just a bit of encouragement to not use regular screwdrivers on fasteners like this. I've done a lot of work with machines full of slotted machine screw (old machines have those instead of socket cap head screws) and they need special handling . That the blade of a regular screwdriver is tapered ends up marring them and it then forever looks like hack has been in there! Ideal are the gunsmiths sets, you know, where you get a gazillion bits all hollow ground and in various sizes. The blade surfaces are parallel rather than tapered and you select the one that perfectly fits the slot.

Enjoying the thread, living vicariously through you with it....always wanted one of those, but at present simply could not fit it in.

Get This.....
hollow-ground-gunsmith-screw-driver-bits-dissassembly.jpg


So you don't do this!

20190921_103027-1300x631.jpg

20190921_103008-1300x631.jpg
 
Last edited:

Susquatch

Ultra Member
Administrator
Moderator
Premium Member
Is this a good looking fastener or what!

What @Mcgyver said.

Those wheeler gunsmith screwdriver sets are available in different sets. Get the big one. They are often on sale and they really are nice. I like them so much that I keep a full set in the house and another in the shop. Nothing beats using the exact right size tip for the screw.
 

garageguy

Super User
Premium Member
x100 on the screwdriver bits. I got a smaller set from Brownells yrs ago and kick myself for not getting the big set. This is what I used on the bolts. I had to grind about .010 or .015 thou. off one side to fit the slot, but it worked great.
 

Attachments

  • IMG_1060.JPG
    IMG_1060.JPG
    324.5 KB · Views: 9
Top