
-
Scam Alert. Members are reminded to NOT send money to buy anything. Don't buy things remote and have it shipped - go get it yourself, pay in person, and take your equipment with you. Scammers have burned people on this forum. Urgency, secrecy, excuses, selling for friend, newish members, FUD, are RED FLAGS. A video conference call is not adequate assurance. Face to face interactions are required. Please report suspicions to the forum admins. Stay Safe - anyone can get scammed.
-
The 2026 Calgary Area Meetup is set for Saturday May 30th at 10am. The signup thread is here! Robinhood has graciously offered to host the meetup again this year. Please note that you MUST RSVP to the notice linked above if you wish to come.
You are using an out of date browser. It may not display this or other websites correctly.
You should upgrade or use an alternative browser.
You should upgrade or use an alternative browser.
Anodizing for Dummies?
- Thread starter someidiot
- Start date

Mark Presling has some great videos on anodizing and other metal finishing techniques.

ChazzC
Ultra Member
My Mother (Laboratory Chemist back in the 30's & 40's) would frequently say "Aluminium," but she was somewhat of an Anglophile. One of her wedding presents (1939) was a small Aluminium tray & coaster set, probably more expensive than the Seth Thomas Mantle Clock she received ($25: I only know this as she got $25 from an Aunt her directed that it be spent on the clock).Thanks - found it. But really - how much can I trust a bloke who says "aluminium"?

My shop anodizing system is basic but does a nice job.
A bucket of 35% H2SO4;
A bucket of sodium bicarbonate;
A bucket of tapwater;
A bucket of NaOH;
An adjustable power supply - 12-24v and 1 to 10 amps.
Titanium wire;
Lead strips for the cathode;
The trick is in the cleaning of the aluminum part.
Clean the part in the NaOH first - that removes any surface crap. Then rinse thoroughly in fresh water.
IMHO only an etching cleaner will do this properly on a hobby budget. By far the best aluminum prep is Dynaflux 781 or UltraBrite. which include phosphoric acid. Both available from AirLiquide etc. Gloves required. After dunking the part in this and rinsing under the tap several times - any surface oils will be removed and the surface has a micro-etch that seems to accept the anodizing well.
The part is wired (use gloves to keep the surface oil free) and connected to +ve with the lead strips wired to -ve and laid out in the acid bucket.
I use a fairly high current (theres a calculator for current/voltage/surface area) but in reality all you need to do is watch the bubbles when adjusting the current.
About 10 minutes is enough for a shallow decorative surface. If a deeper coating is needed, crank up the amps and leave it longer.
The anodizing dyes used are quite expensive. Don't be tempted to try fabric dyes, they do not work.
To colour the part, prepare the dye concentrate and heat it to 60C. Submerge the part and keep the fluid agitated. It takes between 2 and 10 minutes to dye the part, and you can use masks and multiple layers if you want to get fancy. When the colouring cycle is complete, rinse the part in fresh water and you're done.
Anodizing
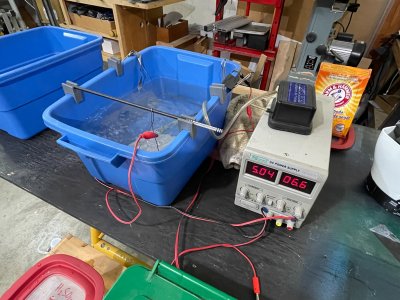
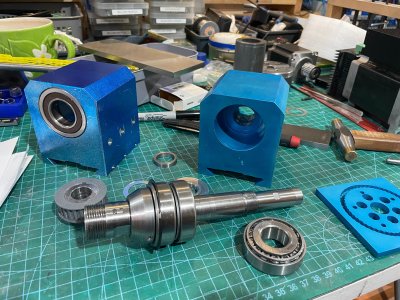
Some finished parts
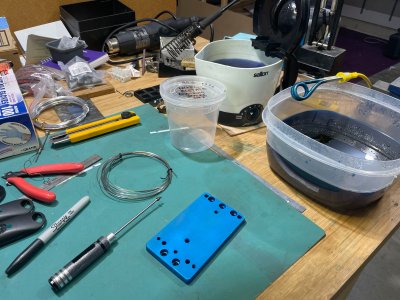
Hot dye
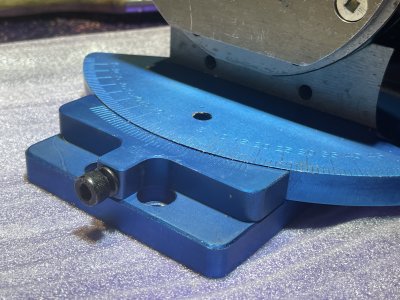
Angle base for a rotary table, hard anodized.
🙂
A bucket of 35% H2SO4;
A bucket of sodium bicarbonate;
A bucket of tapwater;
A bucket of NaOH;
An adjustable power supply - 12-24v and 1 to 10 amps.
Titanium wire;
Lead strips for the cathode;
The trick is in the cleaning of the aluminum part.
Clean the part in the NaOH first - that removes any surface crap. Then rinse thoroughly in fresh water.
IMHO only an etching cleaner will do this properly on a hobby budget. By far the best aluminum prep is Dynaflux 781 or UltraBrite. which include phosphoric acid. Both available from AirLiquide etc. Gloves required. After dunking the part in this and rinsing under the tap several times - any surface oils will be removed and the surface has a micro-etch that seems to accept the anodizing well.
The part is wired (use gloves to keep the surface oil free) and connected to +ve with the lead strips wired to -ve and laid out in the acid bucket.
I use a fairly high current (theres a calculator for current/voltage/surface area) but in reality all you need to do is watch the bubbles when adjusting the current.
About 10 minutes is enough for a shallow decorative surface. If a deeper coating is needed, crank up the amps and leave it longer.
The anodizing dyes used are quite expensive. Don't be tempted to try fabric dyes, they do not work.
To colour the part, prepare the dye concentrate and heat it to 60C. Submerge the part and keep the fluid agitated. It takes between 2 and 10 minutes to dye the part, and you can use masks and multiple layers if you want to get fancy. When the colouring cycle is complete, rinse the part in fresh water and you're done.
Anodizing
Some finished parts
Hot dye
Angle base for a rotary table, hard anodized.
🙂

1018Machine
Ultra Member
I have a full Type II line in my shop, I consult for a few other manufacturers so I'd be happy to help you with questions.

someidiot
Well-Known Dismemberer
I have a full Type II line in my shop, I consult for a few other manufacturers so I'd be happy to help you with questions.
Umm... "cool", I guess. But note the subject line, so it's probably not reasonable to expect me to know WTF "Type II" means.

@someidiot

 letmegooglethat.com
What Is Type Ii Anodizing
For those who think it's easier to annoy you than to Google 'What is type ii anodizing' themselves.