A Tale of Two 3" chucks

PeterT

Ultra Member
Premium Member
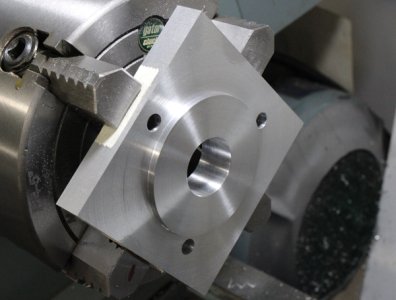
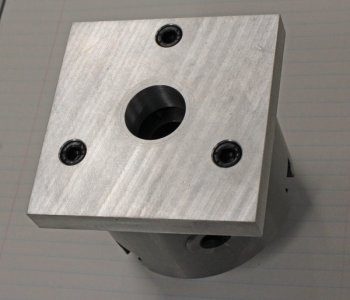
I have been wanting a small chuck for some time in the 3" range. For a few reasons. I have a nice 5C Spin Indexer (Bison actually) with sub thou runout. Its great for quickly plopping in the mill vise & doing rotary whatever rather than setting up the RT. But 5C limits the diameter. I want to make a rectangular back plate fixture for just gripping round stock vertical, or at angles. And some other ideas, but onto the story.

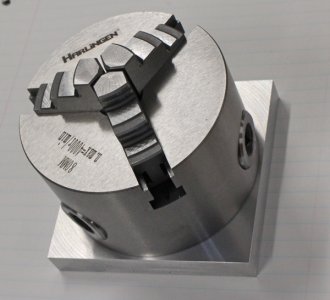
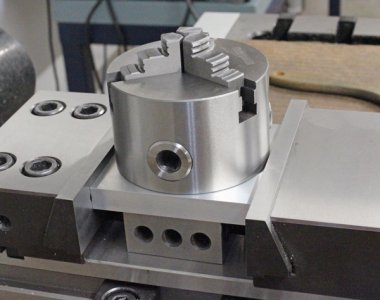
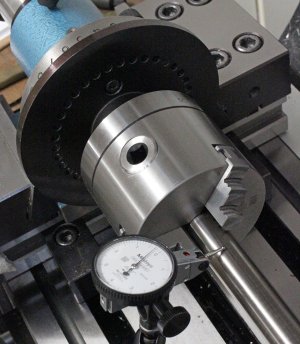
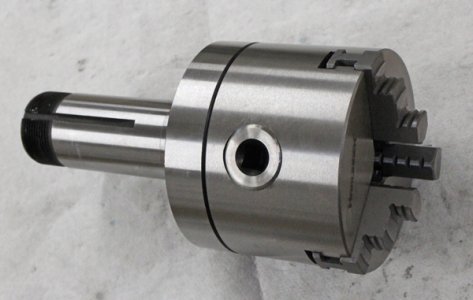
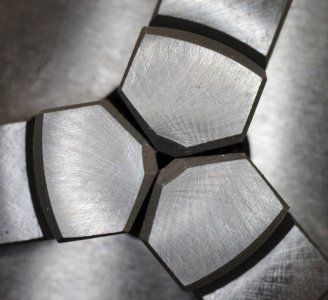
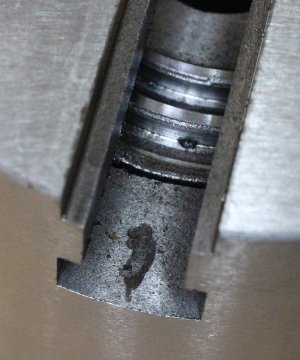
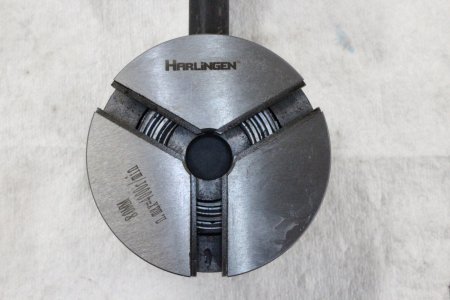
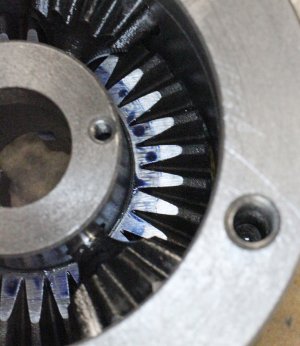
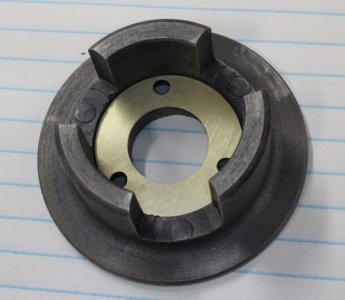
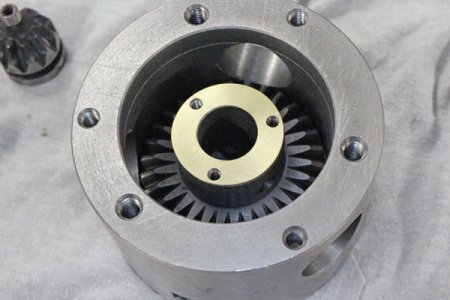
There are lots of these on AliExpress under different names. Seems like mostly used for small hobby lathes. Of course, how good are they? I noticed Accusize offered one that came with optional bolt on 5C backplate fixture so kind of best of both worlds. Available on Amazon Prime so I pulled the pin. It has a plastic insert part rather than metal but other than that looked about the same as others. I set the 5C adapter up (only) in my Spin Indexer I also my 5C lathe chuck. The lip was just over 0.001" TIR. So far so good. Mounted the chuck to adapter & my test bar. Not good at all, like 0.017" TIR. I spent some time examining, re-assembling, trying diffeernt jaw numbers, different diameter test bars. But it was pretty obvious the jaw grind was off.

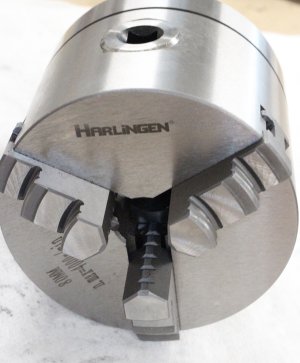
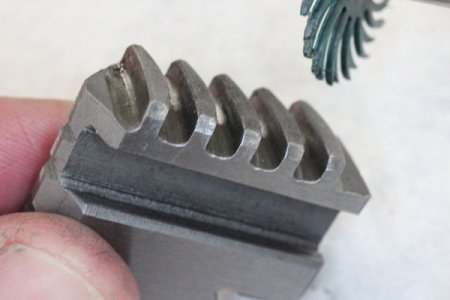
I considered doing the jaw regrind ritual but I have yet to do one myself. Its not exactly easy at this small-ish aperture tiny opening. The wider diameter jaw set looked a bit better but was still about 0.005". They were laterally not very tight in the slides so I decided just return them. That part went smooth. It was done through Amazon return process, I wrote a short problem description, offered pictures but they didn't seem to want them. So back it went but I still dint have a chuck & now a bit more gun shy than I was before.

1690692825099.png 1690692857991.png 1690692894735.png
1690692960884.png 1690692999432.png
 

PeterT

Ultra Member
Premium Member
After some hunting around I saw these Harlingen chucks on Ebay by hhindt store. Its also at LMS & a few other distributers. Same bolt pattern, similar 5C adapter available. The specs read about the same or maybe a bit better, I can't recall its all crap shoot anyways obviously. But I got the sense maybe a small notch up so gave it a try.

1690693464208.png
 

PeterT

Ultra Member
Premium Member
Same runout on the adapter only but much better on the chuck with test bar, in the 0.001 - 0.002" range over all my test bars. About as good as I could hope for.
 

Attachments

  • IMG_5487_edited-1.jpg
    IMG_5487_edited-1.jpg
    357.4 KB · Views: 1
  • IMG_5488_edited-1.jpg
    IMG_5488_edited-1.jpg
    169 KB · Views: 2
  • IMG_5489_edited-1.jpg
    IMG_5489_edited-1.jpg
    271.9 KB · Views: 2
  • IMG_5490_edited-1.jpg
    IMG_5490_edited-1.jpg
    258.2 KB · Views: 2
  • IMG_5491_edited-1.jpg
    IMG_5491_edited-1.jpg
    178.9 KB · Views: 1

PeterT

Ultra Member
Premium Member
I noticed the chuck had some sticky areas when scrolling in or out. I hoped it would be just the usual deburring but you just never know.

This chuck has a metal rear cover plate insert vs the Accusize was plastic. From what I assumed it just keeps the dirt out. It straddles the pinion gears but doesn't t really fit anything else internally. The cheesy screws were very loose as delivered as were the pinion retention set screws so I tightened them up. That made the scrolling action much worse, close to being locked up. So I took everything apart.
 

Attachments

  • IMG_5492_edited-1.jpg
    IMG_5492_edited-1.jpg
    245.8 KB · Views: 3
  • IMG_5493_edited-1.jpg
    IMG_5493_edited-1.jpg
    224.4 KB · Views: 3

PeterT

Ultra Member
Premium Member
The pinions & scroll didn't look horrible for offshore. I blued & coudn't see any immediate friction. Every edge is raw machined usually with frags hanging off so de-burred everything. Re-assembled, still no joy.
I saw a Stefan video where he popped the scroll out using a brass pin from the front. Mine didn't want to move so I chickened out figuring maybe different design or hot pressed in.
 

Attachments

  • IMG_5494_edited-1.jpg
    IMG_5494_edited-1.jpg
    262.9 KB · Views: 5
  • IMG_5495_edited-1.jpg
    IMG_5495_edited-1.jpg
    259.4 KB · Views: 5
  • IMG_5496_edited-1.jpg
    IMG_5496_edited-1.jpg
    343.8 KB · Views: 5
  • IMG_5497.JPG
    IMG_5497.JPG
    323.4 KB · Views: 5
  • IMG_5500_edited-1.jpg
    IMG_5500_edited-1.jpg
    166 KB · Views: 5

PeterT

Ultra Member
Premium Member
Then I realized by pressing on the cover plate I could actually replicate the friction. I blued the end & scroll gear alternately & sure enough, contact. So tight bolts is pressing it against the gear. I thought about machining the end off but wasn't quite sure how much or maybe my tapping attempt had moved it. So I hand made a 0.015" brass shim. Got lucky Its exactly the offset required. After some more deburring , smooth as silk now.
 

Attachments

  • IMG_5498_edited-1.jpg
    IMG_5498_edited-1.jpg
    228.9 KB · Views: 4
  • IMG_5499_edited-1.jpg
    IMG_5499_edited-1.jpg
    325.3 KB · Views: 4
  • IMG_5503_edited-1.jpg
    IMG_5503_edited-1.jpg
    220.9 KB · Views: 4
  • IMG_5504_edited-1.jpg
    IMG_5504_edited-1.jpg
    245.7 KB · Views: 4
  • IMG_5505_edited-1.jpg
    IMG_5505_edited-1.jpg
    217.4 KB · Views: 4

PeterT

Ultra Member
Premium Member
The pinion holes in the chuck body are decently smooth & accurate but sharp, shrapnel edges everywhere, especially the hole for pinion retention. So I chamfered everything with my Dremel & stones & improved the pin. It got better & better, turning very nice like chuck should.

To grease or to oil, that is the Question. I contemplated way oil because its the thickest stuff I have, but decided on grease for now. The scroll has a tiny annular gap between the body where bits could get in which is why I don't like grease unless its well sealed. But with the jaws on there isn't an easy direct path. I use air sparingly. I guess worst case, pull it apart & flush it out, its not a rocket engine.

So FWIW that's how the 3" story played out. Your results may vary. I decided the quality might be a bit better or at least limited to easy fixes. So I have a 4J coming. I have a 4" Sherline RT which is a cute little fellah & decently accurate,again quick setup in teh mill vise. But the Sherline chucks are very limited in what they can hold. So hoping these 3" can also marry to that one day.
 

Attachments

  • IMG_5506_edited-1.jpg
    IMG_5506_edited-1.jpg
    249.7 KB · Views: 4
  • IMG_5507_edited-1.jpg
    IMG_5507_edited-1.jpg
    195.7 KB · Views: 4
  • IMG_5508_edited-1.jpg
    IMG_5508_edited-1.jpg
    204.6 KB · Views: 4

PeterT

Ultra Member
Premium Member
Haha I suppose. What's amazing is that these objects cost what they do considering the material, machining steps, hardening, grinding.... Just a liiiiiitle more TLC at certain critical stages & it could be decent stuff for most weekend warriors. I don't mind kit building if the cost is reasonable - cleaning, parts upgrading parts, deburring is actually therapeutic. But until Santa brings me some grinding equipment that's kind of the end of the trail.

My little machinist vise was the same deal. Nicely ground in all axis. I've been meaning to put it on the surface plate now that I have one. But a leadscrew mechanism that is was such a mickey mouse let down. Fortunately upgradeable, so now its OK to use again.
 

fixerup

Super User
Haha I suppose. What's amazing is that these objects cost what they do considering the material, machining steps, hardening, grinding.... Just a liiiiiitle more TLC at certain critical stages & it could be decent stuff for most weekend warriors. I don't mind kit building if the cost is reasonable - cleaning, parts upgrading parts, deburring is actually therapeutic.
Thank you for sharing the process needed to better these somewhat accurate and affordable chucks. You gave me the motivation and I decide to buy the Vevor 8" chuck and see how it pans out. I will start a new post and share my findings. Delivery Aug 28, I am so looking forward to finally having a chuck with inside and outside jaws. Crossing my fingers, that I get a decent one and hopefully no jaw grinding needed.
 

PeterT

Ultra Member
Premium Member
FYI the 3" Harlingen chuck came from this Ebay seller, but LMS (Little Machine Shop) also carries that name. It is a step up from lookalikes IMO. I liked the 3-jaw so much I ordered same size 4-jaw which just arrived. Its same level of runout accuracy. Needed deburring as well but no backplate issues. However I obviously had a brain fart because its a 4-jaw SCROLL chuck, not an independent chuck. So... once the independent comes back in stock, I guess I'll having triplets :/ Just CAD-ing up some holding fixtures for mill vise because they have common bolt pattern & recess. I think these chucks will be super useful for me in addition to the 5C Spindex mounting.

I made a replacement aluminum knob from scrap cutoff to replace the original heavy cast iron one with MIA handle. I don't think I would actually rotate while milling like a rotary table just trusting the collar to maintain axial position. I just use it to index to positions then lock it down for drilling/milling. Knob worked out OK but I think I made the circular recesses a bit too deep aesthetically. Looks like it should drive a cog belt or something.

1692405490358.png
1692406036289.png 1692406065203.png
 

RobinHood

Ultra Member
Premium Member
That’s a really nice re-work of the chuck. Glad you were able to make it decently accurate.

That draw tube knob looks just fine to me. Nice size to grip onto.
 

PeterT

Ultra Member
Premium Member
Since the bolt pattern is the same for these 3" chucks, I made a little mounting block for use in the mill vise. Aluminum isn't the most robust material for these fixtures but I didn't have any steel or iron scraps. This is from a cutoff of surface ground, MIC-6 cast aluminum tooling plate which I've used for even larger fixtures & it works pretty good if you don't abuse it. I have some different ideas for angle setting use but anyways, a handy way to hold round things using the same chuck system.
 

Attachments

  • IMG_5531_edited-1.jpg
    IMG_5531_edited-1.jpg
    200.9 KB · Views: 6
  • IMG_5534_edited-1.jpg
    IMG_5534_edited-1.jpg
    254.6 KB · Views: 6
  • IMG_5535_edited-1.jpg
    IMG_5535_edited-1.jpg
    227.1 KB · Views: 6
  • IMG_5537_edited-1.jpg
    IMG_5537_edited-1.jpg
    239.7 KB · Views: 6
  • IMG_5538_edited-1.jpg
    IMG_5538_edited-1.jpg
    237.1 KB · Views: 6

fixerup

Super User
Those two work holding fixtures will be handy to have around. You can't never have to many work holding fixtures to help you setting up a difficult job. Your work holding fixtures and photos are very well done. Kudos
 
Top