• Spring 2024 meetup in Calgary - date Saturday, April 20/2024. discussion Please RSVP Here to confirm and get your invitation and the location details. RSVP NOW so organizers can plan to get sufficient food etc. It's Tomorrow Saturday! you can still RSVP until I stop checking my phone tomorrow More info and agenda
  • We are having email/registration problems again. Diagnosis is underway. New users sorry if you are having trouble getting registered. We are exploring different options to get registered. Contact the forum via another member or on facebook if you're stuck. Update -> we think it is fixed. Let us know if not.
  • Spring meet up in Ontario, April 6/2024. NEW LOCATION See Post #31 Discussion AND THE NEW LOCATION

A Press-ing topic but broaching the subject- Arbor Press

Brent H

Ultra Member
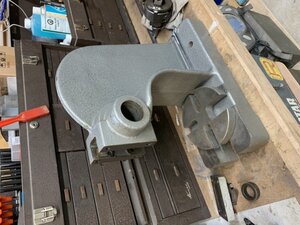
So as my refirb of the Cincinnati needs gears and keyed spindles etc I was on the lookout for Broaching tools and a press. I was able to find a 3 ton arbor press on Kijiji and very kindly @architect (thank you again) picked it up for me along with that mill light :). The press is a simple one without the clutch mechanism that makes things much easier to use. So I started the modification.
D61878C9-3335-4B69-A60B-D8E03E55C8A4.jpeg
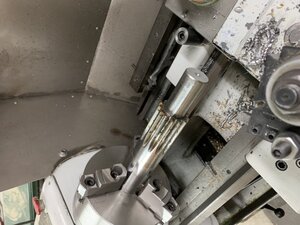
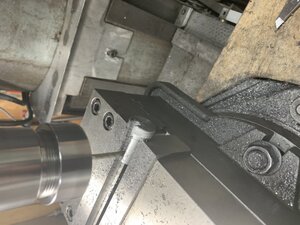
Pictures keep flipping so I am just gonna leave them - pulled the pinion out that drives the rack and chucked it in the lathe

9CD04437-99A0-44BB-A54D-3416E790E502.jpeg
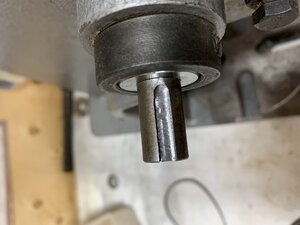
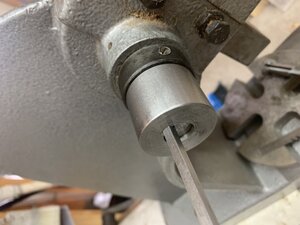
Bored one end to accept a 3/4” ratchet drive and the other to accept a 5/8 shaft with a 3/16” key way.
F87CC390-109A-499A-BFD6-530205F810FD.jpeg
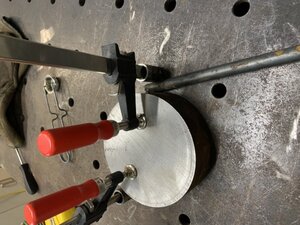
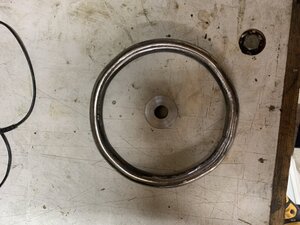
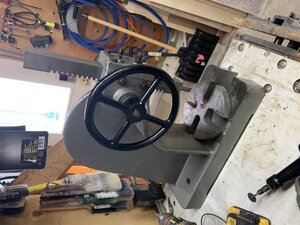
Then I needed a 6” hand wheel for the shaft so I made one by wrapping 5/8” rod around a 6” steel round - heating with the torch to allow easy bend, welded up the ends, made spokes out of 1/2” round and a centre hub out of some scrap 4140. The hub needed a key way......

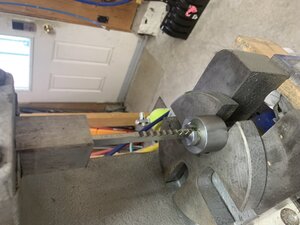
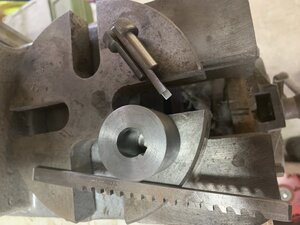
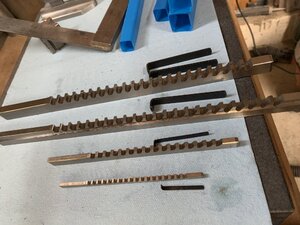
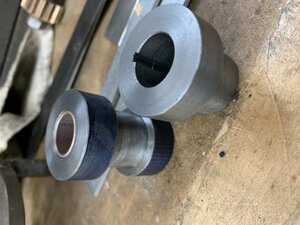
Well the order from Singapore arrived with 4 broaches : 1/8, 3/16, 1/4” and 3/8. So I then made a broaching adaptor for the 5/8 bore 3/16” key: E7916083-8D5A-4DAD-BDD1-6C60C53C82E1.jpeg
D0B8BBEF-94EE-4728-838F-EA572B86C51A.jpeg
12E079B4-223B-4545-BBE7-A8AABA8B6FD5.jpeg
AA323E0D-1515-4869-8ECE-2331BCFE2E10.jpeg
A8C2CDF2-1E3E-45B1-B9FC-7CDB17583723.jpeg
E62FBB2F-6E77-4633-B90B-66CC810B8AAB.jpeg
36B94C2F-4FE0-4CF9-B43C-5FB067B7FC13.jpeg
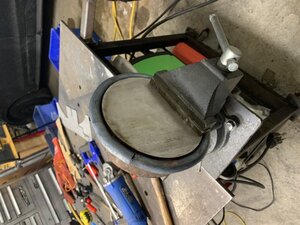
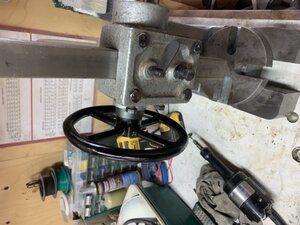
I cleaned up the hand wheel and painted it black. Mounted on the press and I am all set for broaching !!

A69D645A-37C2-470E-81A6-645BA42B25CB.jpeg
3E06E06A-572A-484F-8FD1-50579B7087AC.jpeg
The ratchet is on the other side and fits in a squared out hole in the pinion. You can then use the hand wheel and the ratchet to work the broach or press on a bearing.
 

YotaBota

Mike
Premium Member
There's something missing from the handwheel,,,,,,,,,,,,,, where's the wood?:D
Are you using shims for broaching or can you just power thru?
 

Brent H

Ultra Member
No way to power through. Broach comes with a 0.030” shim - that’s a lot - fist cut takes some elbow grease. Finished with a couple 0.005” shims to fit
 

CalgaryPT

Ultra Member
Vendor
Premium Member
That's really nice Brent. Good for you. Those arbour presses with ratchet mechanisms are great. I just have a little 1 ton one guy, and I wish it were ratcheted. It's a PIA broaching anything without the ratchet I find. Nice work.
 
Last edited:

Brent H

Ultra Member
Thanks @CalgaryPT - this guy on YouTube in Australia had the idea - seemed like a good plan and didn’t waste time once I got it. Worked very well. Ratchet is a $45 PA special and the wheel - LOL well that was a scrap bin special - would have taken pics of the build but things were a bit hot
 

YYCHM

(Craig)
Premium Member
How does this work? Is the broach tapered? Is the broach attached to the ram or just pushed through?
 

Brent H

Ultra Member
@YYCHobbyMachinist - yes the broach is tapered and basically is a set of teeth that shave off the metal as you force it through the bore. I did not buy the collets with the broaches so I have to make them. For example a 3/16” broach needs to cut 1/2 depth (3/16 =0.1875”) /2 = 0.09375” so first push through chopped out nearly 0.060” The shim (put behind the broach) was 0.030” and I added 0.010” of shim to finish things.
The broaches come as just sharpened rods (see the 4th last pic).
 

historicalarms

Ultra Member
No way to power through. Broach comes with a 0.030” shim - that’s a lot - fist cut takes some elbow grease. Finished with a couple 0.005” shims to fit
Hmm. and I was going to comment how surprised I was at how effortless it was using my "store bought" broach kit was to use (1/4" ).
My "homebuilt broaches (from square HSS stock) are as you say, require more "juice". They are a lot bigger (3/8 & 1/2") and the taper angle is just free-cut by hand on a bench grinder so not even or at any specific angle and then a couple or 3 "positive angle" (shallow teeth with not much room for cuttings so "clean out required on a longer cut) teeth cut in it with a Dremmel. They are crude but absolutely an option if "store bought" is too expensive for a "one-off".

I had to build some "broach guides" for different sized broaches and also to accommodate different bore dia in the workpiece. I started out just using Aclands 2 thou shim stock cut to size as shimming material but soon discovered it was a painfully slow process so the last one I built (much more worthwhile if you have a # of pulleys to cut). I drilled & tapped two grub screw holes thru the guide into the broach guide slot and now use one shim that I can adjust broach engagements with a quick small grub screw 1/16 turn.
 

Brent H

Ultra Member
Thanks for the kudos guys - it worked very well. The press needs to have the rack face milled as it is pretty crude. I would like to bore it out and make some attachments- some bearing sleeves, punch holders etc. My lathe is just shy of fitting the rack. Will have to rig up something on the drill press. It is a smaller throat 3 ton - would have been sweet if it could press just a wee bit taller. That being said - I machined a gear blank for the Cincinnati and it needs a 1/8” keyway - oh ya!!! Will see how that goes

As I am making the broach guides I may make the next one a bit more needing of step up shims to make the first press a bit easier - especially for the 1/8”- pretty tiny
 

Brent H

Ultra Member
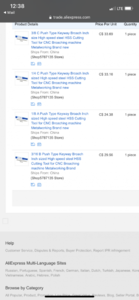
@Hacker : quality seems pretty decent. The 3/16” one had to key a piece of 4140 and it worked well. I will be using the 1/8” one soon so fingers crossed it is decent as well. Aliexpress - around $24 each and I bought 4. 1/8, 3/16, 1/4 and 3/8.
 

Brent H

Ultra Member
98E893AB-2F8B-490C-8867-89AE983F4E44.jpeg
they all seemed to be the same after a bit but here is the screen shot:

EF6BD9E6-1F30-4CB3-A9BA-900626BF8426.png
I guess they were a bit more than $24 but it was free shipping
 

Brent H

Ultra Member
@David_R8 : I don’t believe so - they are just a slide channel. The shims are just mild steel (they ride behind the broach as well). Lots of oil involved- LOL. I have to make another for the 1/8” one and that one needs to slide out some cast iron - should be a fun experiment
 

Brent H

Ultra Member
Well, where to start - Joy!!! Down to PO’d - at myself - tools do not make the master .....

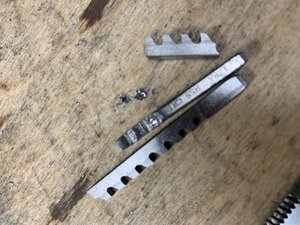
So, for all you guys in Broach Land - lesson of the day- make sure the shim carries through the entire bushing to support the broach or you may suffer catastrophic failure of your small broach -......alas.
In my excitement/haste ...momentary glee at how great my first pass with the 1/8” broach went, I installed the factory shim and pressed on. About 10 seconds later came the ahh FUDGE moment (I did not say fudge however) ... the broach went past the end of the shim, cocked forward and Shazam!
D8722C3F-571F-41A5-9358-8E2418779645.jpeg
I was able to finish the part on the lathe with a boring bar and many passes - argh!

628D071D-7C65-466B-B022-7A42B9CCA8B2.jpeg
Ready for gear teeth - will post that adventure on the Cincinnati No 2 refirb. Page

I was able to use the long piece of broach once and then I dropped it on the concrete shop floor and it got smaller - alas
The 1/8 broach was an “A” size broach so it has a slot in the bushing 0.128” I may purchase another 1/8” but will go to the “B” size for a bit more solidity. The “B” size is 0.190” for the slot
 

trlvn

Ultra Member
The way the broach shattered, it is likely high-carbon steel that has been hardened but not tempered? I presume that is (one reason?) why the price was less than half as much as, say, McMaster-Carr would charge for a HSS broach.

As long as it doesn't go PING, I would guess that hard high-carbon steel would keep a sharp edge longer than HSS steel. [Or is my lack of experience showing again? ;) ] But that the HSS would be more tolerant of pressures that weren't perfectly in line with the cutting direction.

Anyway, I think many of us are learning from your hard-won experience. Thanks for showing both the good and the not-so-good!

Craig
(I have a little broach set--1/8 to 1/4"--but events have conspired such that I haven't tried it out yet.)
 
Top