• Spring 2024 meetup in Calgary - date Saturday, April 20/2024. discussion Please RSVP Here to confirm and get your invitation and the location details. RSVP NOW so organizers can plan to get sufficient food etc. One week to go! More info and agenda
  • We are having email/registration problems again. Diagnosis is underway. New users sorry if you are having trouble getting registered. We are exploring different options to get registered. Contact the forum via another member or on facebook if you're stuck. Update -> we think it is fixed. Let us know if not.
  • Spring meet up in Ontario, April 6/2024. NEW LOCATION See Post #31 Discussion AND THE NEW LOCATION

Tips/Techniques A (mostly) Successful Investment Casting.

Tips/Techniques

YotaBota

Mike
Premium Member
The fittings painted would work for running on compressed air, nuts and bolts would have to be made for the scale appearance. I was pretty happy with the 4-40 nuts and bolts I made using 3/16 hex stock and they weren't that difficult, just a bit tedious.
One of these days I'll get back to my Stuart 10V, winters coming:)
 

Dan Dubeau

Ultra Member
Nice work Mike, looking forward to all the cool stuff you make with this investment process.

For the flanges, you could cast both sides as one, complete with fasteners, and a through hole for the pipe. Then just slip it on wherever you need and solder in place. Nobody would know it's one continuous pipe. Or use them to hide the joint between bends etc and solder the whole works together as a unit.

Since they'd all be the same you could easily build up a large inventory of them in the sizes you need.

8FRzqgjl.png

While modeling that up I got thinking that maybe you could even selectively plate the fasteners too?
 

Mcgyver

Ultra Member
thanks Dan, 100%...thats what I was getting when I said do them as assemblies and SS the tube in. We'll see....depends how well I can get the resin burnout working. That level of detail is entirely possible with wax investment casting, just that so far the resin has fallen short of what I can do with wax.

Another possibility is making a rubber mold from the the 3D print, then injecting wax into it, then doing a lost wax casting from the wax pattern (how production lost wax casting is done). Possible, but the mold making and cutting adds expense and tedium.
 
Last edited:

Mcgyver

Ultra Member
Thanks for all the encouragement! Here's a resin print casting, after lots of fails and resin changes, I had some better results yesterday with AL.

I switched to a much more expensive resin. Suppose to print and burn out well. The print wasn't very good (some distortion) but I think issue is too much adhesion to the FEP. Its a much clunkier part than jeweller would make so using it for mechanical stuff might be a bit out of its comfort zone. I'm going to try some different FEPs, see if the premium ones are better. A bit of PTFE also can help.

I have a bronze casting in a few hours, my second, after an overnight burn out. Bronze is a bit scary, 900F mold, 2000F metal....maybe I'm being a chicken, but keep in mind I'm doing this in my furnace room.

The early pulley had the teeth with a 45 degree angle to accommodate printing difficulties; I could only print it straight up a down. But the new stuff, Bluecast, worked ok with the usual angled/support print so I discarded the angled teeth on the one end.

as it is printed, after curing. The part is 1.050" OD, 5/8 bore. without investment casting (or some lost pattern process) it would close to impossible as there is no possible parting plane that I can see.


zpY8tSC.jpg


some distortion, likely too much adhesion to the FEP (film a bottom of resin tank). It shouldn't matter much as I will turn it away, but it's still something I need to address in my process.

Y6RlXLM.jpg


08LFw9F.jpg


There was some flash, indicating a crack in the investment. Annoying, I'm using new Ransom and Randolf Plasticast, supposed to be the right stuff. However it was just flash....the burn out was good, no ash that I could see

43NC8MW.jpg


early attempt....this one (left) has a much better finish

wPpu286.jpg


I reamed it then held on an expanding mandrel (I made a set foreverago) so I could clean up the outside. Concentricity is based on the cast bore being fairly concentric to the teeth, and a reamer shank is flexible enough so that it will follow the existing hole. After that the mandrels are quite concentric.

I would have just bought one but because of the bore to pulley size, I needed a larger diameter collar for set screws than any of commercial ones this size had. Yeah, I could of reworked that, but casting seemed a good option/learning opportunity.

Its been months (started in May!) of trying and learning...an arduous process! Still far from perfect, but finally getting usable parts. There are simply so many variables, the whole 3D printer world is new and immature in a lot of ways and while lots of resin printed jewellery is being done via lost resin patterns, I doubt very many are doing mechanical shapes (who cares if a ring distorts slight, might not even be noticeable) with thick cross sections....and in AL and Bronze. You are kind of on your own sorting the dozens of variables needing to be all just so.


pU56kbg.jpg


Akvol6J.jpg
 
Last edited:

Dan Dubeau

Ultra Member
You're plowing on in somewhat uncharted territory, and I'm impressed and encouraged by your progress. Well done.

Do you spray your FEP with rainex? While I haven't touched my resin printer in over a year now, I did notice a big difference in sprayed vs non sprayed parts. It was recommended to me back then for parts sticking to it, and it helped out a lot. Not sure if there are better options/products now or not, but it was a cheap solution.

Looking forward to seeing your results in bronze. I have some putter designs I want to cast in bronze, but still have some othe projects to clear through before getting to those, so I'm curious how you make out.
 

Mcgyver

Ultra Member
Thanks Dan,

I've used wd40 PTEF spray and it worked, but didn't with this resin.....first print with it, wanted to see how it went. I like the Rainx idea. Will try it. I did notice a small mar in the newly changed FEP after the pulley print above, very likley caused by the excessive adhesion where the distortion was (which was a big cross section). I'm also going to order some more expensive FEP material, may the cheapo stuff I used is in part to blame. Its all (hopefully somewhat educated) guess work and trial error....with 500 variables!

The bronze casting was better than the first one, but still has major issues.

The pattern. Its a reversing hand wheel for a triple expansion marine engine, and is about 1" dia. Its six spoked, the extra curvy paths are runners intending to get better flow

0NvAlUu.jpg


Is it going to be a dream....or a dud

mT5KGTO.jpg


It looks good from a distance if you squint abit

7OMvQ0I.jpg


but after a bit in a magnetic polisher the flaws are revealed

awioPLf.jpg


The shot below tells the story ....shows the issues clearly but also the potential. Notice how the striations from the 3D print clearly came through toward the bottom right. That's the incredible detail possible with investment casting. The outer ring is small, only about 1/8" cross section yet picked up those tiny lines perfectly.

My current thought, that this photo suggests, is its casting issue vs a resin/burnout issue (with some resins this is the issue....their expansion damages the investment). I'm thinking sprue/runner/flow issue. I was reading a bunch last night....lots going that can mess you up and it can be hard to get good information. Stuff like tapered runners to reduce turbulence, tactics to avoid "investment erosion" etc. It's all about getting the metal through the mold while it is still hot enough without damaging the mold. Time for fluid dynamics 101 lol

I used small runners connecting to the inside edge for ease of clean up. I think I will increase their size and maybe the frequency. I really don't want to put runners to the outside as the compound curve will be much harder to clean up, but there would be room for a larger dia runner so it would deliver better flow. Maybe. First I think I'll double the runner dia and fan it out at the inside of the rim...fanning out creates a bit of turbulence, but will deliver more metal quickly

o2QqHZJ.jpg
 
Last edited:

Dan Dubeau

Ultra Member
That's an encouraging start!

Is it my eyes deceiving me, or are a few of those surface irregularities in the resin model as well? Looks like there is some bubbling on the outer rim that got carried over to the finished casting. Not all of it of course, but maybe some contribution to the defects? I'm also wondering about pouring temp being too low, and prematurely freezing up when different fronts of metal are meeting maybe causing those defects too? Could be grasping at straws there, but it might be another variable to look at. Everything else was good, except the rings where all those different flows of metal meet is the reason for that thought. Turbulence is another one too, but with the casting under vacuum I'd think that would settle down before the metal freezes up?

As you said, there are many variables to work out. It's too bad there is such a long turnaround time per investment to try and work out the bugs. That's a good start though, I can't wait for the next installment.
 

Mcgyver

Ultra Member
There is some distortion in the print, same issue as with the pulley I think. Based on other resins, I expected some issues with the pulley, but not with the handwheel. I expect that will go away with treating the FEP.

The supports on the resin are brittle and often/usually leave small divots as they break off, despite being careful. You are seeing that in the print, but don't much care as its the back of the wheel.

The big issue obviously is the very bad surface porosity on the visible side of the wheel. The part is relatively symmetrical, yet there is that porosity right beside and perfect area. Hard to key in on the source of the trouble

My first bronze casting I did 1915F and this one was at 1880F. The first was far worse (but of course I'm not isolating variables, it was a different resin). Both are the upper end of what to pour bronze at. In both cases the molds were at 970F. My learning continues as there is a lot going on - its not just about hotter. Investment breaks down at 1500F so poorly done spruing adds turbulence and can increase investment erosion.

I also don't know the material. I should buy some silicon bronze grains, but have already shelled out so much on the this journey, my credit card is worn out! The first material was a feedscrew nut and clearly had lots of zinc; at 1915 it was boiling and giving off the telltale with stream of smoke (I have vent overtop of the melter so no bit deal). The second was I think a tin bronze (a gear). Anyway, for sure mystery metal adds to the troubles, but I'm doubting its not hot enough. (one thing I have done well is kep a written notebook of the settings for each print, burnout and cast....far more organized than I usually am)

The cycle is long. 13 hours for a print. About 18 for a cast. The 18 means about one or two a week max....limited number of days when an be there at both ends of the 18.
 

Mcgyver

Ultra Member
"Once more unto the breach, dear friends, once more"

Time for an update. It takes such a large block of time (close to 20 hours straight) to do a casting that I can usually only one attempt in in a weekend. Something goes wrong, and wait until next week.

I also bought some silicone bronze ingots, trying to eliminate possibles sources of the issue, i.e. using mystery metal.
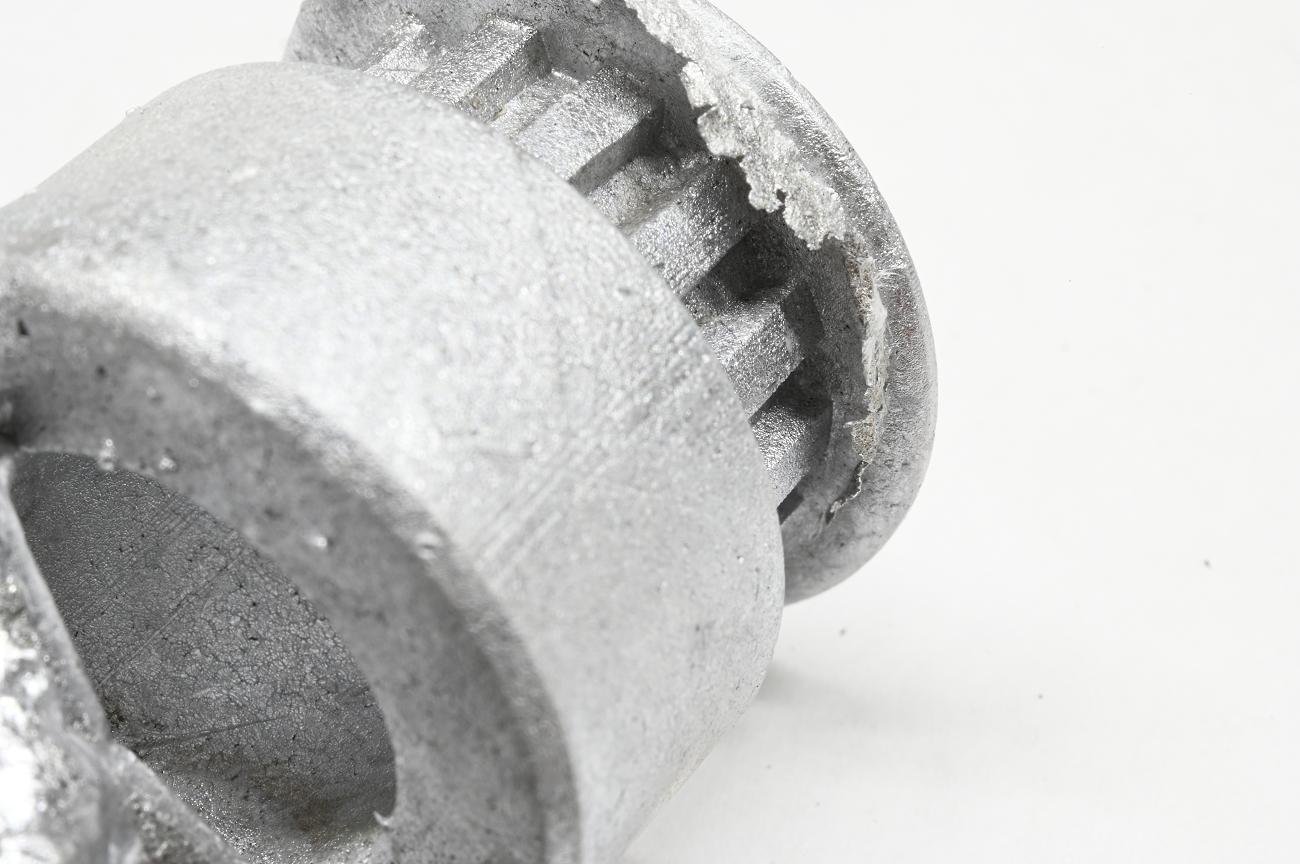
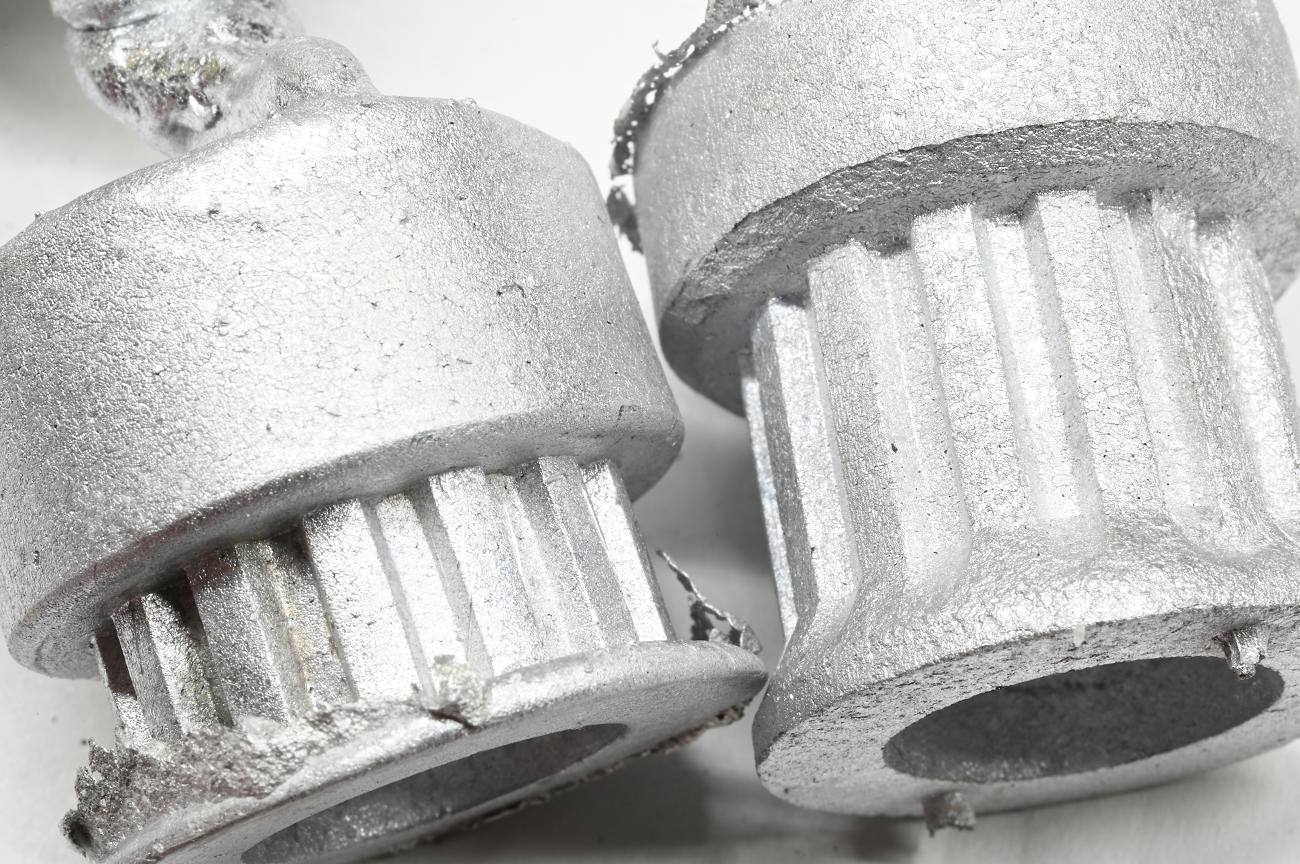
Still lots of flaws

MWZ_5514-1300x864.JPG \

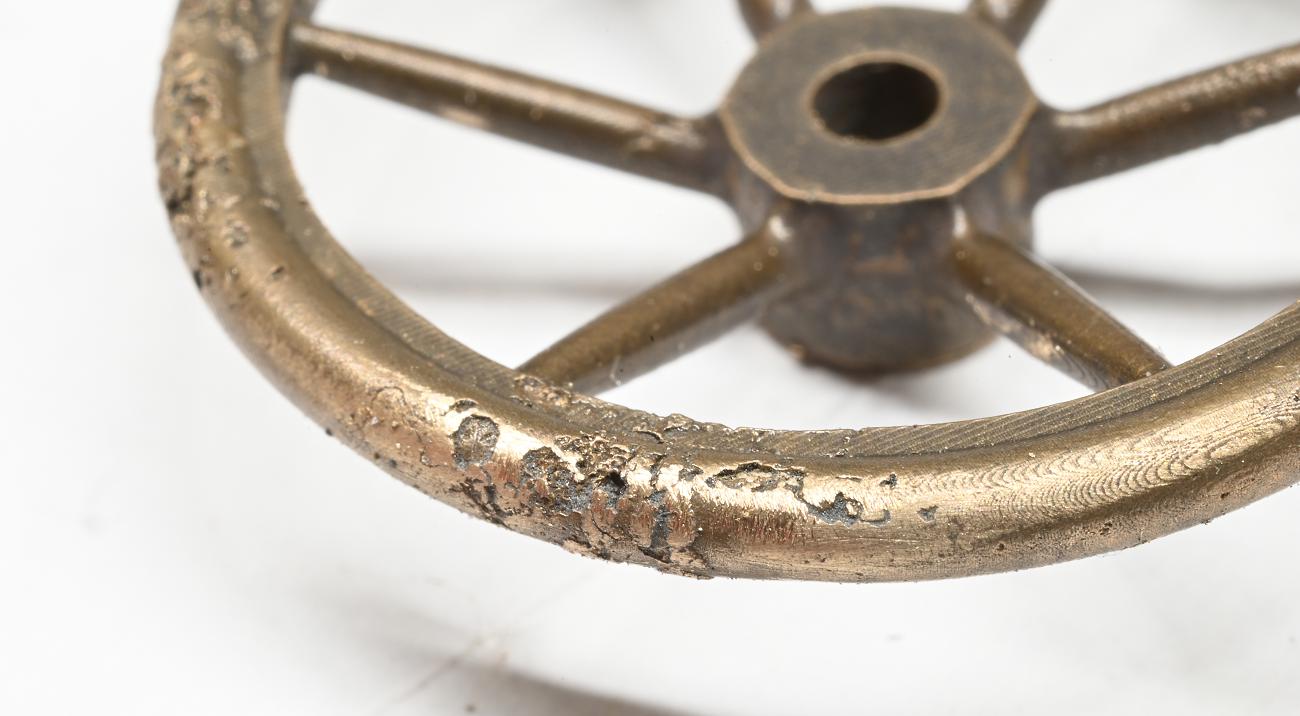
The one at the right, is the above cleaned up an few hours in the polisher. Better, but far too many flaws for this dog to drop the bone! :)

MWZ_5666-1300x864.JPG

This has been brutally frustrating. I've a spent a small fortune on different castable resins and so far all are s**t. I think the issue is whatever the resin does on burnout is damaging the mold, but to be sure, i.e. isolate that, I decided to do a casting with a wax pattern instead of a resin pattern.

I fortunately have a vulcanizer and wax injector (when I bought the oven and vacuum caster it was a complete kit from a guy leaving the business) so it shouldn't be too big a deal, right?

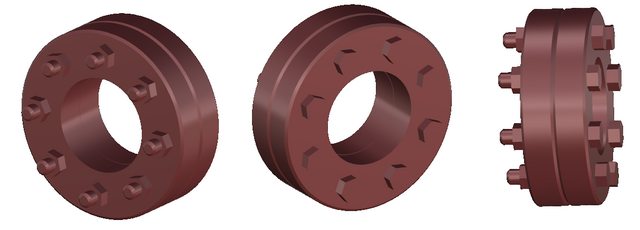
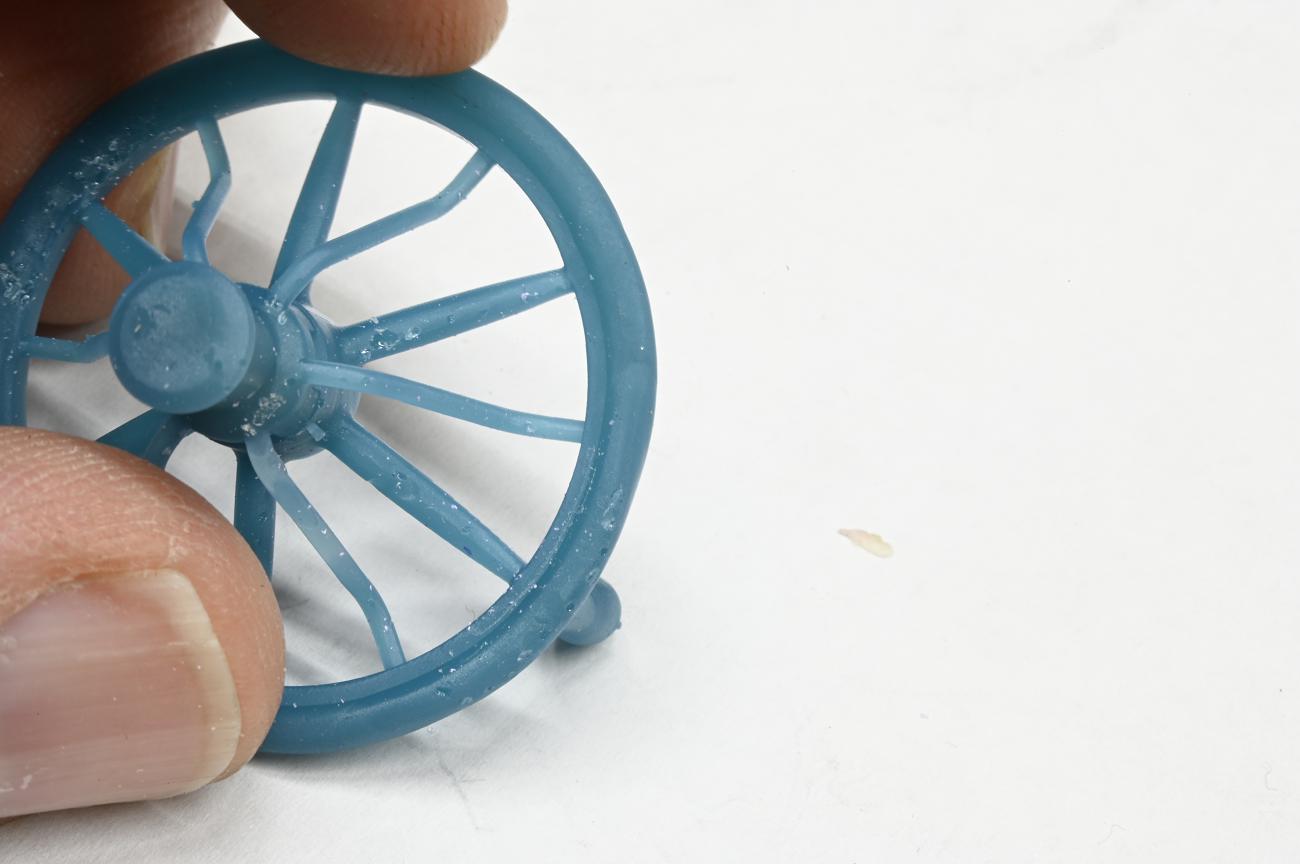
The first thing is to make a mold to create the wax pattern, using the 3D resin printed part. As the part is somewhat fragile I elected to make the mold with RTV Silicone (that btw stands for room temp vulcanizing, no heat vulcanizing needed). That means pouring a liquid from using a press vulcanizer, far easier on the pattern.

First though, I need a casting box for the the silicone. 3D printer to the rescue


MWZ_5546-1300x864.JPG


MWZ_5551-1300x864.JPG

It did take me two tries, the first had too many air bubbles. The manufacture claims no vacuuming is necessary, but I found this highly optimistic. You might be able to dissipate them by vibration, hold something against the box, but have a vacuum made that easy


MWZ_5651-1300x864.JPG

MWZ_5561-1300x864.JPG

There are some tricks to cutting the mold in two. You need a set up like shown below, so you can pull the rubber apart to keep cutting inward. You also put in some curves so there is lots to register on.


MWZ_5565-1300x864.JPG

This is just cutting a bit of excess material off, but shows the idea of its use

MWZ_5567-1300x864.JPG

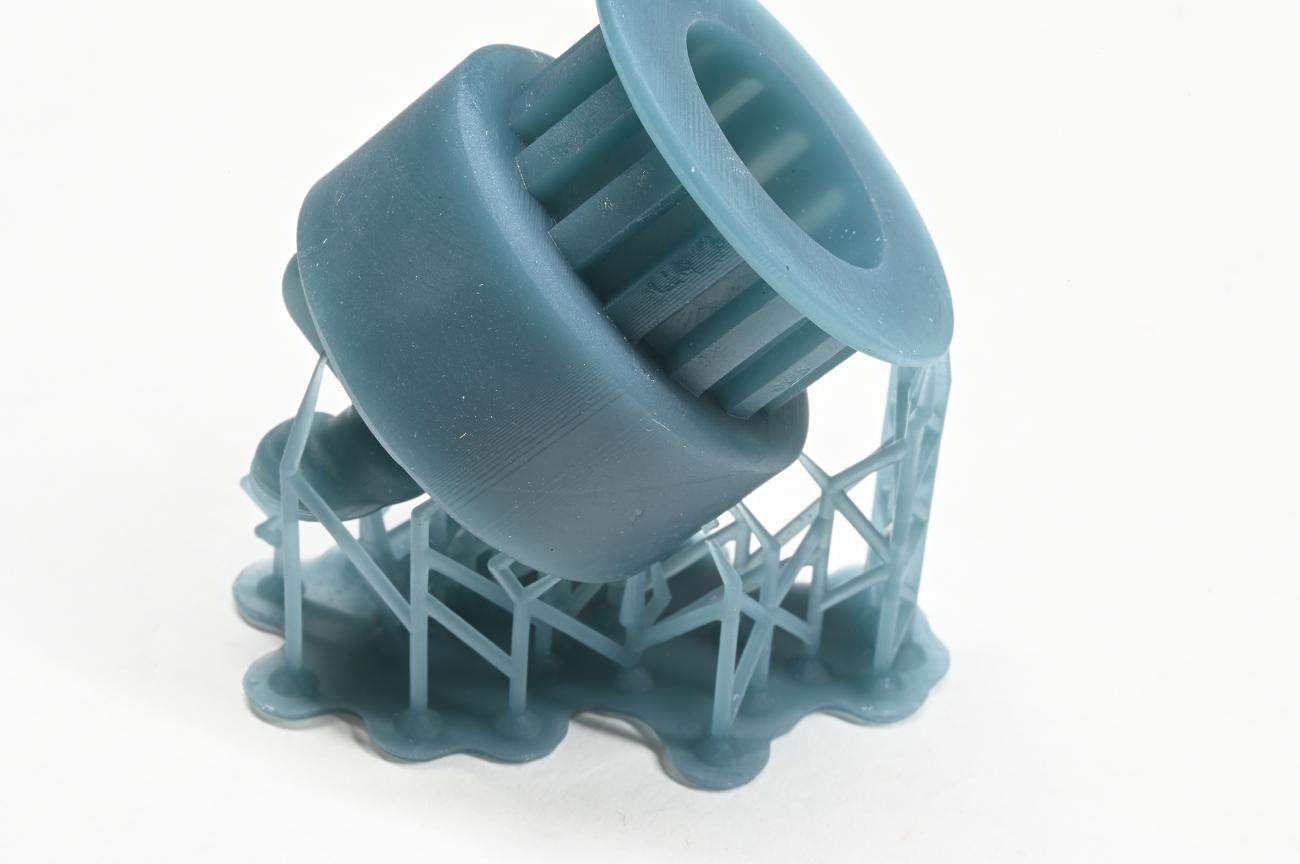
Ready to try. The wax is at 180-190F and under about 5psi of pressure (hand pump, black knob on the top right of the injector)

Injecting with the rubber in the 3D printed box shown below proved to be incorrect. Best to clamp between two steel plates - lets the vents work.

MWZ_5574-1300x864.JPG


MWZ_5658-1300x864.JPG


and try, and try and try

MWZ_5597-1300x864.JPG

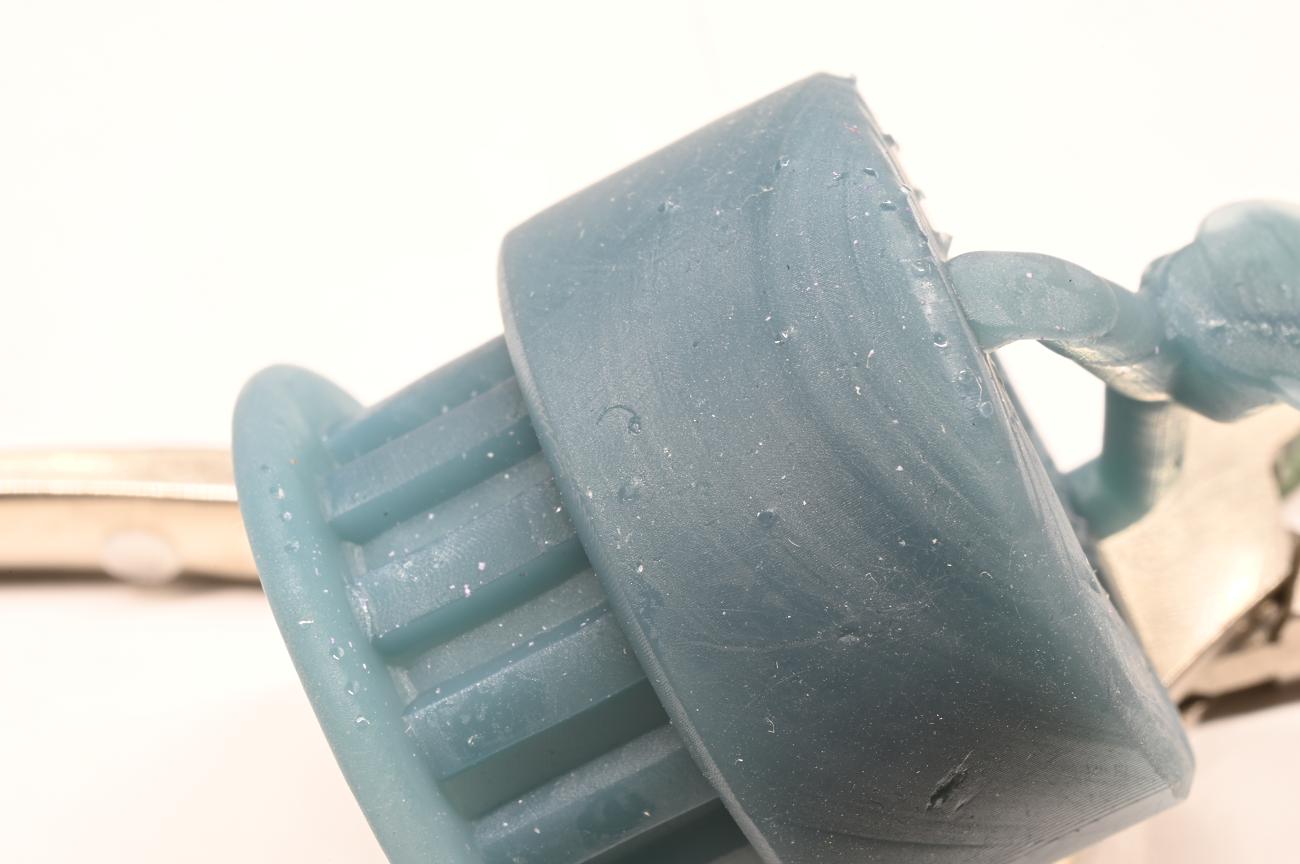
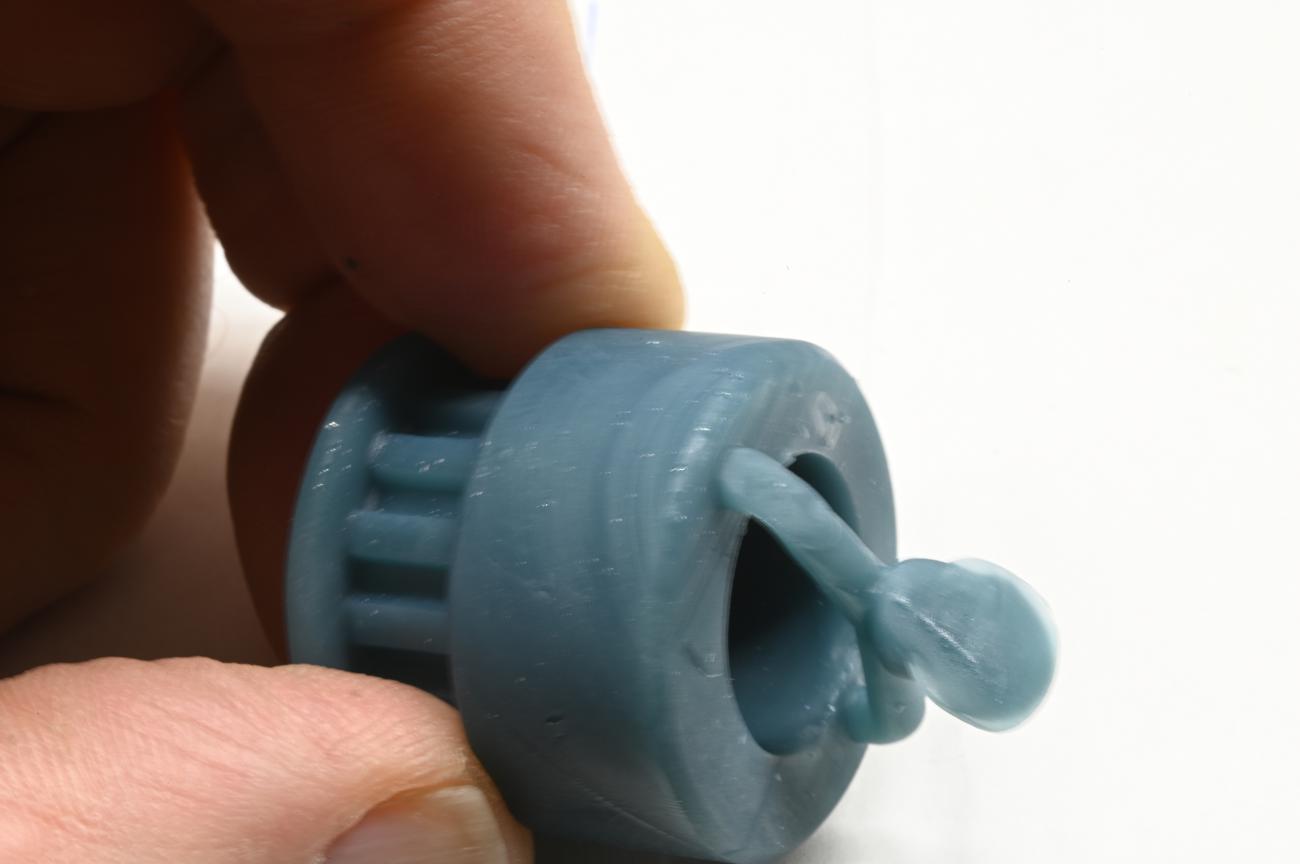
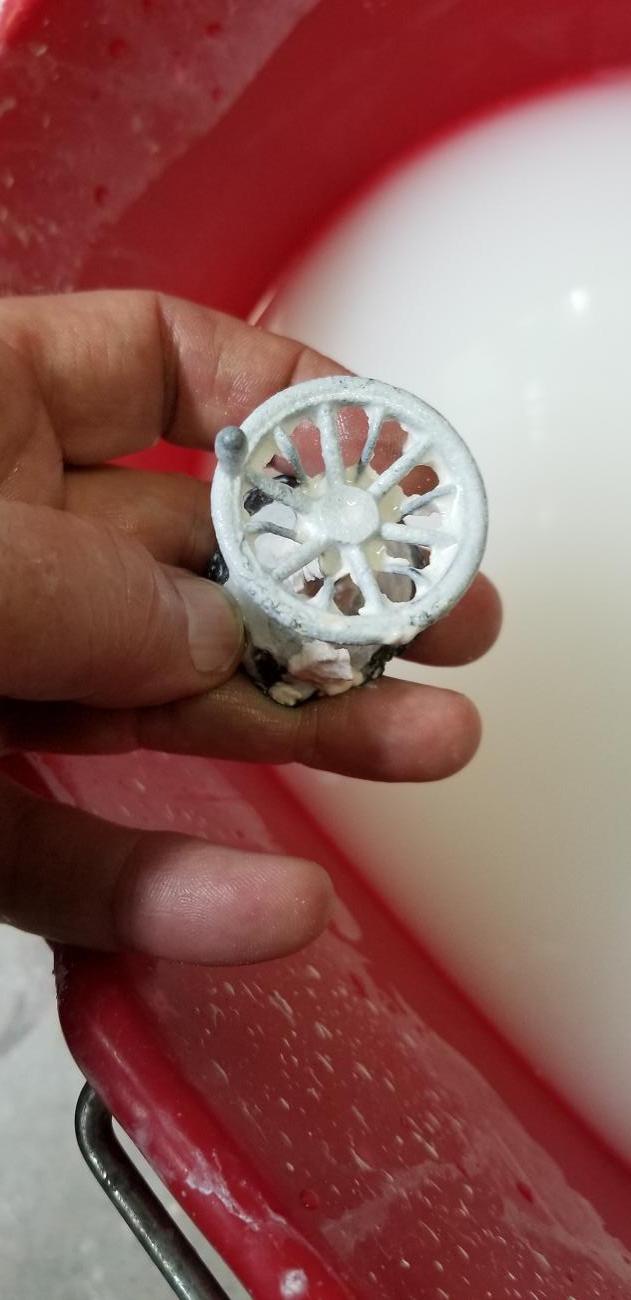
Everyone had some error on it. Incomplete, hollow sections, etc.

What went wrong? First issue I had was air entrapment. I learned how to cut vents in a mold.

The thing that kept nagging was how soft the mold was. It seems like I couldn't take advantage of the wax pressure without having to squeeze the mold together so tightly that it was badly distorted. Commercial RTV sold by jewellry supply places is listed at shore 36. The The RTV Silicone I bought, claimed on the amazon site it was Shore 30 (A scale). I figured it would work. This stuff is not cheap and clearly says its 30A https://www.amazon.ca/gp/product/B09CYYB311/ref=ppx_yo_dt_b_search_asin_title?ie=UTF8&psc=1


MWZ_5662-1300x864.JPG


I did have a few jewellers molds which seemed far stiffer than my RTV mold. But I says to meself, maybe the rubber is old and stiff?

Finally I couldn't take it any more and ordered A scale durometer. The $@#% $##$@%$^#@ #@)(^# stuff from Amazon is 7!! Despite being advertised at 30. The jewelers molds I had measure exactly 36.

The time wasted by that misrepresentation is really frustrating. Of to BC tomorrow for the weekend...when back I'll order some proper RTV from Gesswein and try again. If I get a good casting, I can carry on with this model.....we'll see if I have enough left in the tank to keep going back to the resin makers. It would be so nice to go from print to investment mold...but man, it is challenging!

MWZ_5668-1300x864.JPG
 
Last edited:

Dan Dubeau

Ultra Member
I love your devotion to solving this and figuring it out. Thank you for sharing.

You're saving me lots of money eventually :D.

No seriously, great job, I'm really looking forward to you getting there. This will eventually be an amazing resources for model builders, and honestly the cost to entry for what is achievable isn't that much in the grand scheme of things.

Sculpture supply is a smooth on dealer, and I've bought silicone rubber and other things from them a few times. They would have the silicone in the durometer you need. How they compare to Gesswein in price and service I don't know, but it's another local source to try.

https://sculpturesupply.com/collections/rubber-silicones
 

Dan Dubeau

Ultra Member
Time invested into the process now will pay dividends on every model you make in the future.

I wonder if there is a way to burnout the resin under vacuum? Or flush the cavity before pouring? Air blast? Maybe the resin is reacting with the investment and off gassing while casting? Longer cure time on the resin parts? Just throwing ideas at the wall. The defects sure look like they are burnout related though and not the investment catching bubbles on the resin/wax part. Missing pieces suggesting crap stuck to surface of mold. Maybe you could blow out the cavity after burnout, then stick it back in the furnace to heat up again to pouring temp. Another step, but might lead to better results.

There is a jewelry studio here in Peterborough that does classes on investment casting (or did anyway). I found their youtube during the pandemic and followed along for a bit. Not sure if they still do in person classes or not, but I might try and attend one in the future to get some hands on instruction. https://www.youtube.com/c/ClearMindJewellery/videos They do resin to investment casting frequently and seem to have a good solid process down.
 

Mcgyver

Ultra Member
The investment is vacuumed before and after pouring it into the flask so I haven't had,an air bubble problem. Maybe blowing the mold out would work? Cooling and reheating does add more variables to the mix, more things that could be causing the problem. Don't know how to set up a burnout under vacuum, at least with the current equipment.

I did do some experiments burning out resin pieces just sitting in the oven. They don't melt, just go black and gradually disappear. The current resin doesn't leave a residue and isn't suppose to expand. I also bought some plasticast, an investment intended for resins. Its supposed to a little tougher, but does not produce as good a finish (apparently).

Some are terrible. Anycubic castable for example. Fantastic prints (the green ones above) but they instruct you to use 900C burnout. There they are selling a product for casting, but I doubt anyone there has every casting anything in the lives - you can't take gypsum over 1500F (815C) else it breaks down. When you write to inquire what they suggest about this little dilemma, silence.

But it's suppose to work. At least one of the resin makers is being very good about support, but there is a great long list of variables between printing, curing, investing, burnout and casting. My current thinking is use the exact same burnout and pour with a wax pattern as reference point. If I get a great casting it points strongly to the resin as the issue.

Re the local shop, if you ever get the chance, I'd love to know how they do it - what resin and investment and the burnout and cast parameters. I do have one commercial caster's info on it, but the resin they use is fairly expensive and not available here. It will require Fedex's bendover int shipping option. I may have to suck it up.

There is is also casting in bronze. While lost wax in bronze is common for the art crowd, I wouldn't think its a common a thing for fine detail vacuum casting; i.e. what a jeweller would do. Is it that different than silver or gold? I don't know, but its yet another variable.

First thing though is prove out the rest of process with a good wax patterned casting in bronze. If that too fails, then I may be incorrectly blaming the resin
 
Last edited:

PeterT

Ultra Member
Premium Member
@Mcgyver your trials & tribulations remind me of when I was learning composites. Seemed like shelves of material, epoxies, release agents... $$$ In the end it was a combination of technique & specific permutation of materials. But it took some messing around to eliminate the 99 things that didn't work in order to converge on the 1 that did. Edison mode unfortunately. Yes, I can see where injecting a viscous fluid into a mold cavity is different than pouring a very thin viscosity material like resin casting. Plus you have wax cooling, which increases viscosity some more, and the clock is ticking.

Anyway, not sure if you are aware of this place but they handle a good selection of both urethane & silicone for casting / mold making purposes hopefully in suitable volumes. They have some higher durometer flavors. You probably know urethane is short shelf life once opened & I think lower temp capability, so mold favors silicone. The higher the mix viscosity, the more air entrapment during mixing & thus requirement to pre-vacuum. But you have that equipment so that's good. I wonder, would a higher temp capability silicon allow higher temp wax? (so lower viscosity, better injection & more injection time). Or does the wax itself have a max temp limit?

You'll get there, I can feel it! LOL

 
Last edited:

LenVW

Process Machinery Designer
Premium Member
@Mcgyver your trials & tribulations remind me of when I was learning composites. Seemed like shelves of material, epoxies, release agents... $$$ In the end it was a combination of technique & specific permutation of materials. But it took some messing around to eliminate the 99 things that didn't work in order to converge on the 1 that did. Edison mode unfortunately. Yes, I can see where injecting a viscous fluid into a mold cavity is different than pouring a very thin viscosity material like resin casting. Plus you have wax cooling going on which increases viscosity some more, so the clock is ticking.

Anyway, not sure if you are aware of this place but they handle a good selection of both urethane & silicone for casting / mold making purposes hopefully in suitable volumes. They have some higher durometer flavors. You probably know urethane is short shelf life once opened & I think lower temp capability, so mold favors silicone. The higher the mix viscosity, the more air entrapment during mixing & thus requirement to pre-vacuum. But you have that equipment so that's good. I wonder, would a higher temp capability silicon allow higher temp wax? (so lower viscosity, better injection & more injection time). Or does the wax itself have a max temp limit?

You'll get there, I can feel it! LOL

Peter - Process development comes with trials and lessons learned.
I spent 10 years designing methods and documenting them for (SR&ED) Scientific Research and Experimental Development - Tax Credit applications where the costs of devising manufacturing methods were partially recouped by Industry Canada.

Keep plugging away. everybody likes a success story !!
 

Dan Dubeau

Ultra Member
I wonder if an ash vacuum, or a couple alternating quick cylces of air blast/vacuum would clean out the cavity after burnout enough, without causing it to cool down too much before sticking it back in to bring back up to pouring temp. The last thing you'd want is to blow off some detail before pouring though. High volume vacuum might be more delicate than an air blast. It's a shame the turnaround time is so large. Doesn't lend itself to a lot of easy (or cheap) experimenting.

This one popped up in my regular marketplace browsing and a light bulb went off. https://www.facebook.com/marketplac...place_top_picks&referral_story_type=top_picks
 
Top