Here below are said 4 lines of code. Making a set of jaws is a considerable task, so I’m providing additional comments. If you want a worthy challenge, this would qualify. Maybe there is something special about that chuck so that you really want to use it (perhaps it is big, or a special mount or other features) and you are bound and determined to make new jaws, then go for it. If it is a modest sized, cheap, conventional chuck and you want certain jaw arrangement which it does not have (perhaps the second set of one piece jaws has gone missing, or you want two piece jaws so you can use soft jaw tops -whatever the reason), then you’d likely be better off going and buying a cheap chuck from any of numerous internet providers. Not that making the jaws is any harder than any other machining project - it is just work, one step after another. The scroll teeth are no different, simply another step in the project.
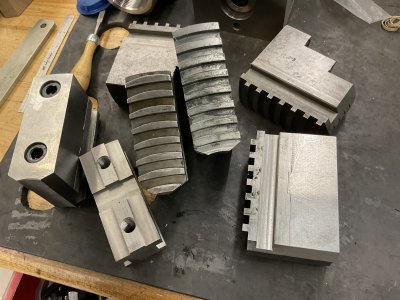
The jaws I made are for a 12” 3J that I use as a table chuck on the mill. I can’t find a brand on it and the jaw dimensions do not line up to those used on other 12” 3J chucks that I could find information on. It was originally a lathe chuck with an L00 taper that was modified by a previous owner and a table mount made (they did a good job of it). This particular item is pretty tall, something I get a useful throat depth. Yes, I could have purchased a 12” table chuck, or bought a 12” lathe chuck and built a mount for it - neither option is cheap, the second option still being a fair amount of work.
After reading over Harold’s instructions I felt I could do it. In his write up, he describes that one could just drill holes and put in pins instead of making cool teeth - probably not as strong. He goes onto present his solution as teeth generated by small arcs displaced laterally. Most of his write up talks about how to accomplish that on a manual machine, somewhat jigged because it is pretty repetitive. With a CNC, you can instruct the machine where to cut (don’t need the full set up he describes), but you also have the option of generating an arc with a radius that changes as the angle progresses - “helical interpolation”.
So, let’s get into it. Make your jaws blanks a good bit longer than finished length (say 2 teeth longer). I suggest getting them pretty well bang on for square in all directions (finish with surface grinder, ground all over) since there is a convenience to being able to use any surface as a reference (still mark the dominant reference surfaces). The jaw width needs to be a really nice fit to the chuck body, slide well, but no wiggle. Then cut and fit the square grooves on the sides - make sure the jaws fit well in the chuck body (obviously you will be test fitting with the scroll removed).
Measure your scroll. As I recall, for OD gripping (normal use) you use the radius at the smallest end of the scroll tooth ID. For ID gripping you use the radius at the largest end of the scroll for tooth OD (even go a touch extra to make sure the contact patch is always in the midpoint of the toot flank).
Harold explains it better than I do. Make good sketches/drawings - the math all has to work out. My jaws are about 1.5” wide, so I setup tool paths assuming a width of 2.5” (you need room to position the cutter, then approach along the path - I actually used an angular description). From the measurement of the scroll determine how much the radius is changing per degree of arc (which is the pitch distance divided by 360 degrees). I did not use cutter diameter compensation, so I could go directly to the starting position (not worry about the approach path) - I worked out the actual tool path needed for the groove, taking into account the cutter radius.
On the DX32 dialect (seems all G Codes are a little different ) G12/G13 is helical interpolation - you have to position the tool in the prior line. Then the G12/13 describes the end point. Of course mathematically it has to work - if you instruct the machine to go to a location that it can’t get to based on the parameters that you provided, you’ll get an error (on my machine the program crashes).
I used a 1/4” EM, the tooth spacing is 0.250” at the thinnest - it would be better if I used a 15/64” or 6mm EM - regardless it still worked fine. Certainly you need tooling suited to the groove width for your application (use an EM slightly smaller than the narrowest part of the groove). On my chuck the scroll pitch is 0.500”
I set up two macros, the first to rough out both sides of the groove (G13 at ~50% depth, then back on G12 at about 95% depth) with conventional milling. Then a second macro, climb milling G13 and come back G12 both at full depth - I’m on the other side of the groove.
I chose to shift by 1/3 of the scroll pitch for each jaw. You wouldn’t have to. You could make every jaw exactly the same, then load up the jaws in the chuck, set the jaws so all are just outside the chuck body OD, push the jaws against the load ring and cut them off, ditto for the ID (loading outward for the OD cuts, load inward for ID cuts, per normal soft jaw trimming practice). It works the same either way, except I didn’t have to take much off the ends of the jaw when I was doing the final fitting.
For trimming the jaws length, you should load the jaws in the correct direction (per YouTuber Robin Renzetti and chuck body deflection) - this topic comes up here frequently when folks want to tru the grip surface of the jaws on a 3J or 6J chuck. You can really see the deflection in a power chuck (ie. hydraulic - CNC). I made my jaws as 2 piece, and used the bolt holes with long bolts (added a sleeve) to push on the loading ring. You could also make the jaw really tall and machine in steps or drill and tap holes for the load ring, then cut that off later. You’re likely going to cut the top of the jaws anyway - so that the elevation will match across all 3 jaws when loaded.
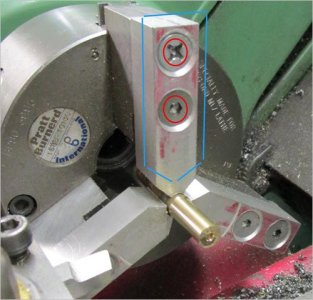
Getting back to the scroll teeth. Dial in the vise and locate the reference corner (I used the left side corner of the fixed jaw). Define X0 off to the left for the radius of the first tooth (the sketch you made earlier and the math associated are important here), and Y0 as the midpoint of the jaw blank. Z0 is the top of the part.
I did a roughing (both sides) and a finishing pass (both sides). I have 8 teeth per jaw, so I ran the cycle 9 times per jaw because I was making grooves, not teeth - have to get both sides for tooth one and eight. Works out to 36 passes per jaw. I used a different EM for the finishing - a new one, tack sharp (and good quality - prefer not to have to change it when many passes into the project).
Here are the tooth macros that I used to make my jaws.
#1 ; This is to rough out the groove, using conventional milling
G1 R3.2778 I0.0 J0.0A340.0 Z-0.095 F10.0 ; I am using polar coordinates to put the tool into the start position
G13 R3.2222 A40.0 F0.5 ; This is the helical interpolation, which goes from the previously defined position to this new location
G1 R4.6702 I-1.4385 J0.0 A15.0 Z-0.185 F10.0 ; Now shift over to the new start position
G12 R4.7118 A30.0 F1.0 ; Coming back for the other side of the groove, faster because most of the material is now gone.
$ ; End of macro #1
The finish passes are nearly the same, except I switched to climb milling
#2 ;
G1 R4.7118 I -1.4335 J0.0 A345.0 Z-0.193 F10.0 ; Position the tool start location
G13 R4.6702 A30.0 F4.0 ; Cut
G1 R3.2222 I0.0 J0.0 A20.0 F10.0 ; Reposition
G12 R3.2778 A40.0 F4.0 ; Cut
$ ; End of macro #2
In actual use.
G0 X3.1 Y-1.0 Z0.1 S1200 M3 ;
G97 X0.1692 ; Shift over, depending on what jaw I was making
=#1 ; cut the first groove
G97 X0.6692 ; shift the origin
=#1 ; cut the second groove
.
.
.
.
and so on. I went in and edited the program for each set of translations (perhaps not the most efficient, but doesn’t take long to run through changing just one value).
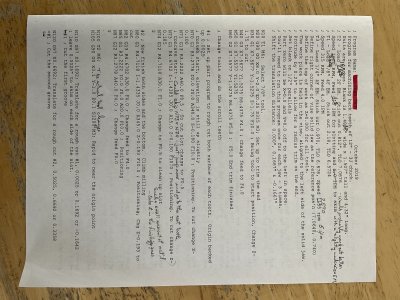
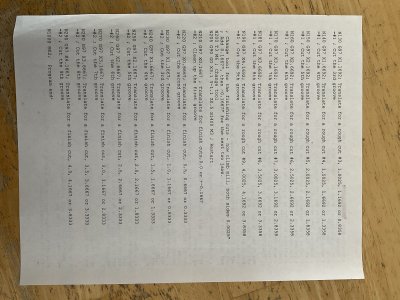
I’ve been manual machining for a while, but this was one of my first CNC projects. That was over 4 years ago, now I’d probably structure it a bit different, (but it would still be the same basic idea). Here are pictures of the entire program, complete with some chicken scratch comments - not all of which I can exactly recollect.
If I were to do it again, I’d go back to Harold Hall’s write up, redo the sketches, redo all the math and confirm all numbers and details. Obviously you have a different chuck, so all the details will differ, but the concepts are still the same. Plenty of knowledgable and more experienced folks here in the online community so looking forward to the comments.
You can see in the photo in the previous post the teeth on mine are a little fatter than the originals - works great. Let us know how you make out.