• Scam Alert. Members are reminded to NOT send money to buy anything. Don't buy things remote and have it shipped - go get it yourself, pay in person, and take your equipment with you. Scammers have burned people on this forum. Urgency, secrecy, excuses, selling for friend, newish members, FUD, are RED FLAGS. A video conference call is not adequate assurance. Face to face interactions are required. Please report suspicions to the forum admins. Stay Safe - anyone can get scammed.

Welding challenge

ShawnR

Ultra Member
Premium Member
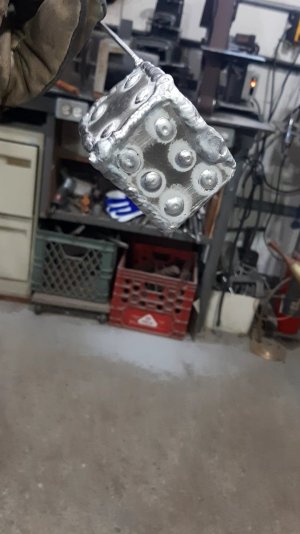
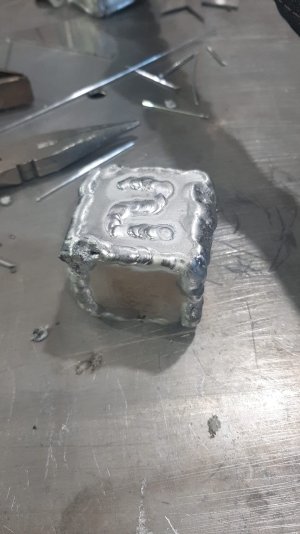
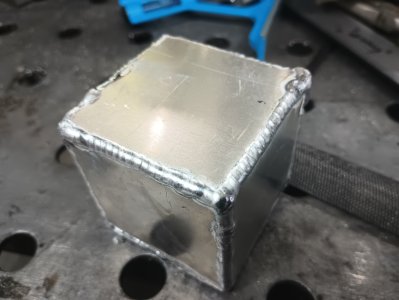
So, I had a small (should have been small) welding project come up. TIG weld an aluminum duct up for the oil cooler in my RV4. For size, the cooler surface is about 6" x 6" and the height will be about 3". After several days of practice, and some premature attempts at the actual project, I have realized that I still need more practice! The small welding project has become a mission to learn to at least do an acceptable tig project. I can do "OK" running beads on flat stock on a bench, but sometimes struggle when it comes to join 2 parts at a corner. So I decided to stop practicing on flat stock and small chunks of stock set up as an angle. I figure welding a small project that more closely replicates an actual project would be better than to keep burning gas and filler on random beads. A 2" cube is actually 24" of welding, all outside corners (like my project will be) and includes several starts, tacks, dealing with the metal getting hotter, etc....

As I was looking for welding info here, and on the web, I found a lot of threads in which someone, like me, is looking for input, or advice, etc. I did not want to post the same questions that are often posted..."my welds are crappy, what should I do?" So.....

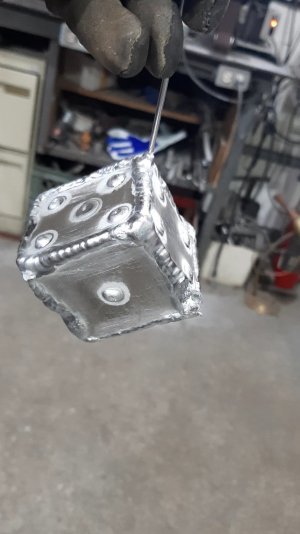
I know that there are several accomplished welders on this forum, some beginners, and many in between. So I figured I would throw this out there. Maybe some will have fun with it. I will submit my first attempt. I am going to keep making these aluminum dice until I feel I am happy with one or two. This first one is pretty ugly. If anyone wants to do one up and post great! Maybe it will inspire some to do one up for their own satisfaction/challenge! Maybe you good welders will do one up to show us beginners how it can be done. Or maybe no one will read this post.....:eek:

I will say that because of this exercise, I was forced to learn a new appreciation for gas flow, cup size, reading tungsten indications, what the balance control actually does, etc. I even (gasp!) got out the welder manual and read about some of the controls!

For those not into TIG, do it with a MIG, or if you are cocky, stick, or even gas fusion. Try to keep them around 2" square. Hoping some of you jump in.

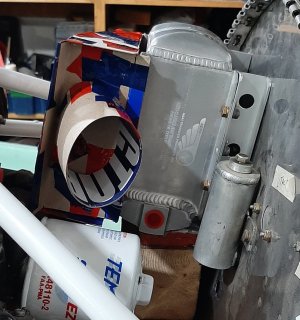
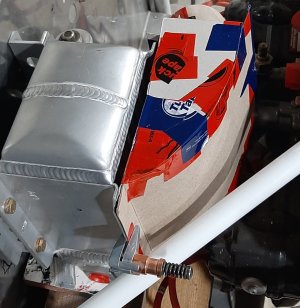
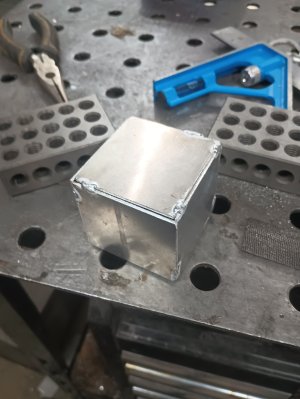
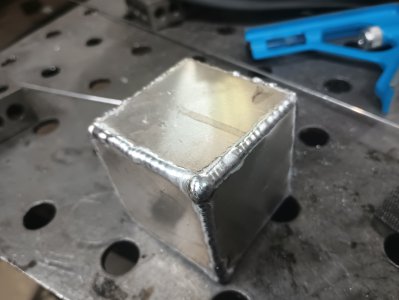
Although the point of this thread is, for those interested, to have some fun with a small welding practice project, I included photos of the oil cooler plenum that will be my actual goal. I have friends that could do a very nice job on it, and it would have been done days ago, but sometimes I want to beat my head on the wall until I learn something. This is one of those times I guess.

Cheers,
Shawn
 

Attachments

  • Die1 46.jpg
    Die1 46.jpg
    217 KB · Views: 31
  • Die1 514.jpg
    Die1 514.jpg
    210.9 KB · Views: 31
  • RV4 plenum1.jpg
    RV4 plenum1.jpg
    365.4 KB · Views: 31
  • RV4 plenum2.jpg
    RV4 plenum2.jpg
    346.1 KB · Views: 30
Two things, and yes I get the idea here.
First, that part screams fiberglass.
Second, try and get the exit of the cooler as far from the firewall as you can. Longer standoffs, different angle, whatever. If you can't get the hot air out then you can't get the cool air in.
 
I accept your challenge. Not sure when I'll get to it, But I will make a die. I have an aluminum sheet project working it's way up the queue, probably in another month or so. Bound to be some offcuts from that, I'll give it a go. Should probably do one first too, as I bet I'm pretty rusty with a tig torch also.......
 
Im with @jorogi, for this part, fiberglass, or 20g sheet with pop rivets, youll end up with a nicer end product

if you want to practice tig for other things that's a different story, and a worthy endeavor.

first question there is what thickness, 1/16 is getting tricky for an open corner, thinner than that is difficult, and an open corner thinner than 1/16...well lets call that extreme.

I dont know what thickness your little box is, but something like that even at .100 is going to get extremely hot if you try to weld it in one shot, to keep it controllable you might only want to weld a few of the open corners at a time before letting it cool off a, it kind of depends whether its getting away from you or not. It looks like you are using 3/32 filler, 1/16 filler is much easier to use on material thinner than .100, with a smaller 3/32 tungsten (or even 1/16, depending on amperage). The smaller tungsten has a lower useful amperage range, and the smaller fillers take less heat to melt into your weld, less heat = more control in this situation.
 
Thanks for the comments. Glad there is some interest.

@jorogi I did consider fiberglass, and in hindsight, it might have been a more expedient and also fun adventure. I will look at your other concerns as well.
@phaxtris I also considered aluminum, again, probably would have been done, but I would not know as much about Tig as I do now,(meaning only that I have learned a little in the last couple of days) although, apparently, it is still not enough....:confused:

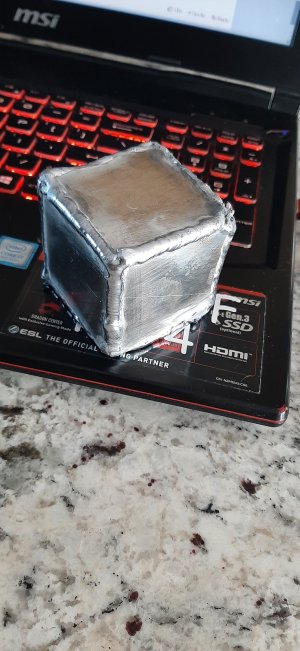
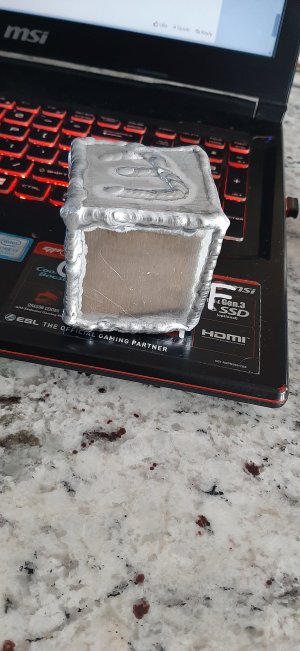
The material is .080 6061. My tungsten is 1/16 and I oscillate between 1/16 and 3/32 filler rod. It seems each time I change, that one seems better, till it is not. I did a second cube today. Will post a photo later. I would say worse than the first, or maybe my expectations were higher having done one. The first corner went well, second one melted away on me, so yes, I think the size of the cube will mean I must let things cool off intermittently.

All part of the learning curve I guess.

Cheers,
Shawn
 
looks like for the most part your using to much heat/its getting to hot

some of those holes look like they are from the hot air trying to escape, as the cube heats up, the air heats up, expands, and pressurizes the cube. pretty hard to seal up until it cools down.

overall, less heat, that 1/16 filler is the one you want to use for .08, and the consistency with your dabbing will come with practice
 
As I continue to throw myself under the bus...

Tomorrow will be better
You should post your settings so it's easier to figure out were to start tweeking at.

I would include balance, Freq, CFM, Amps, and even pulse setting if you got pulse. And even cup size and grade of tungsten may help.

You may want to make some chilling bars for what your trying to build as heat is not really your friend with small material and keeping heat down is helpful. Also maybe add small for gas to escape from your square will help with final tie ins. Then just wait for cube to cool and zap hole

If you don't have pulse your gonna have harder time. Foot petal will help as well.

It's been a while since I've welded aluminum under 1/8 I happen to have .063 sheet laying around. So maybe tomorrow when I get some free time I'll make a few coupons up and see if I can pass along some settings.


Found Good video that may help you out similar concept too what your doing. You would just have to use square bar instead. I feel like he does corner joint video for thin stock but I could be thinking of 6061.com guy

 
Last edited:
Thanks @phaxtris and @justin1

When I was doing flat samples (butt joints) on the steel table, I found the table was soaking up the heat too much. I see in Jody's video, the jig holds the coupons off of the bottom, but sinks the heat from the outside edges. Ah! I was conscience of air expanding inside the box and ruining a joint, but I was flobbing my second joints so the air had lots of places to escape.
As to settings, they were changing lots throughout the exercise. I probably changed too many at one time initially, but then starting messing with only one at a time to try to note the difference.

balance - varied this but settled in around 30%.
Freq around 100-120
CFM around 12-15 CFH, cup size is a 5 currently. I initially had a #6. A friend came over and we tried different ones. He suggested a 5 for this material
Amps max set to around 80 and yes, I use a foot pedal
pulse setting - I have been playing with this since I started (watched a bit of This old Tony, 6061 and Tips and Tricks- all have pulse videos), I can see how it would be great but also got frustrated with it sometimes. I think if all of the conditions are good (metal prep, clean, etc are good, then it makes a job on small metal much easier) but when I started getting too hot, then it started going south, and when I backed off the pedal, then puddle would freeze, then melt, then freeze, meanwhile heating the rest of the metal.....
grade of tungsten Blue bands 2% lanthanated

Watching tips and tricks videos, he cleaned and prepped the edges way more than I am doing. I do use acetone (probably too quickly/not enough) and sometimes prep the edges with sandpaper or a file (probably contaminated). I sharpen (blunt point) tungsten on a grinder wheel that has been used for steel (possibly contamination) so all in all, I suppose I am looking for Jody results with a poor setup and procedures. Granted, I am not doing test samples, but obviously I am looking for the same results. So gotta take more time in my prep. I am going to try another cube today, addressing all of these issues and see what happens.

And will take a step back to practice the dabbing frequency. I am also using a #26 torch on an Everlast 200 DV. I ordered a flex head #17 torch head. I think it will be nicer to use for this small stuff. I had a flex head on some other welder that I previously owned and remember it being very nice to use.

Thanks all for the interest and input. Looking forward to someone else posting their cubes
 
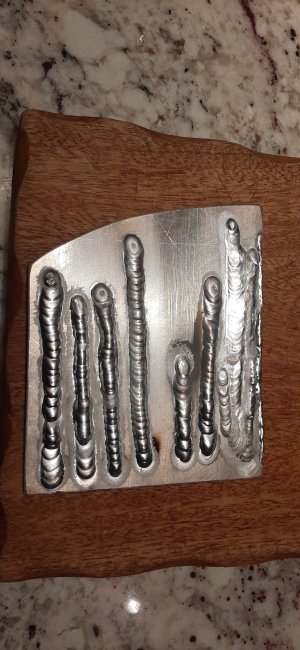
I ran most of these (excluding two right ones) this morning with the input I have received (better cleaning, flat on an aluminum plate so better heat sinking). I varied pulse rate and ratio a bit (going right to left) but did not take precise notes so can't tell you what I did exactly. But overall, I can see that my "cube issue" is coming down to excessive heat build up and poor prep (as noted above).
 

Attachments

  • flat beads.jpg
    flat beads.jpg
    497.5 KB · Views: 6
Back
Top