• Spring 2024 meetup in Calgary - date Saturday, April 20/2024. discussion Please RSVP Here to confirm and get your invitation and the location details. RSVP NOW so organizers can plan to get sufficient food etc. It's Tomorrow Saturday! you can still RSVP until I stop checking my phone tomorrow More info and agenda
  • We are having email/registration problems again. Diagnosis is underway. New users sorry if you are having trouble getting registered. We are exploring different options to get registered. Contact the forum via another member or on facebook if you're stuck. Update -> we think it is fixed. Let us know if not.
  • Spring meet up in Ontario, April 6/2024. NEW LOCATION See Post #31 Discussion AND THE NEW LOCATION

steel tubing based work bench

PeterT

Ultra Member
Premium Member
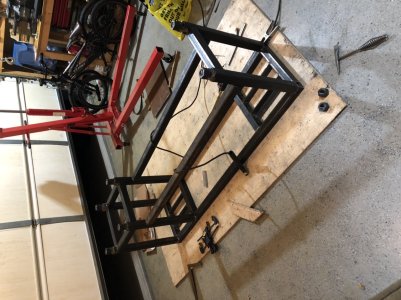
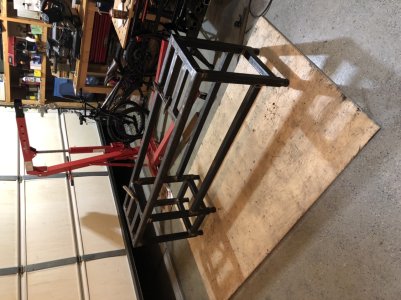
I've been dragging my feet on a work bench to replace some mismatched 'pressed into service' tables that are not up to the task on multiple fronts. I want to accommodate my bench vise, some small footprint motorized machines and room for ‘one day’ acquisition like a belt grinder. I also need maximum underneath space for storage, basically shoe box sized boxes of fasteners, metal stock & whatnot.

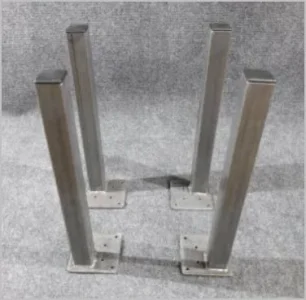
My plan all along was to make wood tables because it’s somewhat familiar territory & tools on hand. I now want to compare to something made from steel tubing which would offer many advantages. So aside from cost & effort & other factors, I have some dumb questions maybe you experienced fabrication/welder types can provide feedback on.

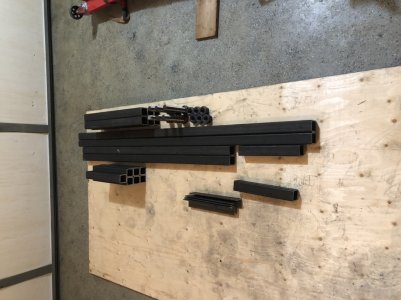
So here is a sketch to kick things off. The table top is nominally 36x48". I figured plywood or MDF bolted through the frame. If I Swiss cheese it with holes or wear it out, simple enough to replace. I can squeeze double this width into the space. Making 2 twins vs 1 long one seems kind of silly on one hand, but also easy to separate & relocate in the future. Or maybe space them out slightly with a skinny storage rack in between. Anyways I don’t need continuous surface & I figure a long one would be an all-round bigger / heavier beast.
 

Attachments

  • SNAG-9-2-2020 0000.jpg
    SNAG-9-2-2020 0000.jpg
    21.1 KB · Views: 0
  • SNAG-9-2-2020 0001.jpg
    SNAG-9-2-2020 0001.jpg
    34.4 KB · Views: 0

PeterT

Ultra Member
Premium Member
So I borrowed this idea from my lathe & mill stand. The sides are like a roman II on the ends. My floor has a slope & the rubber jack feet have worked well for leveling & staying put etc. So the bottom stickout accomodates the feet bolt & nut assembly. The top side joint then looks like this. But this looks like a funny weld to me. I guess there are 3 normal butt edges but I mean the one adjacent to the open wall end - would you just skip that weld?

I've drawn the frame as 2 x 2 x .125". From what I've described thus far does this seem overkill or about right? The same stock is supporting my 14x40 lathe, but its also kind of dead weight. I guess the only lateral force the bench would see is me hack sawing or hammering something in the vise. But it will also have the shelves pretty full.
 

Attachments

  • SNAG-9-2-2020 0002.jpg
    SNAG-9-2-2020 0002.jpg
    11.7 KB · Views: 0
  • SNAG-9-2-2020 0003.jpg
    SNAG-9-2-2020 0003.jpg
    20.6 KB · Views: 0
Last edited:

PeterT

Ultra Member
Premium Member
Here I am on uncharted waters.
- I threw in a rear support bar to give the frame rigidity. Is it needed?
- The bottom shelf would ideally be plywood again, but no way its going to stay flat with the load just supported on the ends. Could I screw something like 1" square tube or angle iron to the underside front & rear to stiffen & then it would also kind of self position between the main legs?
- Any good ideas about accommodating a mid shelf? Drilling an array of holes in the legs would be easy enough. I thought about using the support bar but inevitably its not in the right spot & then you lose space.
 

Attachments

  • SNAG-9-2-2020 0004.jpg
    SNAG-9-2-2020 0004.jpg
    30.1 KB · Views: 0
  • SNAG-9-2-2020 0005.jpg
    SNAG-9-2-2020 0005.jpg
    32.8 KB · Views: 0
  • 2020-09-02_23-20-44.jpg
    2020-09-02_23-20-44.jpg
    26.3 KB · Views: 0

PeterT

Ultra Member
Premium Member
I haven't thought this through so could be hair brained. But lets say I had decent footprint on a bench section to do some TIG welding one day. If I had a metal plate that I could quickly attach & it had short length feet raising it say an inch off the plywood, would that be enough air gap for welding heat, or still a fire hazard?
 

Attachments

  • 2020-09-02_23-30-52.jpg
    2020-09-02_23-30-52.jpg
    28.1 KB · Views: 0

Johnwa

Ultra Member
Here I am on uncharted waters.
- I threw in a rear support bar to give the frame rigidity. Is it needed?
-.
A set of diagonal braces would be stiffer than the horizontal one. Alternatively a set of triangular gussets at the top of each leg.

PS
I’m an electrical engineer so I know just enough about mechanical stress to be dangerous. For that reason I tend to really over build structural things
 

Janger

(John)
Administrator
Vendor
I think you need the cross supports to keep the legs from bending off when you move the table. I weld on top of a wooden table with a 0.125 steel plate on top. for a gap I just use few old abrasion chop saw wheels on top of the wood. I haven't burned the wood.
 

PeterT

Ultra Member
Premium Member
I don't care if the tubing is exposed on one side but just wondering from a welding perspective - would it be better to miter the top frame 45-deg on the corners (ie. bevel the joint, weld, grind the top flat...) vs the 90-deg butt joint as I've shown? Assuming the w.t. is 1/8". Or is mitering actually more work & offers no benefit?
 

PeterT

Ultra Member
Premium Member
Here we are, almost a full year later since my last post. The same 'temporary' stop-gap tables in my garage, zero progress made. I'll blame it on the pandemic wood prices, lower on the priority list. Oh, and Santa failed to bring me a welder LoL

Thought I would run this past you guys. Not that I would buy these but the general principle caught my eye. Basically meatier, generic 'stand-alone' corner posts integrated with a stronger table top. My main workbench table top a plywood ladder frame with top & bottom plywood glued/nailed & nailed to frame, maybe 5-6" total thickness. So quite a lot of rigidity on its own. For reference lets say I wanted 3x4 ft work tables. If I used say 3" square steel tubing legs like pics & mounted to a better table top (red box sketch), do you think I would still need cross bracing on the legs? Or could they stand up on their own cantilevered from the bottom surface with those welded screw plates? Mostly the tables are to support light duty machines, grinder, belt sander... The heaviest side load would be typical awing filing hammering on a mounted bench vise. What is appealing is I could harvest the legs & use them on another table if shop conditions change, as opposed to a larger welded frame made from smaller material like 2" steel tubing. I could have standalone storage shelves or maybe a roll in tool chest.

https://www.ebay.ca/itm/383344852537?var=651811287289&hash=item5941223e39:g:0tgAAOSw6IJeCR6S
 

Attachments

  • EDT-2021-08-22 12.54.24 PM.jpg
    EDT-2021-08-22 12.54.24 PM.jpg
    19.6 KB · Views: 8
  • SNAG-2021-08-22 12.54.52 PM.jpg
    SNAG-2021-08-22 12.54.52 PM.jpg
    24.6 KB · Views: 8

PeterT

Ultra Member
Premium Member
Probably should have sketched legs closer to the table surface corners, but you get what I mean.
 

Attachments

  • EDT-2021-08-22 1.13.20 PM.jpg
    EDT-2021-08-22 1.13.20 PM.jpg
    19.1 KB · Views: 8

LRSbm146

Member
Last thing I built that kind of resembled a table was my lathe stand. Have a double slope in my garage and the original cabinets were not going to work well. Also, space is at a premium so extra storage was also needed.
It’s made from 2”sq, 3/16” wall so it’s quite heavy. I also wanted to make it so a guy can move it with a pallet jack rather than a hoist...

Sorry about the picture rotation
 

Attachments

  • 353269FC-7378-4A2B-88E9-14F368AE660A.jpeg
    353269FC-7378-4A2B-88E9-14F368AE660A.jpeg
    316.7 KB · Views: 16
  • 1B499AB1-6B3A-48D2-BDBC-92ACF33C135E.jpeg
    1B499AB1-6B3A-48D2-BDBC-92ACF33C135E.jpeg
    397 KB · Views: 12
  • 654754FC-B595-42E5-BCB0-A42B2EC9A07B.jpeg
    654754FC-B595-42E5-BCB0-A42B2EC9A07B.jpeg
    373 KB · Views: 17
  • 3345E9BC-DFE6-4FBC-8C5A-A1A701884F3C.jpeg
    3345E9BC-DFE6-4FBC-8C5A-A1A701884F3C.jpeg
    405.1 KB · Views: 14

PeterT

Ultra Member
Premium Member
That's a nice stand. Mine is made from 2" square tubing as well, but not nearly as functional as yours with the extra framing - which I suspect double as shelving platforms? My chucks & accessories are sitting elsewhere which is kind of wasteful space wise. The pallet-jack-ability is smart IMO.

I don't think you have taper attachment on yours either, huh?
 

LRSbm146

Member
@PeterT No taper attachment unfortunately...
I just moved it for the first time with a pallet jack and it took all of about 20 seconds.
Got the DRO test fit yesterday so I can get better measurements for the brackets.
 

Attachments

  • 4F249718-F2B0-497C-B7C8-30E987DB3951.jpeg
    4F249718-F2B0-497C-B7C8-30E987DB3951.jpeg
    538.7 KB · Views: 5

ThirtyOneDriver

Johnathan (John)
Just some notes based on experience @PeterT - miters are prettier but typically I've cut them w/ a chop saw and found that I never got the ends cut square or precisely 45° - when I go to weld the miters (even w/ well planned and executed tacking, clamping to a heavy welding bench, using Bessey welding corner clamp/vises) I tend to get some twist that I need to work out somehow afterwards... and even w/ decent effort, I never cut the stuff perfect enough to have everything square... I do however fix/fudge this the best I can before final welding and if it's still an issue I'll break out the torch to relieve any stress in the joint. I don't have any experience butting up the ends because my welding friends would make fun of me, but I think it would be simpler in the manner that you're only dealing w/ one end and really only one dimension per joint.

We didn't have many resources when I was teaching welding in Afghanistan to locals, so I ended up putting a thick sheet metal (16 gauge?) over a plywood topped work bench. We were stick welding with an AC machine and my students lacked formal education (couldn't write their own names in their own language) but we managed NOT to light the table on fire... there were some char marks though. If you are TIG welding at an amperage that you don't require a water cooled torch, using the table top as a work surface should be fine. As I say that, I'm imagining the table top to be about 1/8" plate and I would avoid welding directly TO the table top (I'd clamp or rest my work on the metal). The grounding circuit would ideally find it's path through the steel frame that's in contact with the top.
Same topic (wooden top and metal working); when I was super broke, I used an old (wooden) kitchen table to do some scroll work on with 1/2 or 3/4" square stock - it worked for the job without starting on "fire" (flame ups don't count as "fire"... right?) - it was badly charred in the area that was in contact with the cherry hot steel but it kept it's relative shape and I was able to use the top to keep things level and consistent. I have a feeling that the table kicked around "just-in-case" for a little while without being used again before it got kicked to the curb so it must have handled it reasonably decent.
 
Top