• Scam Alert. Members are reminded to NOT send money to buy anything. Don't buy things remote and have it shipped - go get it yourself, pay in person, and take your equipment with you. Scammers have burned people on this forum. Urgency, secrecy, excuses, selling for friend, newish members, FUD, are RED FLAGS. A video conference call is not adequate assurance. Face to face interactions are required. Please report suspicions to the forum admins. Stay Safe - anyone can get scammed.

Prema Shaper Toolpost from scratch

Dan Dubeau

Ultra Member
Weather was great, but conditions were too crappy for skiing this weekend, so I did a bunch more cleanup in the shop, and decided to mess it all up again by machining a toolpost for my shaper I've been meaning to get around to for a while.....

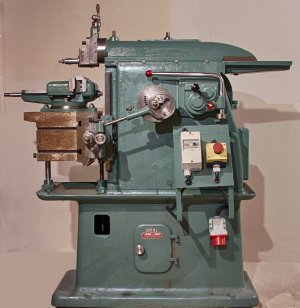
This is the look I'm going for here. Sized to take a 5/8"x2" tool shank. It's tough to find info on shaper tooling, but I think most Armstrong styles tool holders for a machine of this size would be around 5/8"x1.5? I added the extra 1/2" and made it 2" just because. I don't think more space is going to hurt anything here, and seeing as how I'll most likely be making all my own tooling for it too, I can make my holders a bit bigger.
http://www.lathes.co.uk/prema-shapers/page3.html
prema shaper.jpg

Clean chip pan? It's been a while.....
JJwZsZo.jpg

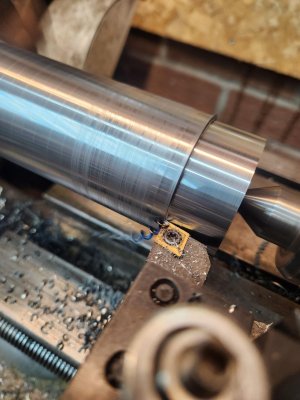
Won't last long once I tear into this 2" chunk of 4140
JzrX2Ow.jpg

Import CCMT doing a pretty good job filling that chip pan again.
sFDNctA.jpg

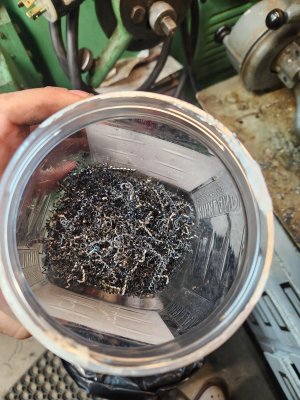
Saved some chips for a canister damascus at a later date. Ended up with a full jar of fusilli by the end.
51aZu5N.jpg

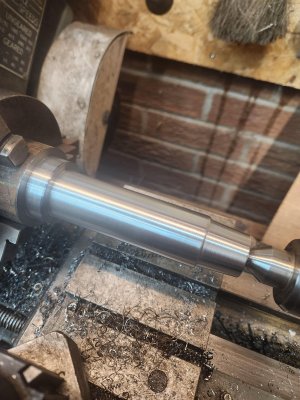
Finished op1
jQbeysH.jpg

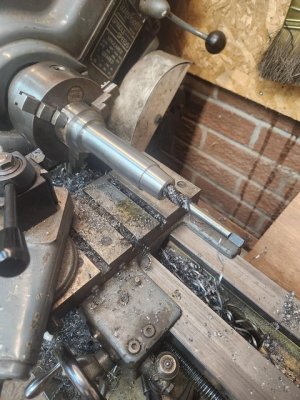
Drilled and tapped the end for 1/2"UNC. Small Monkey (F) wrench for turning and a tail center kept me straight. A spring center has been added to my list....
gLygXhWl.jpg

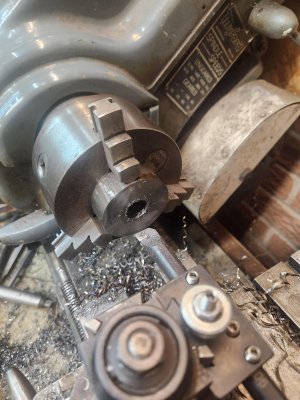
Then I cut off the stub, (made dinner, ate dinner, realized my phone was dead so didn't get pictures of this part....) faced the end, and then and machined the stub into the spacer ring? (not exactly sure what this piece is called. Collar? Base?)
gsXTSPT.jpg

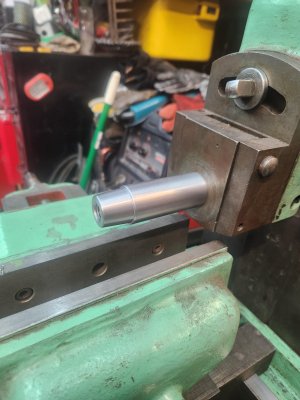
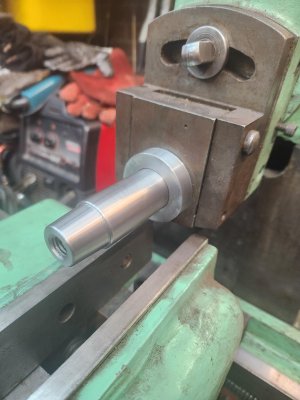
Then I tried it all out for fitment on the clapper. Very nice snug sliding fit for the post. <0.001"
GkSnaKt.jpg

Just a little bit slightly looser fit for the ring. ~0.001-0.0015"
pVS0vxK.jpg

This is where I'm at tonight. Still need to make the screw, and will try and get the slot cut this week. In all honesty it'll probably be next weekend before I get back to it again. My goal here is to not cheat and take it to work. Even though I so badly want to crank out that screw on the Nakamura CNC, or even the Hardinge
biggrin.png
. I want to make it all 100% in my own shop with my own machines as part of my past year long big push to sever my reliance on the work shop, and bring my home shop up to where it needs to be to do the projects I want to do. Slowly but surely I'm getting there.
 
I dug out my J.H. Williams holders for a quick measure. They are 1/2" wide, 1 1/4" deep and roughly 7" long, and they take a 3/8" toolbit. I got the set of three holders with the 1929 South Bend that I bought a few years ago. They are the "T" holders which are use for Tungsten carbide tooling and have a straight hole for the toolbit rather than the ones with the built in rake angle for hss. These are the number 1 size holders and should be about the right size for your shaper.
 

Dan Dubeau

Ultra Member
Thanks for checking. I did end up finding an Armstrong brochure last night after posting which listed the sizes of all the holders. There's still time to shorten up my toolpost 0.5-0.75" to be more inline with holder sizes, but I honestly don't think it'll matter too much, unless anyone can think of a reason to do so? The extra holding capacity might come in handy someday?
 
Thanks for checking. I did end up finding an Armstrong brochure last night after posting which listed the sizes of all the holders. There's still time to shorten up my toolpost 0.5-0.75" to be more inline with holder sizes, but I honestly don't think it'll matter too much, unless anyone can think of a reason to do so? The extra holding capacity might come in handy someday?
I don't think that the extra slot length will be a bother at all, and as you say, it might come in handy one day.
It should also go without saying, but here goes anyway; we want to see the slot put in with a drill press and shaper........:rolleyes:
 

Dan Dubeau

Ultra Member
I don't think that the extra slot length will be a bother at all, and as you say, it might come in handy one day.
It should also go without saying, but here goes anyway; we want to see the slot put in with a drill press and shaper........:rolleyes:
Best I can do is a manual mill, with some manual quill shaping to square up the corners...... Although I might leave the rounded ends. Still debating that one......I'm not even going to cheat and use the Tormach for this one. :D
 

Dan Dubeau

Ultra Member
Lol, There will be shaper projects coming don't worry. Just not this one...Some swage blocks for the blacksmith shop will be among the first. A few more tool holder projects for it first though.

I was thinking about making the bottom of the slot square, and co-planer with the ring. That way a tool would have full support across the bottom at any rotation. Is it nessesary? definately not, but an interesting machining adventure. Then again, I may call an audible on the play, and just bury the slot below the surface like they all do when it comes time to machine it.
 

Dan Dubeau

Ultra Member
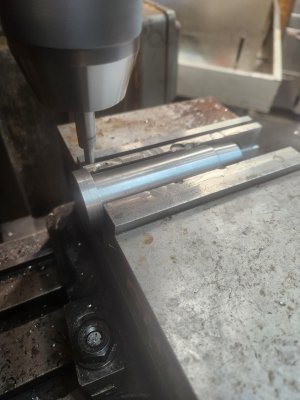
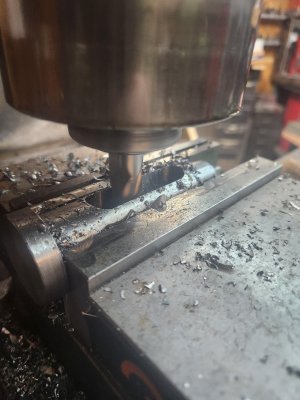
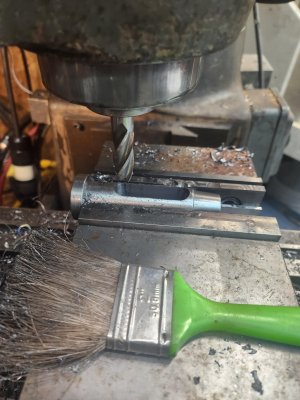
After the kids went to bed, I was sitting reading some old shaper literature, then realized the wife wasn't home from work yet, and there was no reason I shouldn't be out in the garage cutting a slot. So out I went.

Edge found the center, and zeroed out the readout. The vise jaw came to me that way.....
2ONAcmH.jpg

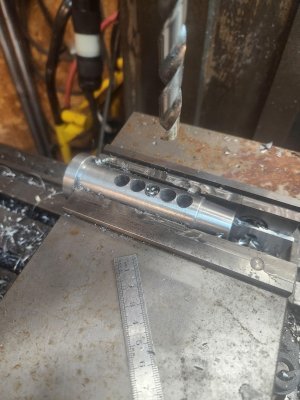
Chain drill out some holes
IeOUpEZ.jpg

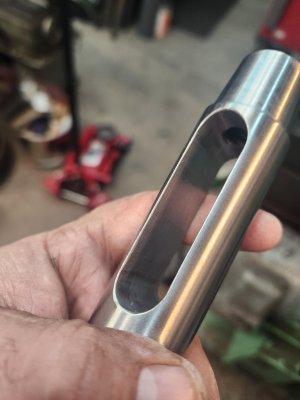
Plunged out the remainder with a 5/8" HSS endmill, then steped out 0.005" per side to clean up the sides
SgJbvUG.jpg
KDL11bz.jpg

A little work with the dremel to deburr
OGMivQ5.jpg

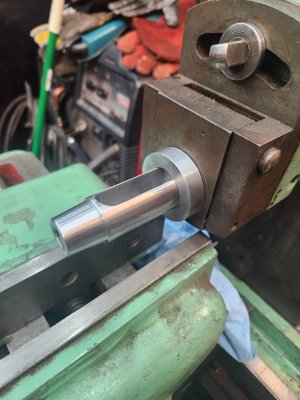
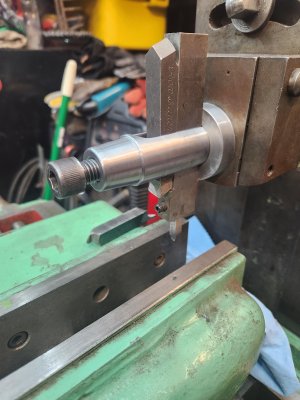
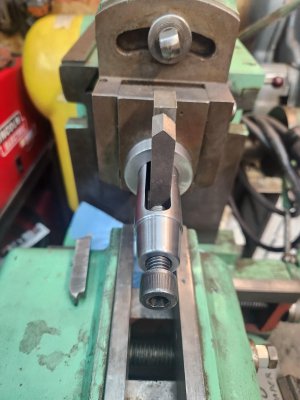
And a trial back on the shaper
JsVaeSh.jpg
DZPzBZe.jpg
By0x7ik.jpg
Didn't realize I had that 1/4" toolbit holder until digging through my stuff. That'll come in handy.

Will try and make the screw this week/weekend, then make some chips. Don't tell anybody, but I kinda of enjoyed making chips manually again. Been a long time since I've really used a manual mill for anything other than drilling or counterboring as a glorified drillpress.
 

historicalarms

Ultra Member
Just an observation here from a dude that has never been close to a shaper (but has always lusted for one until health reasons moved them to the back burner)...Looking at the clearance between the slot you cut & the cutting bits, wouldnt you want that slot a slip fit so the tool cant move within it? With the slot already cut that wide I am thinking maybe a threaded set screw hole might be required in the side of the new mount to pinch the bit against one side or the other.
 

Dan Dubeau

Ultra Member
Yes, I made this post to take 5/8" wide holders. Shown are just some 1/2" ones I had laying around and mounted for "show". Having never used a shaper either, and very limited time using a lantern post on a lathe, I was curious about the need for a tight side to side fit too. I think it's much more important to have a tighter fitting toolholder on a shaper than a lathe due to the forces involved.

I plan on making a couple toolbit holders to fit this post, and keeping an eye out for some used armstrong ones to fit also. The chances of me using a toolbit directly is probably slim, but I did have the same thought as you to put a grub screw in the side to snug them up. I could always just shim it too. But the grub screw is not abad idea. I also thought about making another, or a few more toolposts with smaller sizes of slot to hold toolbits directly, but will cross that bridge if I get there. I don't think that's very practical, but it's been a fun project, and I've got lots of material..... A couple toolholders of various sizes should have me covered for pretty much any situation I may get into.
 
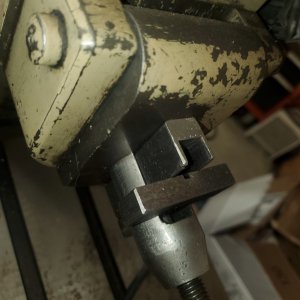
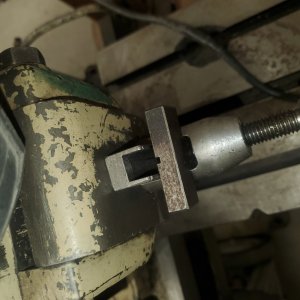
20240130_081457.jpg 20240130_081517.jpg
I almost exclusively use this setup that I made for mine. The "sled" is a tight fit side to side and the tee holds it together. The little groove down the tee drools cutting oil when I add it to the top.
Kinda hard getting pictures, as I have the shaper spun around with the clapper up to the wall so I can re-engineer the drive setup.
 

Dabbler

ersatz engineer
.Looking at the clearance between the slot you cut & the cutting bits, wouldnt you want that slot a slip fit so the tool cant move within it?
That is what I thought, but a lot of guys use tool holders in shapers and American Rocker tool posts that are too narrow, ans seem to get on well. I assume that the holding pressure of the bolt is sufficient to prevent most movement.

@140mower I think your idea is fantastic!
 
That is what I thought, but a lot of guys use tool holders in shapers and American Rocker tool posts that are too narrow, ans seem to get on well. I assume that the holding pressure of the bolt is sufficient to prevent most movement.

@140mower I think your idea is fantastic!
I wish that I were smart enough for that to be my idea....... I am pretty sure that I got it from Shaper Andy on YouTube. He did some pretty interesting stuff in his early days, such as cutting tee slots with the shaper. His videos are a little bit rough around the edges, but it was technique I was after, and I learned quite a bit from his videos...
 
Thanks. Something simple like that is easy to make, and a great way to hold toolbits directly.
Yup, it won't get much more rigid than that. Mine uses 1/2" tool bits, a 4" stick of hss allows for enough stick-out for most situations such as Aloris style tool holder dovetails.......
The tee is just packing, the tee part just holds it in place while changing toolbits.
 
I happen to come across these don't if they are of any interest to you.

I have sent him a message, it would be nice to have a proper shaper tool or two in the collection. If nothing else to be able to compare them to what I am using currently.
We shall see what comes of it.
Thanks ;) I had planned on using the money for school shoes for the kids, but they need stories to tell their grandchildren too......:rolleyes:
 

Dan Dubeau

Ultra Member
I happen to come across these don't if they are of any interest to you.

Not a bad price. I would actually like to make them for a fun project though. Not under any false pretenses that'll I'll save money, but building stuff like that is enjoyable for me. I'm going to start with an indexing one using a hirth joint and branch out from there.
 
Top