Scam Alert. Members are reminded to NOT send money to buy anything. Don't buy things remote and have it shipped - go get it yourself, pay in person, and take your equipment with you. Scammers have burned people on this forum. Urgency, secrecy, excuses, selling for friend, newish members, FUD, are RED FLAGS. A video conference call is not adequate assurance. Face to face interactions are required. Please report suspicions to the forum admins. Stay Safe - anyone can get scammed.
Here is my start to the #1 kit, I figured finally having a long weekend off it would be a good chance to jump in with both feet.
I've watched both blondi's and Joe pies build logs for inspiration on the process/techniques...and doing my own spin with what I have available, and with what makes sense to me with my fabrication/layout/drawing experience
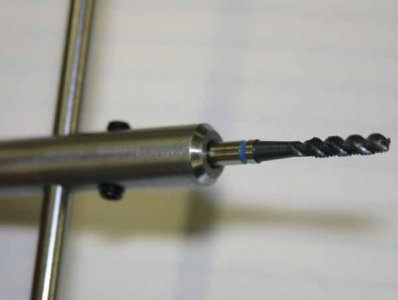
Casualty count so far...1 2mm end mill (got greedy) and 1 5mm end mill (part moved...nst)
Included is a picture of the tap "handles" I whipped up for the tiny little taps
Re your tapping handles, maybe you know this already but just in case - you can position the disc lower down the tap so that you have sufficient amount of shank to be guided by the drill chuck jaws. To tap, just crack the jaws open a bit vs grip so that the tap shank can rotate freely but is still being guided by the jaws. Wider discs provide more leverage & feel while tapping, but can also block out what you want to see if they are too big.
@PeterT thanks, my intent was to tap like you describe, but I found with the larger 5-40 size tap I could not get enough bite on the shank after the first few threads and it would just slip, so I moved up to the flats...I think its maybe because I put two set screws 180 apart...not enough surface area providing the necessary friction maybe
Keeping them straight seems to be ok by hand, I bought a taper and a plug for each size, taper first then plug seems to be working good, I'm sure it would be a different story if I went straight away with a plug though
Keeping them straight seems to be ok by hand, I bought a taper and a plug for each size, taper first then plug seems to be working good, I'm sure it would be a different story if I went straight away with a plug though
That's what I always do too. For some jobs you never need the plug - eg through holes and deep holes. But I almost never buy just one tap - I buy the pair even if I only need one of them. I stopped buying complete sets a very long time ago. I just buy a quality tap pair for what I need as I need them. Once in a while I buy a die too.
Yes, from what I've seen of others, they grind a small flat on the tap shank to give the set screw something to land on, a rudimentary key.
I use this homebrew version. Set screws engage tap flats, no tap grinding, use as a shank to power tap or use the tommy bar. I could have slimmed it down a bit but the set screws need some minimum thickness.
Anyway, didn't want to digress your engine project into a tapping discussion. Its good that you are thinking of this in advance, fiddly fine threads is a thing with these models. Things that help with tap alignment & reducing chance of breaking them off is worth the effort.
Nice to see another steam engine thread, I'm just getting my head around starting back on my Stuart 10V.
Did you buy the kit from PM? If so and you don't mind sharing, what did the shipping cost?
Just a note on house keeping, it's a good idea to cover the ways as cast dust is hell on sliding surfaces.
The shipping was expensive, I think it was like 80 usd, to justify the high shipping to myself i bought the #1 and the #5 on the same order, I believe it was the same shipping for the one kit as it was for the two...so why not....total for the two kits and shipping was 332usd ( i found the email with the price quote). However I don't believe i got dinged with any duty/tax when it arrived.
Figured i would start with the #1 as there is some guidance out there in the world of YouTube.
This is all i have time for today, laundry, paperwork, grocery shopping are all calling my name......and according to my wife....."chippers" as well (potato chips)
Casualty count for today : 1 - 7/64 drill bit...snapped as i broke through on the first steam hole into the steam inlet....switched to a cheaper, softer bit for the remainder (and used the called out 1/8...(there is a reason i used a 7/64, but thats another story). Problem solved, no more broken bits to try and remove.....although i was lucky enough to remove the broken bits without much trouble
Locating the steam port holes seems to be a bit of a contentious item between the two youtubers.....BlondiHacks eyeballed it it happened to work out for her, Joe Pie goes on a great big tangent with some kind of fancy layout ball and a bunch of math (and lets be honest...is kind of a dick about it the whole time). Although this is probably the absolute most accurate way of locating those holes....I don't have a fancy layout ball...and would wager most hobbyists don't either...
Not wanting to eyeball it, and being used to working with drawings that are missing the dimensions that would make life easier, it was not hard to see the missing right angle triangle created from the edge of the bore and the called out dimension (that makes the hypotenuse) . I used fusion 360 to do the math for me....because...it gave me a nice screen shot and....technology. Used an edge finder to find the edge of the bore (i know not perfect...but this is only half a piano), took off the radius of the finder, edge found both sides and halved (also not perfect)...then went off the dro for the remainder...i am off a few thou left to right....but all of the steam holes busted into the steam chest at a nice elevation, i would call that a success
i also did not have any way of indicating the center of the bore for the head bolts....turned a chunk of scrap into a tight plug i could use to center everything up.....seemed to work well enough
for the keen viewers, the reason im using an er32 collet chuck instead of r8 collets in the spindle....the collet chuck is very close in size to my drill chuck...i have a round column mill, this is a bit of a work around for not having to raise the head when going between a drill chuck and a short endmill
@PeterT no worry's, i dont mind tangents, its a forum after all, one thing leads to the next
"oh it's a week night...I'll just do something small"
Well that escalated, not having any way to actually hold this little guy I had to spend some time making clamps and a sacrificial fixture board thing
I tried the superglue thing...my superglue must suck, because it definitely didn't work for me
I centered up the casting on the center boss...but I don't think the boss was really centered on the rest of the casting so the one bolt hole is a few tho closer to the edge than I would like, maybe there was a better way, possibly the holes first...oh well
I also ordered the number one and number five at the same time to save on shipping. Likely won't have time to work on mine and until into the new year.
I like your suggestion of using fusion 360 to calculate the steam port angles. Joe Pye has more toys than most of us can afford.
And Janger more right than he knows - figuring out how to hold the small pieces to machine them is more than half the battle!
A bit more progress, most of this is over a week old, I was waiting on a reamer, then off to mexico, and now back at it today. Included are pictures of the two bit extensions i needed to make in order to spot/drill the set screw hole in the flywheel, and the little bit of setup/work i have done on the base, and a video of the flywheel running at 900 rpm. I realized after the fact i should have been turning it on an arbor, so time will tell if it runs that true with its on the crankshaft, wost case i can turn an arbor later and skim the flywheel so it runs nice and true...oh the things you think of after your done for the night and in the shower
I am changing the plans up a bit, and have gone with 9mm for the reamed holes relating to the crankshaft (flywheel, crank caps, eccentrics....), reason being a 9mm spiral reamer is like 1/4 the price of a 3/8 reamer, i will just turn the crankshaft to suit the 9mm bores
Love following along your build. Forgive me if you already mentioned it...are you using British Standard threads with it or are you going to use similar imperial threads instead?
Love following along your build. Forgive me if you already mentioned it...are you using British Standard threads with it or are you going to use similar imperial threads instead?
I don't think I ever did mention specifically. I am using the fasteners that came in the kit, imperial, 2-72, 5-40, etc. I am ok with the look of the kit fasteners...and it was not an extra cost
I don't think I ever did mention specifically. I am using the fasteners that came in the kit, imperial, 2-72, 5-40, etc. I am ok with the look of the kit fasteners...and it was not an extra cost


")