Parting / cut off tool

mbond

Well-Known Member
Premium Member
Hi

I'm new here, and have recently gotten back into metal working.

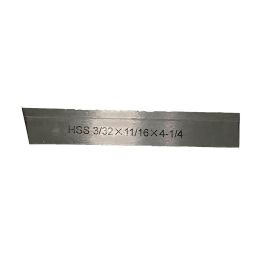
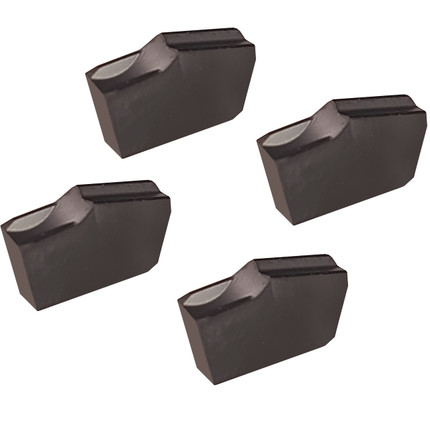
Last week I was working on a test piece (brass) and broke the carbide in the parting tool that came with my lathe on the very first cut. I think the cause was the tool post being too low and working on a very small section at low speed. I have added steel shims and all of the tools cut better now, but obviously I need to replace this broken one. There are many options and I am out of my depth

I plan to make simple projects mostly in brass and aluminum - at least until I get better. I have a tool, post that holds 1/2" square stock. Is there something that I should be looking for in this kind of tool?

thanks in advance
 

DPittman

Ultra Member
Premium Member
If you're working primarily in brass and aluminum then hss is hard to beat, it's easy to get a sharp edge and it will wear well in brass and aluminum.
There are a multitude of cutoff tools that use inserts and I'm still trying to comprehend all of them and which one is best for me (in my budget) so I will let other make those tool recommendations to you.
 

whydontu

I Tried, It Broke
Premium Member
My 2 cents, and I’m sure I’ll get toasted for this. I work mostly in aluminum, some brass, and make pipe fittings in 304 stainless. My lathe is a BB B2227L 10x18 3/4 hp. I have yet to find a carbide parting tool that works. I use old-fashioned tapered HSS bits and sharpen often. $10 gets me a tool bit that can be easily ground for left or right cut, or add some top rake, and when I break off the tip,I just regrind.


Versus $50 for four carbide inserts


Tomc938

Ultra Member
Premium Member
I would agree with the High Speed Steel recommendations. I have some Carbide, but I find the only advantage is that you can run the speeds higher. I have the same lathe as "Whydontyou" and it's a pleasure to cut Al and Brass. Might not be a good idea, but for parting off smaller parts in brass I even add a slight angle to the front of the cut off tool. That way it cuts through the outboard piece slightly before the main piece. Then no nub to clean up.

I also usually use HSS for steel. Just need to sharpen on occasion.
 

PeterT

Ultra Member
Premium Member
I prefer the T-style of HSS. the tapered ones are OK if you have perfect toolholder geometry & grip & size. But those issues have plagued many people.

But 95% of time I use carbide inserts. This style, MGEHR. They are reasonably priced, inserts come in 3 exciting colors (that's AliExpress speak for preferred alloys but for the longest time I used the one for steel interchangeably with other materials & was hard pressed to see the difference). Come in neutral (parting) or rounded (grooving), fit same holder. The holder is specific to I believe 1.0,1.5,2.0 mm width. Same inserts fits a boring bar type hole for internal/obique grooves.
1691033460504.png
 

Tecnico

(Dave)
I’ll toss in some of my opinion while we’re at it.

Background: I’ve been turning for ages but have dipped my toe in the replaceable insert pond in more recent years so probably some of the more experienced members can fill in the missing gaps.

Also, I’m writing this to cover topics starting from a basic level and on up so hopefully you can pick what level works for your experience.

For parting, for the most part I use one of the tapered tools @whydontu mentioned. The advantage is that you can grind and dress the cutting faces as you want them. Case in point, you want a different edge geometry for brass, steel or aluminum. That’s one of the advantages of a replaceable (carbide etc.) inserts, they can be bought tailored to the material you want to cut. Brass is particular, it behaves differently and wants a lesser relief angle than aluminum for example.

For any turning, controlled tailoring of the cutting clearances (rakes etc) to the material and purpose, plus finish honing make a big difference in your results, especially on some of the lighter machines. There are good references on Hobby Machinist (?) or other forums or Harold Hall books etc. but I don’t have links at my fingertips, sorry! Replaceable inserts are a good stepping off point to get in the ballpark quickly but you can get further with/better results in some cases by grinding HSS. Surface finish on mild steel is one case. I really like the results I get with inserts for aluminum though.

For parting, keeping the cutting tool rigid will produce better results so minimizing the (cantilevered) stick out and locking the carriage and compound axis (if possible) helps keep the tool from being drawn into the work piece. Brass would be one of the materials more sensitive to that.

You’ve touched on one of the key setup points for turning, cutting edge height. There is a fair amount of discussion in this group and in particular, there is good discussion and examples of making a fixture to set tool height. That gets you pretty much where you need to be and tweaks might be needed for particular cases.

Hope this is helpful, let us know how it’s working for you, I’m interested in particular in how the the parting inserts work out.

D :cool:
 

Susquatch

Ultra Member
Administrator
Moderator
Premium Member
I sometimes have trouble parting too. Just hang in there and keep trying.

There are 3 cardinal rules for good parting:

They are:
1. Rigidity
2. Rigidity
3. Rigidity

I won't explain each one, but I bet you get the drift. Lots and lots and lots of discussion on here about rigidity.

Sometimes parting goes better slightly below center. But I think you are ALWAYS better off to start on center and only drift from that when on center doesn't work.

I always used to prefer HSS. AND I confess I still reach for it when I need to part. But I acquired a Carbide tool from another member a while back and it works just fine as long as I up the speed and adhere to the 3 cardinal rules of parting above.

When nothing else works, I part upside down and it has NEVER failed me.

As said above, do yourself a huge favour, make yourself a center height gauge, and never look back. You won't regret it, I promise!
 

YotaBota

Mike
Premium Member
Rules 4,5,6;
4. Squareness
5. Squareness
6. Squareness

Your parting blade has to be exactly 90 degrees to the work or else the blade is going to break. I've always used the tailstock spindle (locked) to square the toolpost. When you start parting, go in .150-.200 and back out, then slowly go back in. If you see the blade skimming metal from one side or the other as you advance the blade then you aren't square to the work.
 

mbond

Well-Known Member
Premium Member
Thank you all for your suggestions. I never expected to get so many replies so quickly.

I have a CX615 combination machine. It is new, but I took it all apart to get it into my garage and have put it back together. So far, I have spent more on accessories than on the machine itself ;) I used a gauge with a magnetic base to measure the lathe chuck run out to about 2 thousandths an inch, and the mill quill was unmeasurable with the tools that I have

When I bought it, I selected to option to upgrade the default tooling to Acusize carbide parts. They work well, except for the parting tool that I broke right away.

The tool post is lower than the center by about 300 thousandths of an inch. Thin steel shims allow me to adjust this obviously. So far I have found that a height of about 50 thousandths below center produces the best cuts for the tools I have on the brass and aluminum test blanks that I have cut so far

It seems clear that some sort of HSS blade is what I need

This is a hobby for me - something to get me away from computers for a few hours each weekend. I have a vast theoretical knowledge of metal crystalline structure etc., but little practical experience. I want to make something simple like a plum bob first, and then work up my skills to harder projects
 

PeterT

Ultra Member
Premium Member
The tool post is lower than the center by about 300 thousandths of an inch. Thin steel shims allow me to adjust this obviously. So far I have found that a height of about 50 thousandths below center produces the best cuts for the tools I have on the brass and aluminum test blanks that I have cut so far
A picture might help understand your distances, but as a general guiding principle, tools should start out on the center line of the work. It may perform better a thou high or low (that's 0.001"), but start at center.
But 0.050" below center is way too much. At minimum, inefficient cutting, poor finish, heat... But things could get more exciting if it suddenly digs in & jams up. Softer alloys like aluminum are more prone to doing that.


YotaBota

Mike
Premium Member
I like the video except I'm not sure about using the fluted end of a drill bit to catch the parted off piece. I realize the chance of the bit getting caught between the the spinning part and the parting tool is very slim but Murphy is alive and well living in our shops.
 

PeterT

Ultra Member
Premium Member
I agree with you there. When I took a machining class they showed us using the drill bit as a part catch from prior operation. I think its an old school bad habit passed down the generations. Just a scrap rod of whatever stock is a better choice. I take my sharp stuff out of tailstock when not in use. It prevents the expensive cutting edges from getting damaged & keeps the blood IN the arm where it belongs. And dropping a potentially heavier part laterally on a cutting drill or whatever probably doesn't do it any favors.
 

PeterT

Ultra Member
Premium Member
Another point if it wasn't discussed. some parting tool holders clamp the blade at an angle, some are straight. But if you extend or retract the blade as a function of diameter to minimalize stick out, it also slightly changes the tool height relative to center, so something to be aware of.

The insert style parting tools have the angle built in the insert/clamp. Since they are held in a straight toolholder, the resultant cutting geometry does not vary by extending or retracting the tool because teh shank is straight.

1691161514187.png 1691161707789.png
 

mbond

Well-Known Member
Premium Member
I have been working all day, but hope to try out these suggestions tomorrow
 

Susquatch

Ultra Member
Administrator
Moderator
Premium Member
I have been working all day, but hope to try out these suggestions tomorrow

I think it's worth adding here that parting is one of those tasks that will almost always give you trouble at some point. Anyone on here who says they NEVER had a problem is not pushing the boundaries.

There are lots of great tips above and a million more available by searching.

I've had more than my fair share of problems so I've developed a large inventory of techniques and I'm not done yet. Someday soon, I'll be making a parting plynth.

So the best advice I can give you is to be both patient and stubborn. There is always a way...... You can always come back here with photos and get lots of help specific to your situation.

Parting upside down has NEVER failed me....... YET!...... LOL!

I've never made a plumb bob. The ones I have are plenty good enough for functional application. But I built my own gps RTK Rover and Base station that I often use with a theodolite to establish coordinates for farming and a little lot surveying. You have made me realize that a showcase quality brass Plumb Bob with a replaceable hardened steel point should be 42 H iii on my project list.....

Screenshot_20230806_082846_Chrome.jpg

Just imagine it with some metallic inclusions in clear or stained epoxy rings and an etched patine.

The sequence of operations already has my head spinning! Two different sized invisible threaded fittings - one for the point and one for the string. Might need to make a female taper to hold it!

Thank you!
 
Top