TOBARApprentice
Super User
Hey everyone.....
So I pose this question in hopes that I am missing something, but I am pretty sure I’m not, and what’s worse, I may just “suck at this”.
So last night I mounted my “new to me” but never used Tormach vice to my mill table. I put my Indicol ontobthe mill quill with its .0005 resolution Starrett indicator on it. Tap tap...... tap tap...... tap tap.... tap tap.... before you know it, .0002 difference over 5 inches, I come upstairs and proclaim to my wife that I am some kind of rockstar!! Slept like a baby!
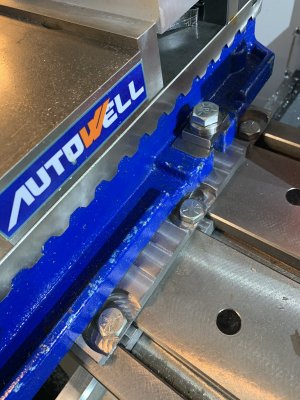
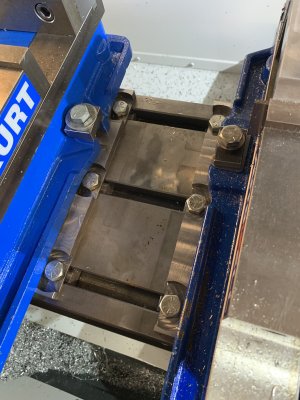
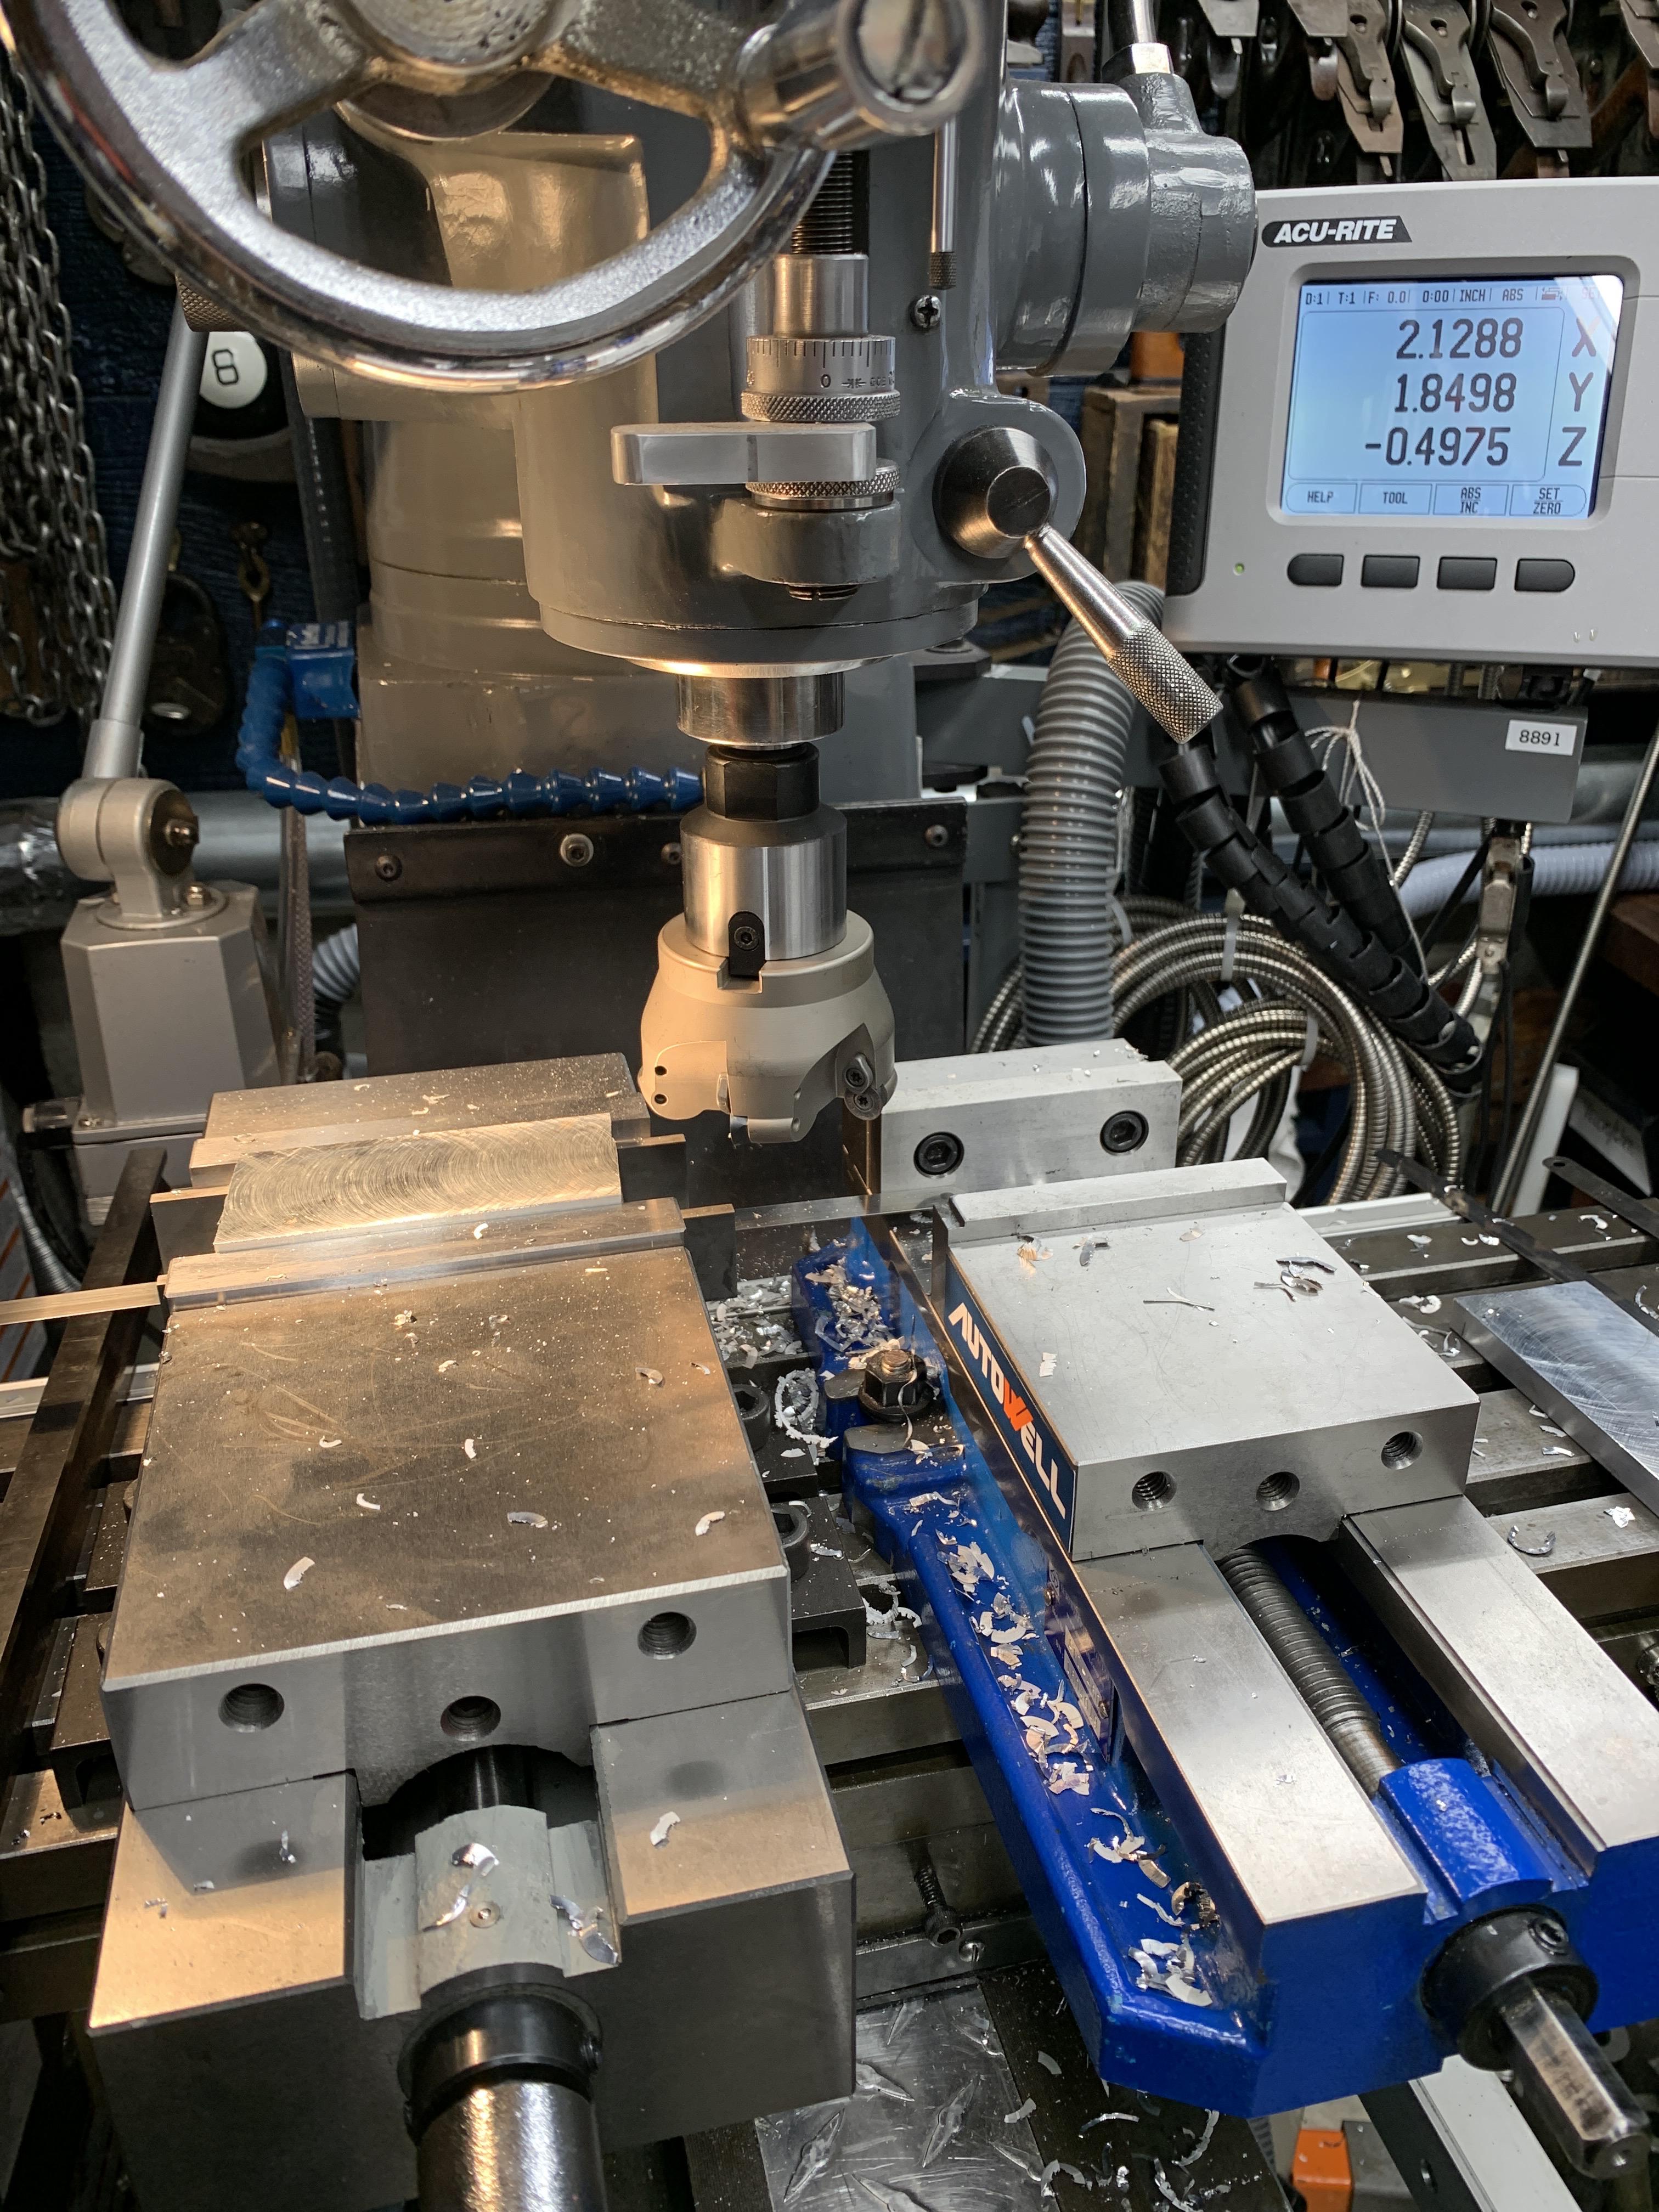
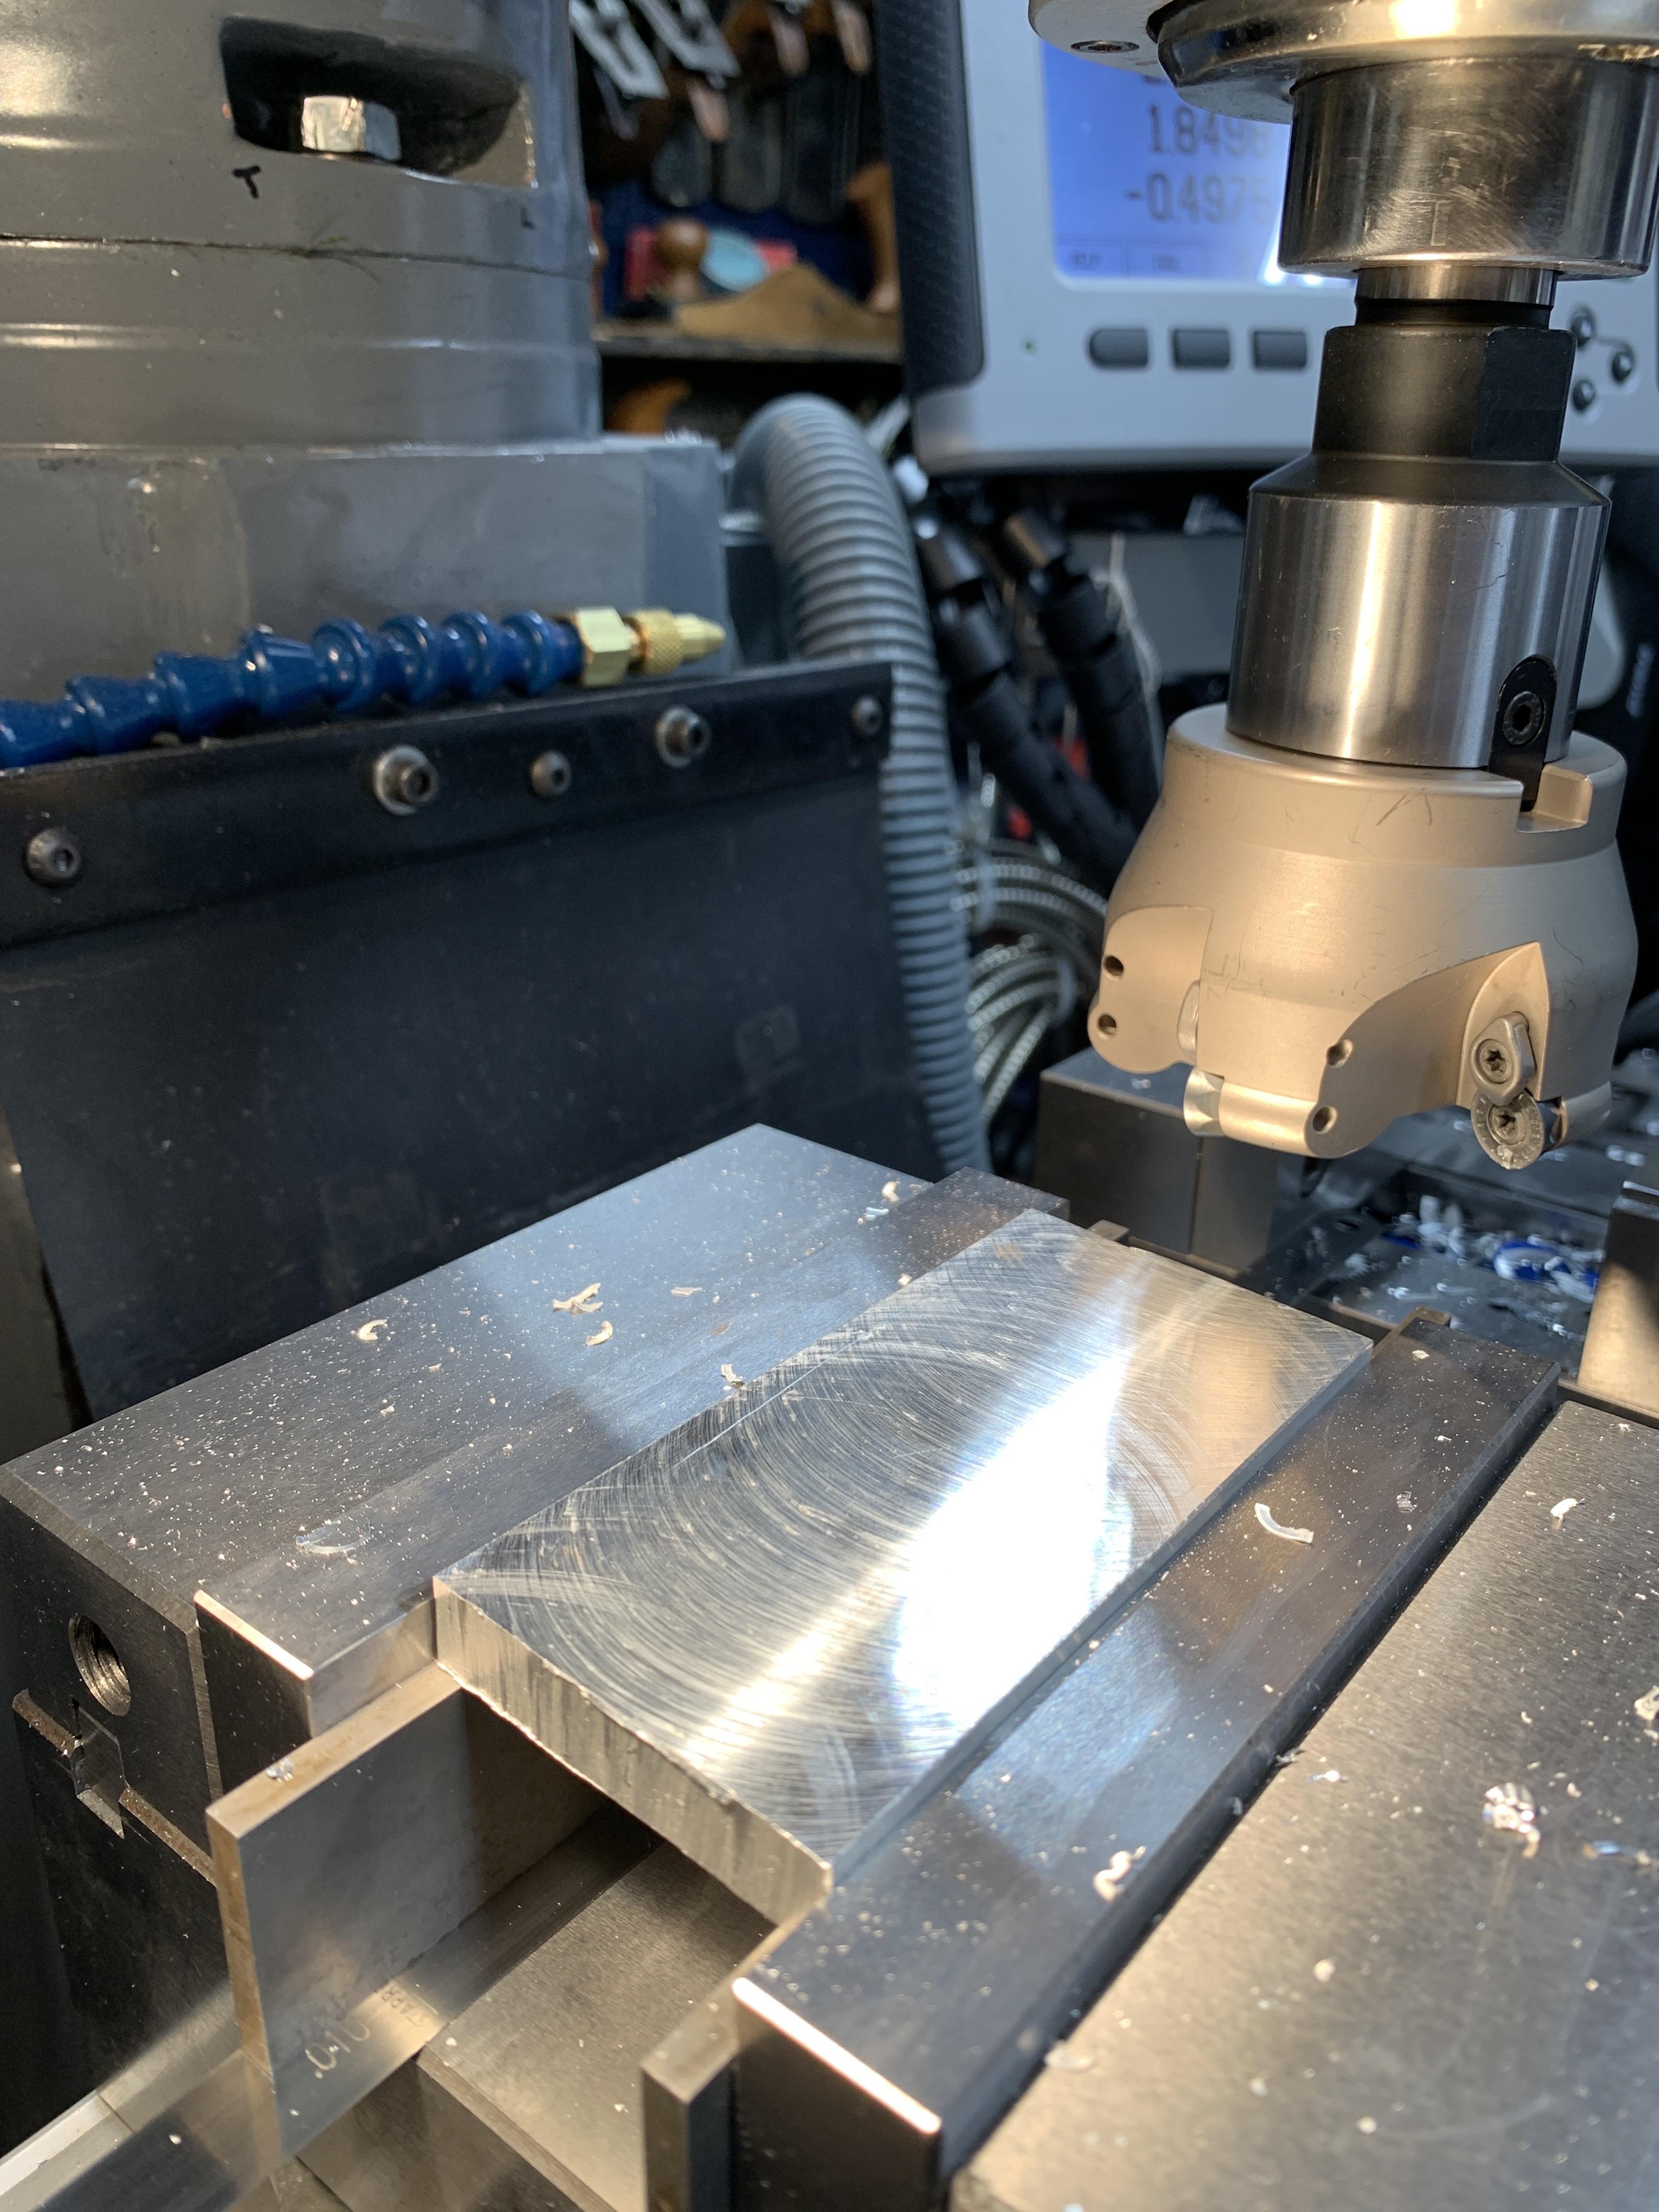
Tonight I go to the shop..... Some background, I have the Tormach 5” Vice on the mill next to the Autowell 4” Vice. I have begun a Stuart Models Victoria Steam Engine and the first operation is to make the base surfaces parallel. So the difference in height of the 2 vices is .272, no problem thinks I...... I grab a piece of aluminum from the scrap pile and put it on Starrett parallels the Tormach Vice. I use the carbide insert shell mill to mill the top surface flat, flip it over and mill the bottom parallel. I took .010 off the top and .020 off the bottom. I removed it form the vice, de-burred it and mic’d it.
Thanks for staying with me to this point.
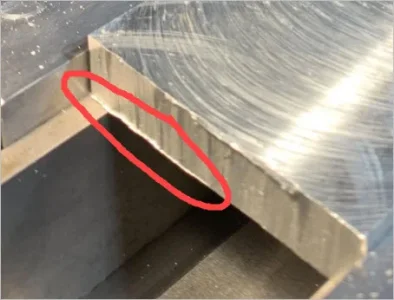
All four corners are different thicknesses and by .005 to .009 difference how is that even possible? There are no chips - the vice is immaculate and has been cleaned with MEK (that’s some nasty sh@$). The Parallels are Starrett and mic perfectly parallel. I used a hammer (soft face dead blow) to make certain the material was seated. All I can think is that I am going to have to tram the mill head again...... and that job SUCKS!!!!
Or does everyone seem to run into this? My plan is to try again with a fresh piece if scrap tomorrow to see if I can isolate the culprit...... my fear is that you’ve been listening to him.
In any case, thanks for listening and commenting if you do. Good luck lads with that move tomorrow; if my wife would let me out if the house I’d be there to help too.
Cheers.
Derek
Sent from my iPhone using Tapatalk
So I pose this question in hopes that I am missing something, but I am pretty sure I’m not, and what’s worse, I may just “suck at this”.
So last night I mounted my “new to me” but never used Tormach vice to my mill table. I put my Indicol ontobthe mill quill with its .0005 resolution Starrett indicator on it. Tap tap...... tap tap...... tap tap.... tap tap.... before you know it, .0002 difference over 5 inches, I come upstairs and proclaim to my wife that I am some kind of rockstar!! Slept like a baby!
Tonight I go to the shop..... Some background, I have the Tormach 5” Vice on the mill next to the Autowell 4” Vice. I have begun a Stuart Models Victoria Steam Engine and the first operation is to make the base surfaces parallel. So the difference in height of the 2 vices is .272, no problem thinks I...... I grab a piece of aluminum from the scrap pile and put it on Starrett parallels the Tormach Vice. I use the carbide insert shell mill to mill the top surface flat, flip it over and mill the bottom parallel. I took .010 off the top and .020 off the bottom. I removed it form the vice, de-burred it and mic’d it.
Thanks for staying with me to this point.
All four corners are different thicknesses and by .005 to .009 difference how is that even possible? There are no chips - the vice is immaculate and has been cleaned with MEK (that’s some nasty sh@$). The Parallels are Starrett and mic perfectly parallel. I used a hammer (soft face dead blow) to make certain the material was seated. All I can think is that I am going to have to tram the mill head again...... and that job SUCKS!!!!
Or does everyone seem to run into this? My plan is to try again with a fresh piece if scrap tomorrow to see if I can isolate the culprit...... my fear is that you’ve been listening to him.
In any case, thanks for listening and commenting if you do. Good luck lads with that move tomorrow; if my wife would let me out if the house I’d be there to help too.
Cheers.
Derek
Sent from my iPhone using Tapatalk
 ....
....")
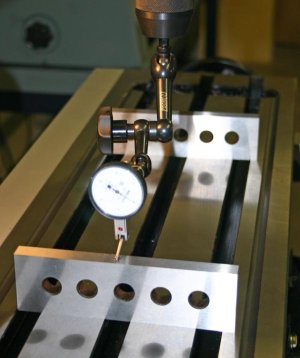
") Then you can test by wiggling the parallels they should not move underneath the part. And I agree it’s easy to clamp the material too hard and see it bend. Try putting an indicator on the mill head upside down measuring the deflection as you tighten up the jaws.
Then you can test by wiggling the parallels they should not move underneath the part. And I agree it’s easy to clamp the material too hard and see it bend. Try putting an indicator on the mill head upside down measuring the deflection as you tighten up the jaws.