Tobho Mott
Active Member
Following up after buying ingredients for iron rated greensand here:
And mulling up ~450 pounds of the stuff...
And building the tools for my new A12 crucible that has been saved for iron service...
All that was left was to temper that new crucible, ram up some test molds, and get to it!
Ideally to prepare a new clay graphite crucible for use, first you stick it in the oven at 250 for a few hours to make sure its's really dry, then SLOWLY warm it up to a red heat, then you can take it up to operating temperature before sealing it up overnight in the hot furnace to slow cool.
My furnaces don't really do "slow heating" so the way I do the first part is to put the baked dry crucible into a hot empty furnace that's just been shut down...
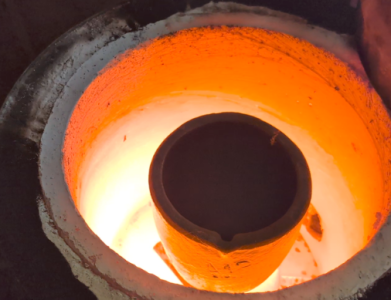
Then close off the tuyere and vent hole for an hour, and then it should be hot enough to fire the furnace back up and really get it hot.
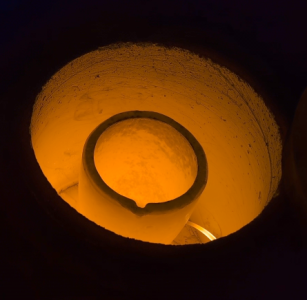
First time I'd used that furnace for anything other than a big forge in several years, and also the first time in years I'd run any furnace of mine on diesel instead of propane. I'll need to get used to running my burners in oil burner mode again anyhow to do cast iron. The big furnace was as slow to get up to temp as I remembered.
With that done, I picked out a few patterns I had lying around.
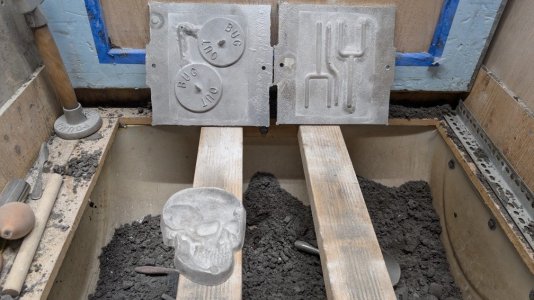
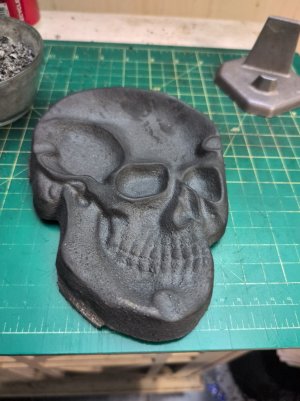
Matchplates for sprue covers (can never have too many) and pattern rapping tools, and a skull shaped ashtray. Molds were made, and left to sit and dry out for a couple weeks. I could have done that faster with a torch; the sand was fairly wet to start with, but I knew it would be a few days til I could find time for a melt anyway.
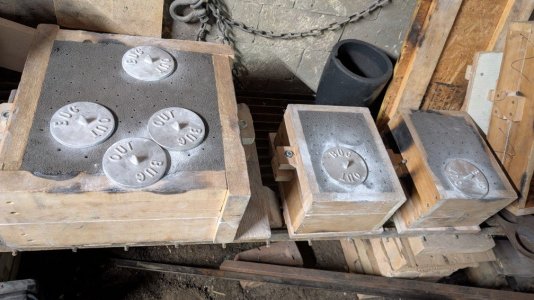
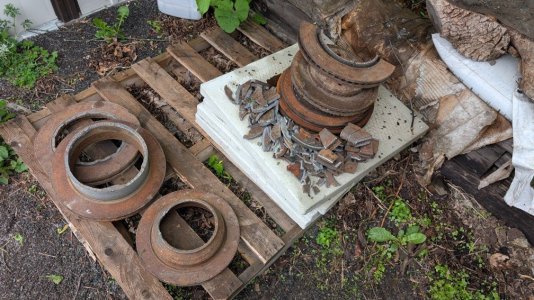
By that time, I'd had time to bust up some scrap brake rotors, which is what I've chosen to work with for its ubiquity and consistent alloy.
Figured a couple more molds lined up couldn't hurt. Rammed up a little decorative maple leaf pattern and a chill wedge to break and examine for chill (white way too hard iron). Then it was time for the first attempted iron melt! I chickened out and used the smaller furnace but I don't like abusing it like that, it heats up fast but it's really built for lighter duty.
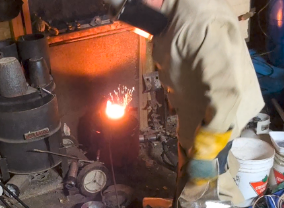
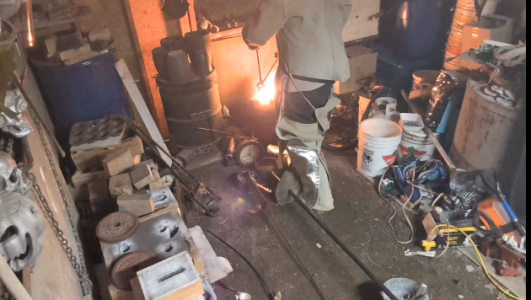
Partial success! I was sure the smaller molds had filled and the bigger one hadn't. It had a cold riser on the far side that never filled, I used the last of the iron that I had melted to dump down that in desparation (though by then it was starting to cool and get slushy) as I'd skimmed off a good 25% of my charge as slag and dross and run out before I got to the leaf or the chill wedge, though the crud was so foamy it looked more like half.
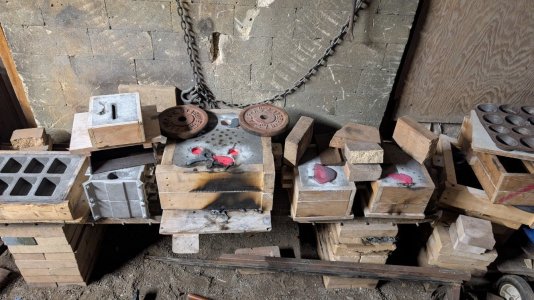
Well, I had it backwards. The smaller molds both misrun, figure I must have poured a hundred degrees or so too cold. But also somehow the ashtray did fill, and I dont see any seams or cold shuts where the 2 pours met. That's not a good technique, but this was just a test pour and it seems I got away with it.
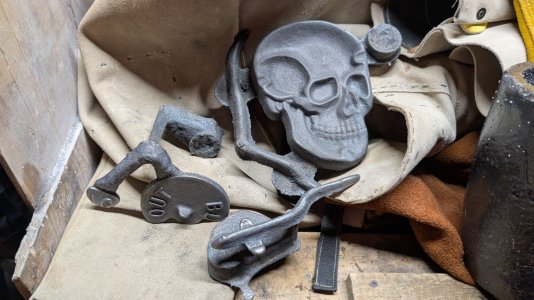
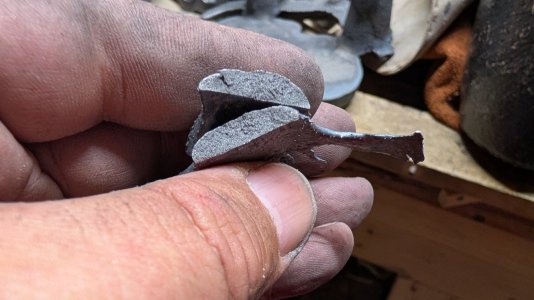
I used a little borax for flux and some perlite as a slag coagulant, but after conferring with a couple of other iron casters I think next time I'll skip both and see how it goes. I added 40g of 75% ferrosilicon inoculant based on the initial 20# charge of iron, though only about 15 ever got poured. So maybe a little more ferrosilicon than I needed. But everywhere I fractured it I saw nice soft grey iron. No wedge to break, so I smashed up some of the gating to have a look inside it.
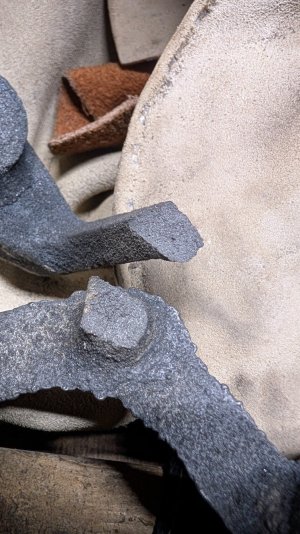
The only white (chill) I saw was in a small puddle of frozen iron that ended up on top of the mold, not inside it. I'm happier about that than I am upset about the first 2 molds not filling, next time I'll simply try for hotter to fix that, but chilled iron would have been a bummer trying to solve if too much ferrosilicon didn't get rid of it...
To sum up, it's not quite ready for prime time yet, but I can sort of cast iron now!
I'm leaving out some details about the wardrobe malfunctions that happened during the melt. Not quite as scandalous as Janet J's, but I will say that my assless chaps were just about hanging down around my ankles by the time I poured these.
Jeff
I drove out to Foundry Supply Source in Milton ON a couple weeks ago to pick up ingredients to make some iron rated greensand. John P. The sales and lab guy gave me a great tour and showed me just about everything they sell there, Wow! I had not been out to Milton since 2015 when it was still called Smelko Foundry Products and was located on the other side of the 401. Tim Smelko gave me an amazing tour back then too, but I never got to see their sand testing lab equipment until this trip. I mentioned Tim had shown me everything but that, and John kindly let me shoot some photos and...
- Tobho Mott
- foundry ontario road trip
- Replies: 6
- Forum: Blacksmithing, Foundry, Forge, Anvils, etc.
And mulling up ~450 pounds of the stuff...
Back from Foundry Supply Source (Formerly Smelko Foundry Products Ltd) in Milton ON with greensand ingredients and inoculant needed to finally give iron casting a try.
For cast iron, John P. (sales and sand lab guy from the supplier) gave me this recipe:
88% 56GFN sub-rounded silica*
10% bentonite clay**
2% seacoal***

Then mull with 3.5% of the total dry ingredients' weight in water.
* GFN (Grain Fineness Number) is a sort of average mesh size from a selection of screens used to describe foundry sands. The grain shape and the distribution of grain sizes has a fairly...
For cast iron, John P. (sales and sand lab guy from the supplier) gave me this recipe:
88% 56GFN sub-rounded silica*
10% bentonite clay**
2% seacoal***
Then mull with 3.5% of the total dry ingredients' weight in water.
* GFN (Grain Fineness Number) is a sort of average mesh size from a selection of screens used to describe foundry sands. The grain shape and the distribution of grain sizes has a fairly...
And building the tools for my new A12 crucible that has been saved for iron service...
A bit of progress on the liftout tongs for the A12. Still needs the upright handles. I'll give them a few good whacks and throw them at the driveway a few times to see if I can break them before I trust my plugs-into-a-110v-outlet power-fister fluxcore machine "welding" (emphasis on "my") on stock this thick, or really any thickness seeing as this is a tool for handling molten metal, but at the very least things are tacked in place to where I can take it to a friend's house who has a big boy welder and more experience using it. These are based on Bldr J's. He also supplied me with the...
All that was left was to temper that new crucible, ram up some test molds, and get to it!
Ideally to prepare a new clay graphite crucible for use, first you stick it in the oven at 250 for a few hours to make sure its's really dry, then SLOWLY warm it up to a red heat, then you can take it up to operating temperature before sealing it up overnight in the hot furnace to slow cool.
My furnaces don't really do "slow heating" so the way I do the first part is to put the baked dry crucible into a hot empty furnace that's just been shut down...

Then close off the tuyere and vent hole for an hour, and then it should be hot enough to fire the furnace back up and really get it hot.

First time I'd used that furnace for anything other than a big forge in several years, and also the first time in years I'd run any furnace of mine on diesel instead of propane. I'll need to get used to running my burners in oil burner mode again anyhow to do cast iron. The big furnace was as slow to get up to temp as I remembered.
With that done, I picked out a few patterns I had lying around.

Matchplates for sprue covers (can never have too many) and pattern rapping tools, and a skull shaped ashtray. Molds were made, and left to sit and dry out for a couple weeks. I could have done that faster with a torch; the sand was fairly wet to start with, but I knew it would be a few days til I could find time for a melt anyway.

By that time, I'd had time to bust up some scrap brake rotors, which is what I've chosen to work with for its ubiquity and consistent alloy.

Figured a couple more molds lined up couldn't hurt. Rammed up a little decorative maple leaf pattern and a chill wedge to break and examine for chill (white way too hard iron). Then it was time for the first attempted iron melt! I chickened out and used the smaller furnace but I don't like abusing it like that, it heats up fast but it's really built for lighter duty.


Partial success! I was sure the smaller molds had filled and the bigger one hadn't. It had a cold riser on the far side that never filled, I used the last of the iron that I had melted to dump down that in desparation (though by then it was starting to cool and get slushy) as I'd skimmed off a good 25% of my charge as slag and dross and run out before I got to the leaf or the chill wedge, though the crud was so foamy it looked more like half.

Well, I had it backwards. The smaller molds both misrun, figure I must have poured a hundred degrees or so too cold. But also somehow the ashtray did fill, and I dont see any seams or cold shuts where the 2 pours met. That's not a good technique, but this was just a test pour and it seems I got away with it.

I used a little borax for flux and some perlite as a slag coagulant, but after conferring with a couple of other iron casters I think next time I'll skip both and see how it goes. I added 40g of 75% ferrosilicon inoculant based on the initial 20# charge of iron, though only about 15 ever got poured. So maybe a little more ferrosilicon than I needed. But everywhere I fractured it I saw nice soft grey iron. No wedge to break, so I smashed up some of the gating to have a look inside it.

The only white (chill) I saw was in a small puddle of frozen iron that ended up on top of the mold, not inside it. I'm happier about that than I am upset about the first 2 molds not filling, next time I'll simply try for hotter to fix that, but chilled iron would have been a bummer trying to solve if too much ferrosilicon didn't get rid of it...

To sum up, it's not quite ready for prime time yet, but I can sort of cast iron now!
I'm leaving out some details about the wardrobe malfunctions that happened during the melt. Not quite as scandalous as Janet J's, but I will say that my assless chaps were just about hanging down around my ankles by the time I poured these.

Jeff
Last edited:
