How (and How Much) Do You Use Your 3D Printer?

Arbutus

Super User
Premium Member
Also, consider that many parts can be built as an assembly, and glued together. ABS, ASA and even PLA bond very well when using acetone (ABS) or PVC pipe cleaner (PLA etc). Not many plastics bond well with epoxy, but if you can find methylmethacrylate adhesive it will bond anything very permanently, including metals, nylons and acetyl.

So with a bit of forethought, some designs can be split into blocks, printed independently (colour, material, fill density) and bonded together.

As @jcdammeyer said, using 3DP as part of the design can solve many of the complex geometry/milling/fabrication/strength issues and this is what I find makes the technology so useful.
:)
 

Tecnico

(Dave)
I would Orient the print to suit load. Another option is to Anneal them, thereby reducing air gaps. Doing this will change the shape slightly of the part and so the model might need to be scaled appropriately. For parts requiring load, maybe use a performance material such as PC or CF.
Interesting, the comment about annealing. I wonder if vapour smoothing of ABS would have a similar effect by flowing the surface. I’m thinking how that relates to solvent bonding.

Pretty cool light display @jcdammeyer ! I had seen the parts before but now I seee the big picture.

Thanks for filling in more details @Arbutus that’s kind of where I thought it was going.

D :cool:
 

jcdammeyer

John
Premium Member
As @jcdammeyer said, using 3DP as part of the design can solve many of the complex geometry/milling/fabrication/strength issues and this is what I find makes the technology so useful.
:)
Size is another issue and for that matter the direction of the strands within a part. So where you need tension the printed section of the part is oriented say 90 degrees to the other sections. Or just to make something larger.


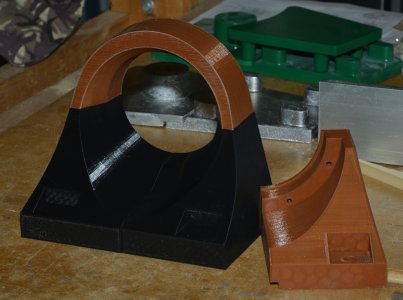
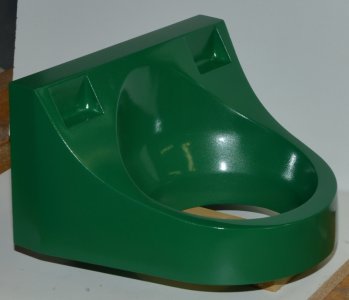
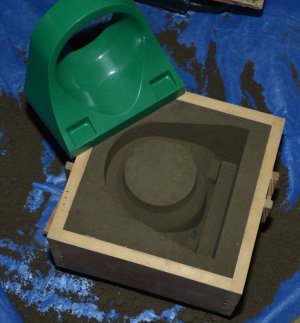
I think I've posted this photo series before but it shows that the finished part doesn't look like it's 3D printed as 3 parts when all is said and done. It was too large to print as one single part.
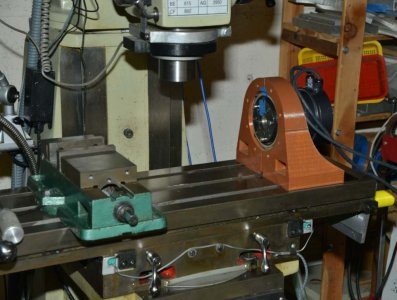
First a trial fit for what the finished part would look like with the harmonic drive mounted in place.
D8X_5784_Plastic_Mount-1.jpg

And then the pattern for casting.
1. Set together.
PrintedPattern.jpg
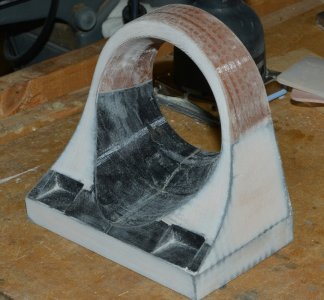
2. Glued and filler added and sanded.
PatternPrep-1.jpg
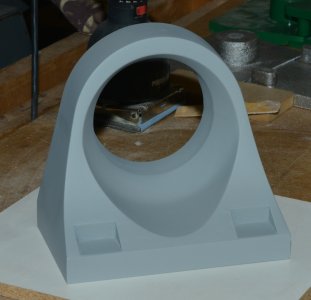
3. Primed
PatternPrep-2.jpg
4. Painted
PatternPrep-3.jpg
5. Trial run
Pulled-1.jpg

Yes. It could likely have been made out of wood or foam and some foam carving.
 

Arbutus

Super User
Premium Member
In my experience vapor smoothing only affects the surface to a depth of a few thou. (think case hardening). Acetone vapor cannot reach the internal surfaces in sufficient concentration to have any effect. If you leave the part in the vapor too long, hoping it will penetrate deeper, the part will melt into a puddle of goop !

A better way to add strength during printing is to pause the print and fill the hollow areas with epoxy injected by syringe. It is messy but it works for some parts.
 

Tom O

Ultra Member
Could you mist the print with acetone as you print it as it would have time to fuse and evaporate? Asking for a friend (yeah that’s it lol)
 
Top