Tool Gage pin

Tool

slow-poke

Ultra Member
I have two sets of gage pins, these would be lower accuracy class based on what I paid but I'm not sure I would want to clamp any of them into a collet. I should probably purchase at least one known good gage pin just for measuring run-out.

On my mill the total run-out as measured with a test indicator and a random 5/8 endmill just below the collet was < 0.0002". That's plenty good enough for me, however it would be nice to know where the error is (spindle, arbor, or gage pin, or all of the above)? Seems like it would be good to have at least one gage pin with known runout that I know is not contributing to the error.

Does any of this make sense?

Quick google search shows Class Z is 0.0001" and class X is 0.00004", so either one of those sounds good, not sure if you can trust an aliexpress Class whatever to actually be a class whatever, anyone have any experience with this?

What should I expect to pay? Amazon Meyer "X" is $40, Vermont is $35 not sure if that's crazy high price or not?

On eBay Deltronic Class X is $5 + shipping


My BB surface plate is supposed to be good to 0.0001" so I suppose I could try rolling one around on the surface plate while measuring, but that seems tricky staying on the high spot, not sure I could trust the results.
 
Last edited:

Mcgyver

Ultra Member
I think you are making life complicated unnecessarily (almost part of the gig, right?). just use the gauge pins you have or get a couple of (quality make) dowel pins.

The long winded version.....

- Clamping a gauge pin in a collet won't hurt it, they're hardened. I do it often enough to set up OD tools on my little turret lathe.
- No you can't trust certs from China. The only reason to believe any tolerance or calibration claim is if its from a credible source, basically beyond refute. Kind of excludes all the imports from China
- when checking them on the plate, use v blocks (that you have proven/verified) with the indicator on a surface gauge (with a flat bottom!)
- I wouldn't believe a BB surface plate claim, they're a retailer passing along products out of China or India so who knows about the certs.
- You could get a quality brand dowel pin, 1/4 or 3/8 maybe 1 - 2' long. they are hardened and I don't think i've ever checked one out that wasn't straight and consistent in diameter to a tenth.
 

PeterT

Ultra Member
Premium Member
@Mcgyver beat me to it. You might be entering the metrology range where temperature & phase of the moon (kidding) start to influence numbers. Are bearing tolerances within that range?
I don't know the answers. But I've always wondered if/how the same 0.00002" gage pin diametric specs also pertained to axial runout. You could have a banana shaped rod with very accurate diameter cross sections, but it would show runout while rotating.
 

Susquatch

Ultra Member
Administrator
Moderator
Premium Member
As a retired machinist/job shop owner, I find these discussions amusing. On a milling machine you measure .0002 runout accumulated between spindle, collet and pin?!! Quit fooling around and get back to work.

Alright, stop harping about work and getting things done. That kind of ideology is for retired job shop owners and doesn't apply to retired hobbiests.

Speaking only for myself I find it amusing that job shop owners seem to think I need to get any work done. I'm 77 and don't really care about work, efficiency, productivity, or any of those other silly profit oriented goals.

I just wanna have fun. I like pushing things to the limit and I like learning how much I can push myself and my machine!

I also like to waste money and time learning and doing what others might think is impossible or impractical.

Please take that as a different polar take in the same subject. Not as criticism. All said with a big huge smile on my face.

Does any of this make sense?

Yes, makes sense to me anyway. I agree with @Mcgyver and @PeterT - lots of ways to skin the cat.

When I break an endmill, I always keep the stub and put it into a recycle bin until I have time to sort them. When I do, I test them with a known good v-block for run out and longitudinal differences as Mcgyver suggested. Then I mark them with colour coating on the end.

That way I have a bunch of pins with known runout. I'd love to have a few very high quality pins to use a references. But my pin set isn't a really good one. My gauge blocks are.

I'd be willing to buy a FEW really good gauge pins if I found a good reliable source.

The trouble is that you need metrology that is better than what you are trying to measure or the results are always going to be questionable.
 

slow-poke

Ultra Member
Great responses everyone, thank you.

It's interesting to observe the various perspectives on something like this. I completely get both the just get it done as well as the let's explore this in a little more detail just to learn something.

I really enjoy digging into the details sometimes and I think it's enough to drive some people bonkers (I get it). Often when I'm exploring something that I know little or nothing about I ask a lot of questions from anyone interested in the subject, just to get different perspectives. One question I have found quite useful especially if the person has more experience is "If you were trying to do this or solve that how would you approach it"

I also find it interesting that some people can't seem to see that their solution that may be great for them might not be so great for someone else. Flood cooling comes to mind, it's easy to see the benefits there are many and in an production type shop likely a necessity. However for a hobby guy with the mill in a house were productivity is low on the priority list it might not make sense.

I'm like Susquatch in this respect It's all about having fun and learning, if I live to a hundred, life will be way too short.

I have been meaning to get a smaller set of V-bocks, perhaps I should get some "better" quality ones? It never ends;-)
 

Mcgyver

Ultra Member
I have been meaning to get a smaller set of V-bocks, perhaps I should get some "better" quality ones? It never ends;-)

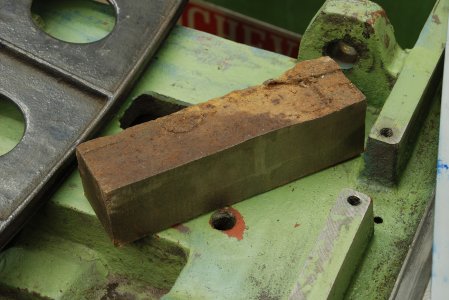
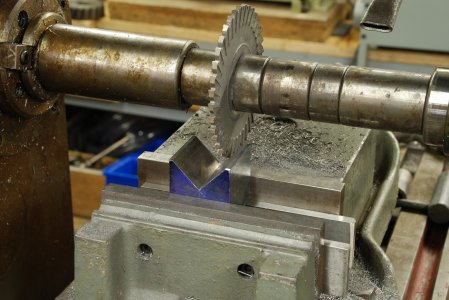
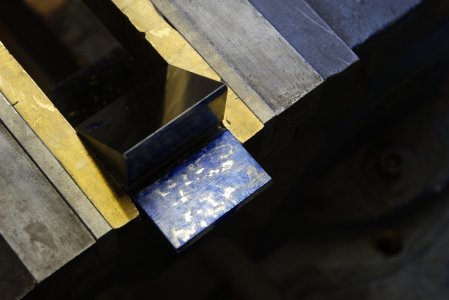
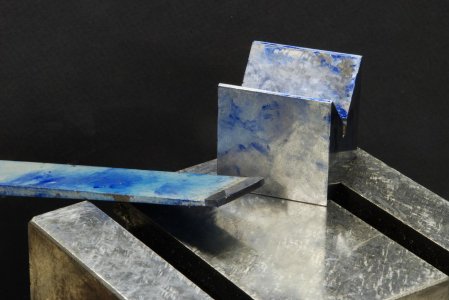
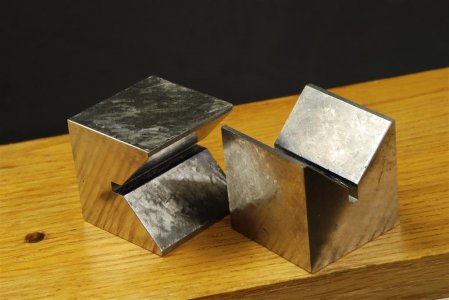
the best V blocks might be the ones you make ..... a few pics to make it interesting. These are by yours truly and are to a tenth in all directions. i wanted them very accurate as they rested on an inverted V way as part of some set up and gauging for a reconditioning project.

You can hit the tolerances you are talking about with simple home shop stuff ....... but you might have to make it to 101.

DSC_1538-1300x870.JPG

DSC_1577-1300x870.JPG


DSC_1724-1300x870.JPG

photo 001-1300x870.jpg


DSC_1670 (Large).JPG
 
Last edited:

Susquatch

Ultra Member
Administrator
Moderator
Premium Member
i wanted them very accurate as they rested on an inverted V way as part of some set up and gauging for a reconditioning project.

Are they good to a tenth on a given dimension (eg 2.0000 +/- 0.0001 or on each surface referenced to itself?

Did you make them as one block and then cut it in half, or separately.

They appear to be scraped?

Regardless, awesome work!
 

Mcgyver

Ultra Member
thanks, yes scraped, no idea the dimensions as that didn't matter. Made individually. They're matched in size, squareness, 90 degree V, out side surfaces relative to the V, centring of the V etc. Basically used the 90 as a gauge to scrape the inverted V, then with the blocks sitting on the V, the tops and sides of them are within a tenth. Those became the reference surfaces from which to measure (check parallelism of the corresponding way - was it going up or down or left or right relative to the blocks on the V way
 
Top