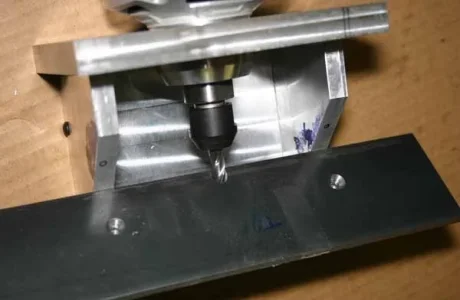
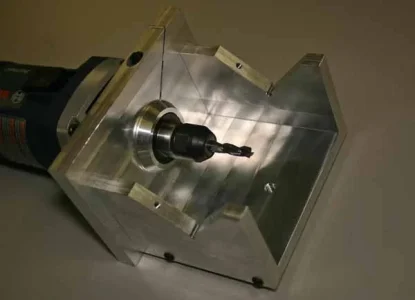
I guess I could call this Take-2. My first attempt was a V base I adapted onto a Makita variable speed trimmer router. The end of the cutter did the cutting, which was my preference. It worked but it had a few issues. It was kind of gangly to mount & not super safe to hold with one hand & push the work through with the other. The depth control used the stock ratchet wheel & clamp but it was kind coarse & hit & miss to adjust. The big concern was shavings were dropping through the cutter clearance hole & I figured the internals would get shorted.
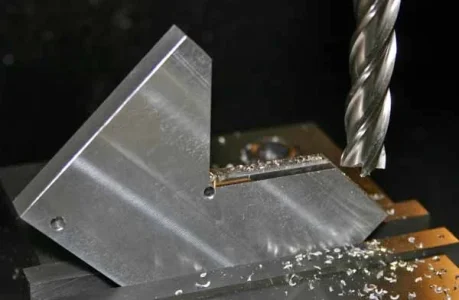
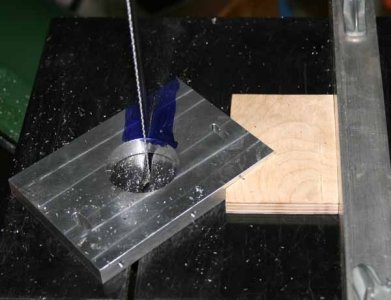
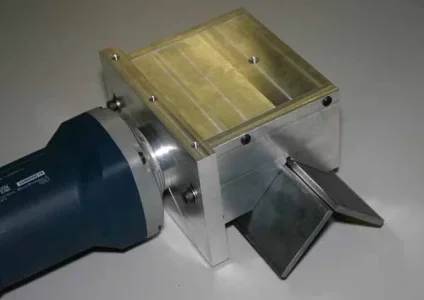
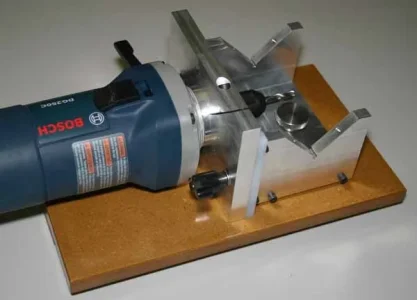
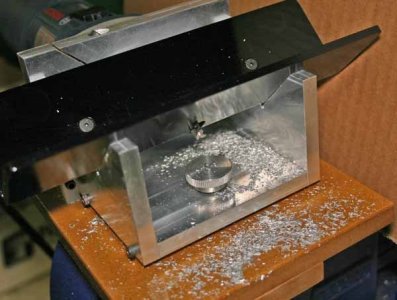
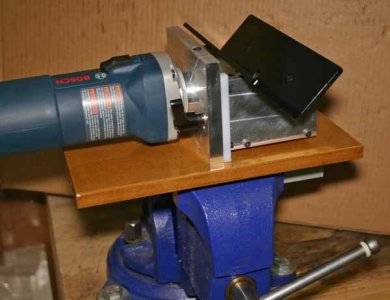
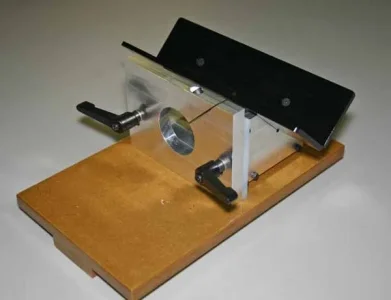
So this one uses my Bosch die grinder in lay down mode. Unfortunately this model is not variable speed but seems to work OK. This has the cutting action on the side of the end mill. Die grinder vents are more protected than routers by design. But the firewall, base & 2 side members kind of make a natural confined box. 90% the chips stay drop down into there, nothing back to the motor. Goggles recommended.
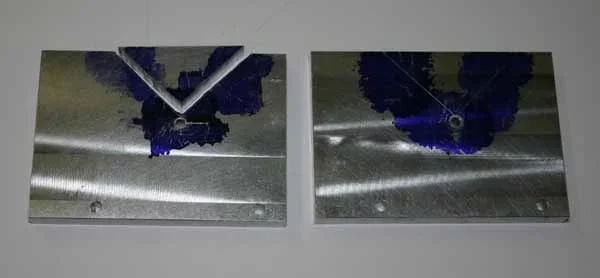
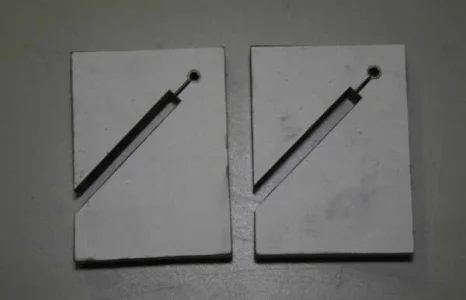
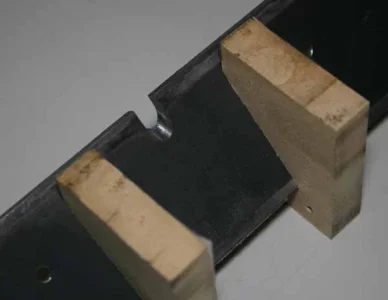
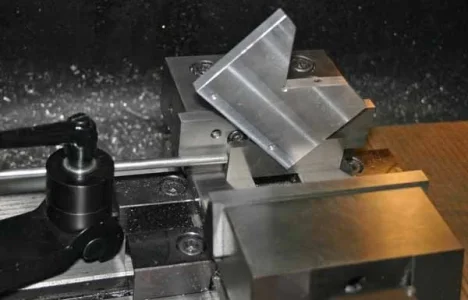
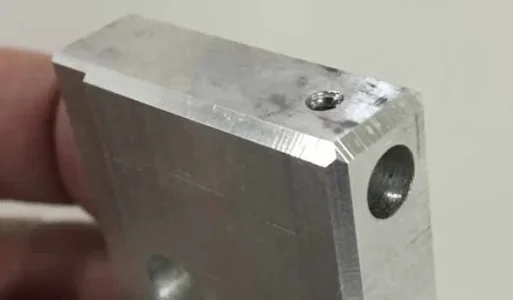
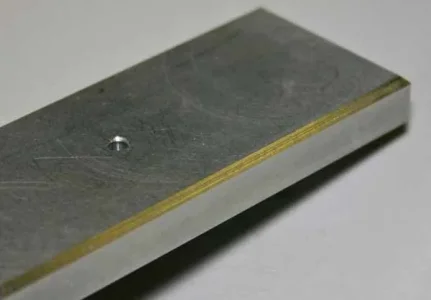
To adjust the chamfer, I loosen the clamp handles, turn the knurled knob which jacks up the V frame up or down. The frame is confined by the UHMW slide rails. The base is 1/2" MDF. Rather than mount the base which was the plan I screwed on a keel from same material. Much easier to just hold it the bench vise. The test cuts look pretty good. Quite smooth & consistent. The aluminum tester is about .070", the steel is about .020". You can zip through the edges pretty quick & there is no kick back tendency, its quite controlled.
The V rails were designed around 3/16" thickness but whatever I was handed at MSM I discovered too late was undersize. I think it was offcut from sheet metal stamping vs. rolled steel. Anyway after filing & straightening it still looked like crap & was starting to rust. I gave it the Tremclad spray bomb treatment which in hindsight was probably dumb, its probably going to just scratch off. Maybe a piece of stainless or something? Anyway, the machine turned out ok. Its meant to do work, now time to move on.
So this one uses my Bosch die grinder in lay down mode. Unfortunately this model is not variable speed but seems to work OK. This has the cutting action on the side of the end mill. Die grinder vents are more protected than routers by design. But the firewall, base & 2 side members kind of make a natural confined box. 90% the chips stay drop down into there, nothing back to the motor. Goggles recommended.
To adjust the chamfer, I loosen the clamp handles, turn the knurled knob which jacks up the V frame up or down. The frame is confined by the UHMW slide rails. The base is 1/2" MDF. Rather than mount the base which was the plan I screwed on a keel from same material. Much easier to just hold it the bench vise. The test cuts look pretty good. Quite smooth & consistent. The aluminum tester is about .070", the steel is about .020". You can zip through the edges pretty quick & there is no kick back tendency, its quite controlled.
The V rails were designed around 3/16" thickness but whatever I was handed at MSM I discovered too late was undersize. I think it was offcut from sheet metal stamping vs. rolled steel. Anyway after filing & straightening it still looked like crap & was starting to rust. I gave it the Tremclad spray bomb treatment which in hindsight was probably dumb, its probably going to just scratch off. Maybe a piece of stainless or something? Anyway, the machine turned out ok. Its meant to do work, now time to move on.
Attachments
-
 IMG_0313_edited-1.webp9 KB · Views: 34
 -
 IMG_6557_edited-1.webp9.3 KB · Views: 35
 -
 IMG_6558_edited-1.webp19.6 KB · Views: 36
 -
 IMG_6579_edited-1.webp17.1 KB · Views: 36
 -
 IMG_6576_edited-1.jpg33.1 KB · Views: 38
 -
 IMG_6567_edited-1.jpg25.3 KB · Views: 40
 -
 IMG_6580_edited-1.webp12.9 KB · Views: 38
 -
 IMG_6582_edited-1.webp15.8 KB · Views: 38