Bofobo
M,Mizera(BOFOBO)
It has been a long time since I have made a post. But I wanted to share this amazing failure.
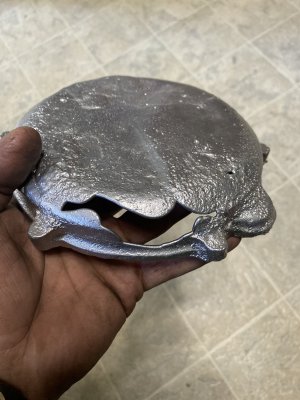
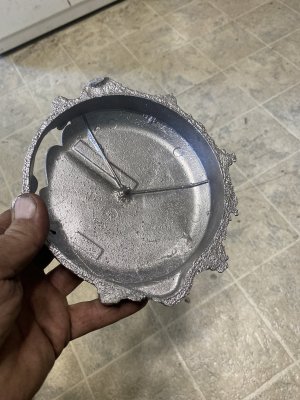
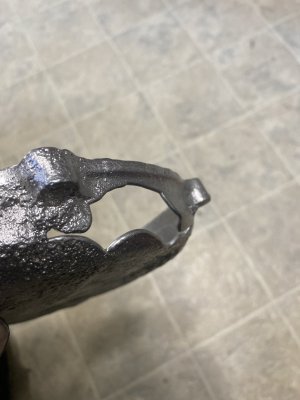
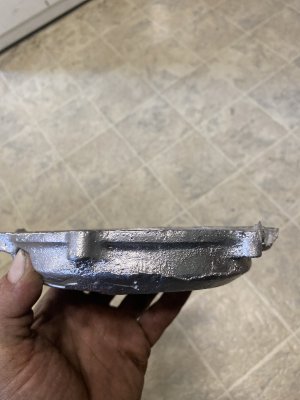
 While I spend most of my time in the woods over summer I get fancy ideas, this was no exception. I dropped my dirtbike on a root which punctured my clutch cover, ok epoxy fixed it for riding short stints but it was leaking constantly because it would get chipped off. And a notorious foot brake puncture was also a constant pain. The cover is magnesium originally so patching is not an option. So on to the summer. I have a spot I don’t move much but I do intense clean ups of the campsites so the conservation et.el officers don’t ask me to move on. So I made my own green sand. Using a small area of clay found nearby and some sand a bit finer than play sand from a sand bag i Found abandoned at one of these sites, along with all the aluminum I found in the ash layers of a great many fire pits plus some scrap I’ve accumulated from other years clean ups. And wood made from self harvested lumber using an Alaskan chainsaw mill for the flasks. I had everything I needed so I went for it. I tried many times after this but my mold failed. I Didn’t put extra weight on the top once I had my sprue and vents all placed on this first attempt. But I hand mulled the sand with a stone and mixed it in a tarp. Filled in the voids and holes with straight clay as well as the Honda name. I was so close but the side lifted and it was lost, I’ll keep this piece for a long long time I’m sure. Enjoy the photos, when the youtube video gets through the queue I’ll add a link so you can see what I did. Would love to get a sub to my New channel as my friend and I will be doing metal work projects along with other real life adventures.
 While I spend most of my time in the woods over summer I get fancy ideas, this was no exception. I dropped my dirtbike on a root which punctured my clutch cover, ok epoxy fixed it for riding short stints but it was leaking constantly because it would get chipped off. And a notorious foot brake puncture was also a constant pain. The cover is magnesium originally so patching is not an option. So on to the summer. I have a spot I don’t move much but I do intense clean ups of the campsites so the conservation et.el officers don’t ask me to move on. So I made my own green sand. Using a small area of clay found nearby and some sand a bit finer than play sand from a sand bag i Found abandoned at one of these sites, along with all the aluminum I found in the ash layers of a great many fire pits plus some scrap I’ve accumulated from other years clean ups. And wood made from self harvested lumber using an Alaskan chainsaw mill for the flasks. I had everything I needed so I went for it. I tried many times after this but my mold failed. I Didn’t put extra weight on the top once I had my sprue and vents all placed on this first attempt. But I hand mulled the sand with a stone and mixed it in a tarp. Filled in the voids and holes with straight clay as well as the Honda name. I was so close but the side lifted and it was lost, I’ll keep this piece for a long long time I’m sure. Enjoy the photos, when the youtube video gets through the queue I’ll add a link so you can see what I did. Would love to get a sub to my New channel as my friend and I will be doing metal work projects along with other real life adventures.