• Scam Alert. Members are reminded to NOT send money to buy anything. Don't buy things remote and have it shipped - go get it yourself, pay in person, and take your equipment with you. Scammers have burned people on this forum. Urgency, secrecy, excuses, selling for friend, newish members, FUD, are RED FLAGS. A video conference call is not adequate assurance. Face to face interactions are required. Please report suspicions to the forum admins. Stay Safe - anyone can get scammed.
  • Several Regions have held meetups already, but others are being planned or are evaluating the interest. The Ontario GTA West area meetup is planned for Saturday April 26th at Greasemonkeys shop in Aylmer Ontario. If you are interested and haven’t signed up yet, click here! Arbutus has also explored interest in a Fraser Valley meetup but it seems members either missed his thread or had other plans. Let him know if you are interested in a meetup later in the year by posting here! Slowpoke is trying to pull together an Ottawa area meetup later this summer. No date has been selected yet, so let him know if you are interested here! We are not aware of any other meetups being planned this year. If you are interested in doing something in your area, let everyone know and make it happen! Meetups are a great way to make new machining friends and get hands on help in your area. Don’t be shy, sign up and come, or plan your own meetup!

Tips/Techniques A 3D printed solution

Tips/Techniques

jcdammeyer

John
Premium Member
I was trying to figure out how to cut a nice clean rectangular hole in a plastic box for an AC Adapter connector. Now I know they come round but back in 1993 when I spent some time in Hong Kong I bought a bag of 100 of these
1701646018055.png

So paying a few dollars for a panel version just didn't make sense.
First thing I did, partly for practice and there was nothing interesting on the TV to watch while sitting with SWMBO in the evening, was draw a model.
1701646118214.png

A friend suggested instead of trying to make a rectangular hole just 3D print a mount for it with the hole. Hmmm....

A bit more CAD and then 3D printing...
1701646242858.png


1701646277942.png

Now all that's left to do is solder on the wires, hot melt glue pushed in around it while it sits flat on the cold table-saw top and I have a panel mountable holder.

And there it is, mounted with the AC adaptor plugged into it.
1701646534151.webp
 
The hole point of this was to try and run these lights off a smaller 24V only supply and not have them networked and not use a huge connector. One of the units I've modified is going to sit under one of the trees in the yard as a Christmas light.

Some might recall my discussion about path lights and how to mount them. I made this video in September 2018 and as yet have not gone further. So getting to the point where I've pulled a few out and modified one to work off a 24V AC adapter is a big step. Not only that I can modify the boards to just run on 12V as totally stand alone. Then they wouldn't have network capability but maybe I can make that work too.


In either case, having the bigger 3D printer and being able to print a larger mounting ring has been awesome. Thanks to my friend Joe M. for doing the Fusion stuff which my Alibre Version 26 cannot do. (Apparently Version 27 will but I don't have $659 US to spare). My Alibre can put text along a straight line but not along a curve.

The lamp mounts onto that ring which has the printing and raised it up enough so the power connector doesn't sit on the table.


ModifiedLamp.jpg


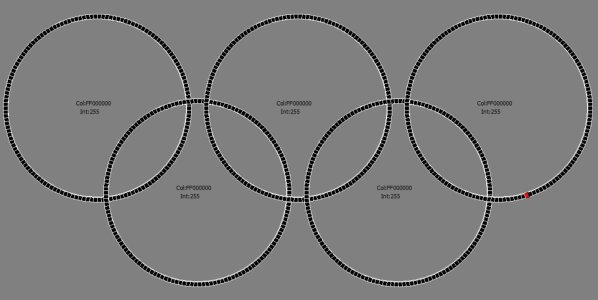
Oh and this lamp was originally at the YVR rings in this position (Red Dot).
Ring5Lamp69.jpg

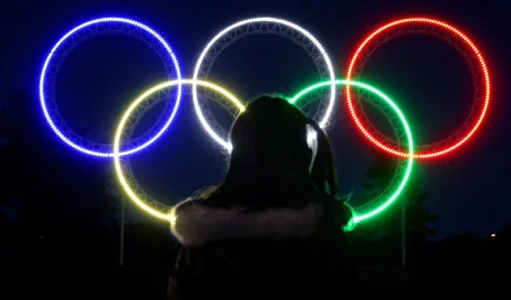
In real life the rings were 5 stories high.
DUSKRINGBackground.jpg
 

Attachments

  • 24-Sport-Olympic-rings-005.webp
    24-Sport-Olympic-rings-005.webp
    23.5 KB · Views: 8
Last edited:
Back
Top