Well it has been a long, long haul getting my lathe operational dating back to ~May this year. But I’m happy to report it’s been running for a couple weeks now & (knock on wood) seems to be silky smooth. Maybe even better than it ever ran but I don’t want to jinx it. I’ve got about 200 pics & probably just as many emails. So here is the story highlights in case you run into similar issues.
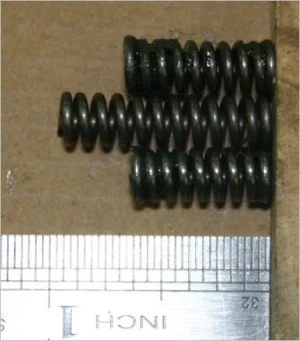
The problem started under power feeding. Nothing excessive, 0.025-.035” DOC in steel. My clutch started clicking, then complained louder, then finally disengaged altogether. I removed the clutch springs & balls, stretched them a bit, no improvement. By hand I could feel the power feed bar was binding so something was amiss in the apron. I was very fortunate to meet John Conroy on this forum who owns same lathe different name & he helped me through the initial disassembly when he was in town. Thanks John!
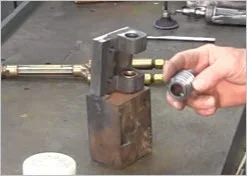
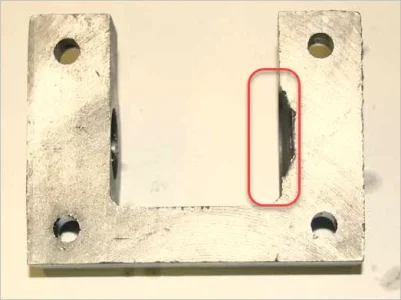
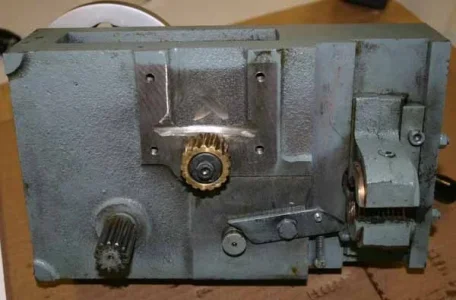
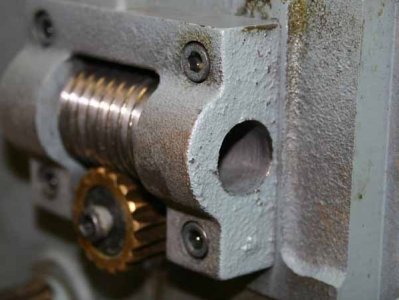
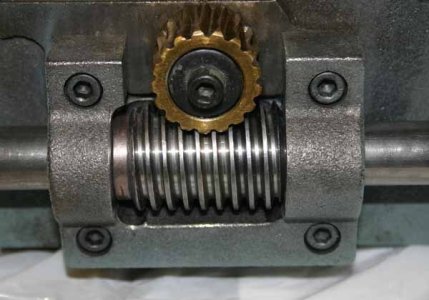
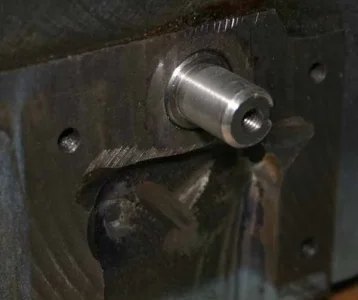
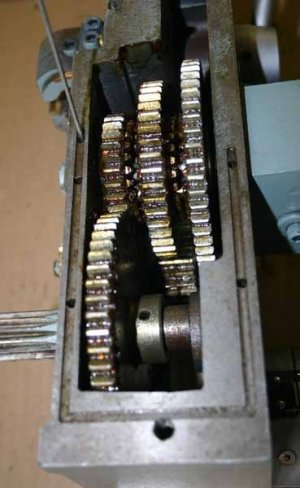
After teardown & apron removed I saw the worm gear had worn away at the cast iron C bracket that retains it. Rather disturbing because this machine has seen relatively light duty up until a few years ago. Fortunately the (hardened) worm gear was not damaged. FYI there is an excellent 12-part Keith Fenner YouTube series called Lets Look Under The Old Girls Apron where he rebuilds a distant Taiwan 14x40 cousin of my lathe & he had this exact same issue. Newer lathes have a different layout improvement. I milled a flat in the bracket correcting the wear & John turned me a bronze spacer ring from a Princess Auto bronze bushing that acted as a glorified thrust washer.
After reassembly it was slightly better but clutch still disengaged. Bummer. If I rotated the PF rod by hand it turned ¾ turn free then frictioned up. But this is also where the worm uses up its backlash & starts to engage & pull so the problem could be elsewhere. This began the journey of WTF 10 possible things that might cause friction. I removed the carriage top & cleaned up the <cough> ‘scraping’ so it slid better on the ways. I checked all the carriage gears & shafts, they run smooth on the bench. I fiddled with the alignment of the C bracket because it’s a loosey-goosey bolt-on design that can rub on the shaft with the bolt pattern tolerance. I removed the helix gear & its shaft from the apron. Gear was worn but hard to know if sufficiently bad. Every time I made an attempted fix or adjustment I had to re-assemble the lathe to see if it worked.
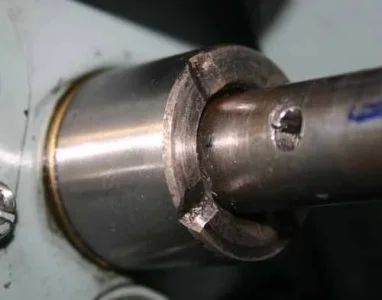
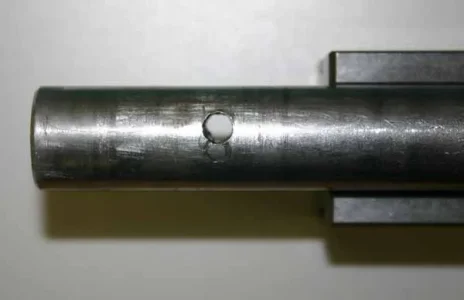
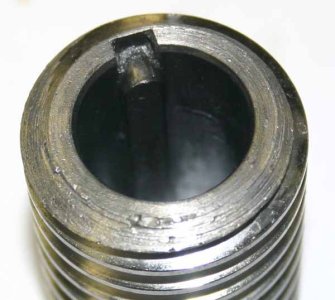
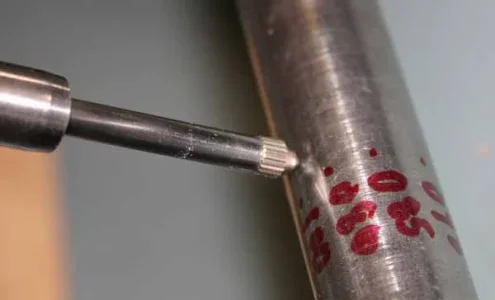
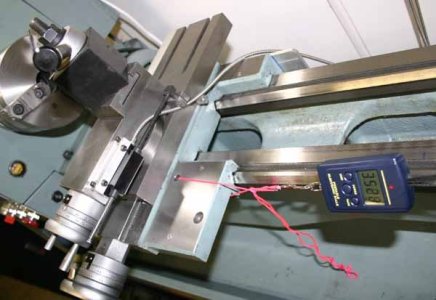
Finally I had the overdue thought to just check the PF rod runout itself by putting it back in the lathe supported by the clutch cup & tailstock bearing block. Then DTI mapping down the rod length. Sure enough it was bent, max 0.075” at about 1/3 length from headstock. Predominantly in the same plane as the keyway slot. I’ve heard that the shaft can stress relieve itself over time on the keyway, or maybe it got distorted when the bracket wore? Or maybe it was not true to begin with & the wear aggravated it?
My options were straighten or replace, so I pursued both. I could find a similar (19mm OD x 5mm keyway) from Chinese lathe which would need to be modified, about $200 & a couple months delivery. I wasn’t too concerned about the tailstock turndown mod. But the thing you come to realize about Asian iron is they do some bizarre things when it comes to drilling roll pins in these rotating parts. Like off center & at ‘hand drill’ angles. So matching that off-geometry to other parts like clutch cup wasn’t too appealing. Enter Modern Tool who went out of their way to source me parts from Taiwan including new helix gear (which engages worm) & some other spares. Unfortunately my shaft was no longer available. New shafts are very expensive. Milling an IMP (7/8”) shaft keyway is do-able, but I was told it would probably warp more than what I had.
So I took my PF rod to a local place called Driveline Experts where they do that kind of straightening press work. Unfortunately it just wasn’t getting done so after 4 months of patient waiting & polite phone calls I took it back. I then contacted Keith Fenner. He has a lot of talents but shaft straightening is his forte. Plus he is a super nice guy. I shipped it down & he had done within a week within 0.005”. I’ll attach a link where I’m now semi-famous (inside joke).
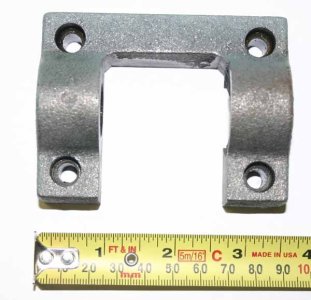
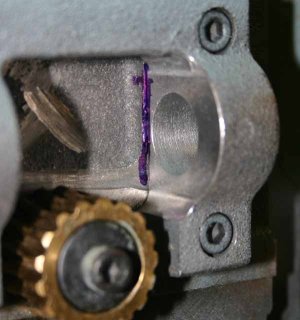
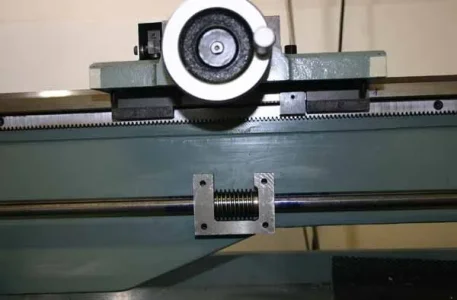
Now with a perfectly straight shaft this baby is finally going together! Not so fast. Again, better but not still not right. WTF. More email exchanges with John. What could be different? I started to get the sense by elimination maybe it always was a bit out of alignment but basically ran despite itself. The driveline will overcome a certain amount of resistance by brute force. I noticed the bracket holes were oversize but shiny on one side (read bowing the bar into submission). There is also no datum, pins or contact registry of apron to carriage, just 2 bolts holding the apron on. That carries the bracket & worm along for the ride. Another potential misalignment?
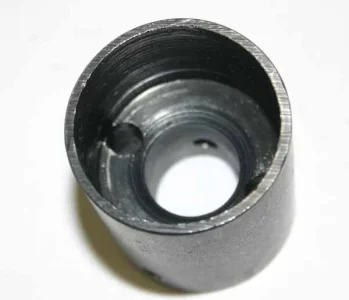
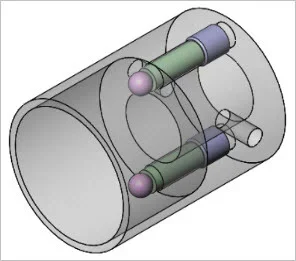
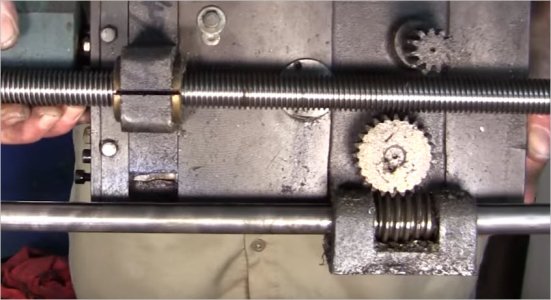
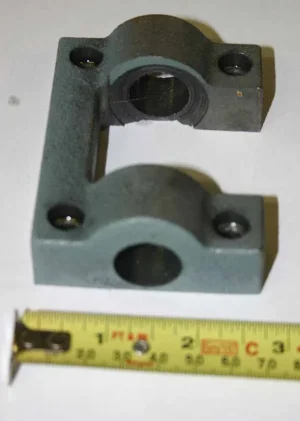
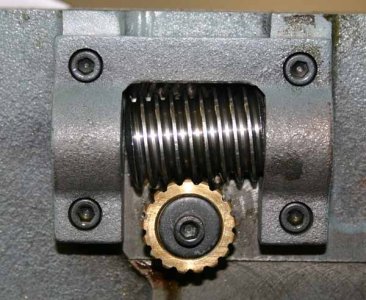
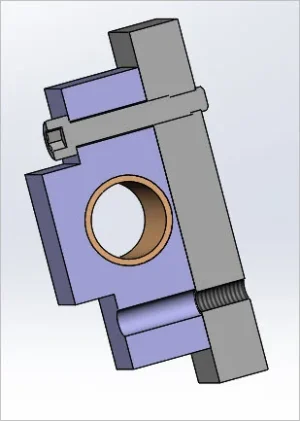
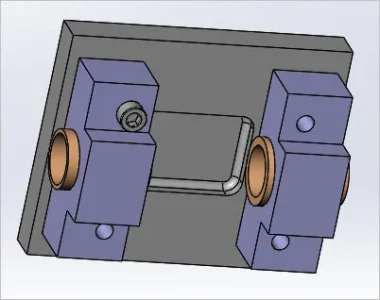
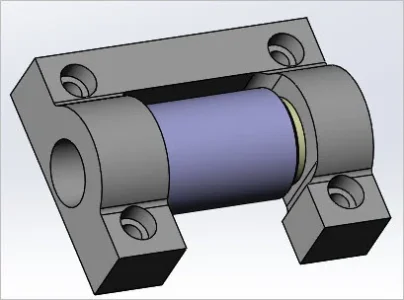
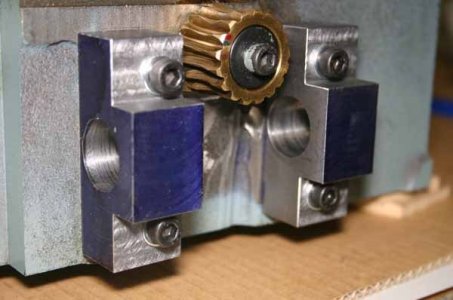
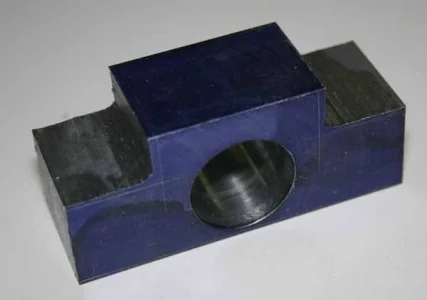
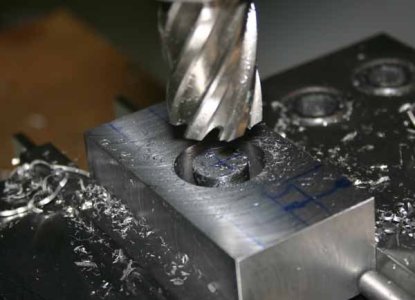
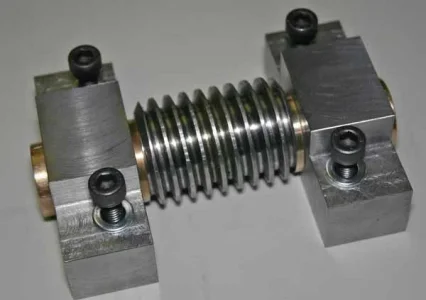
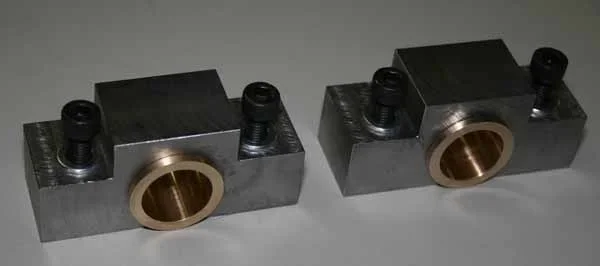
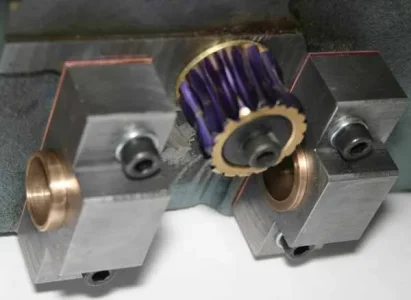
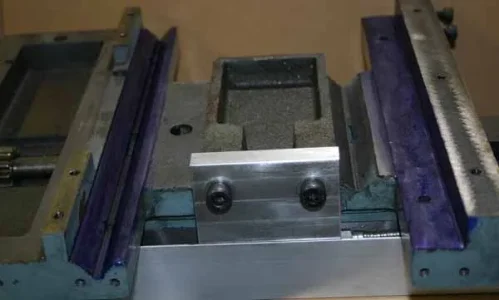
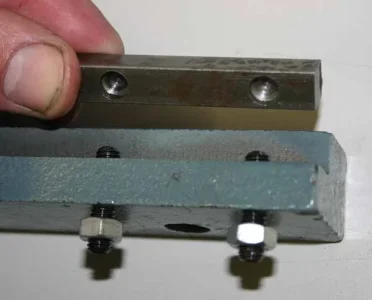
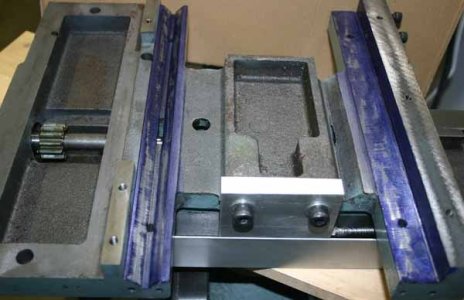
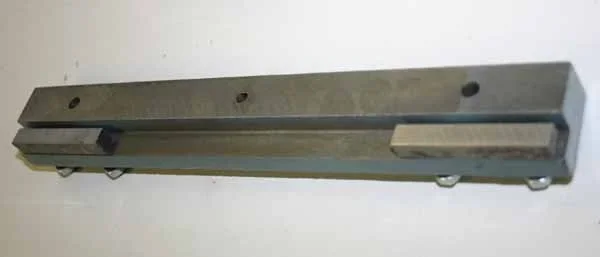
So I decided to replace the C-bracket & make 2 independent steel blocks, each with longer bronze bushings. This allowed me to float the blocks into position using the rod to dictate concentricity. I made them undersize so that I could shim the blocks to however they fit on apron & match the bolt pattern. The bronze gives me longer sleeve area & also have bushing boss material on either side of worm. This is desirable because when you power feed carriage in either direction or PF cross slide, the worm thrusts to opposite sides & contacts this.
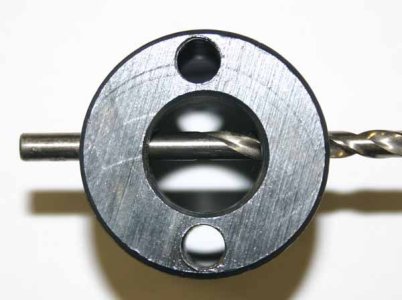
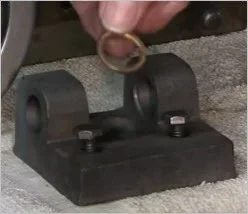
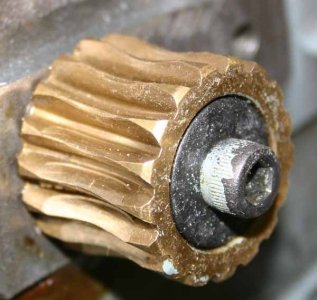
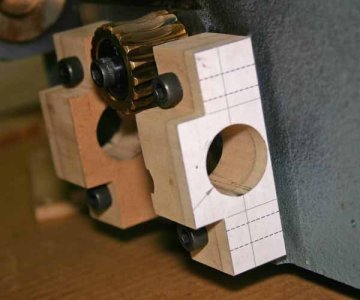
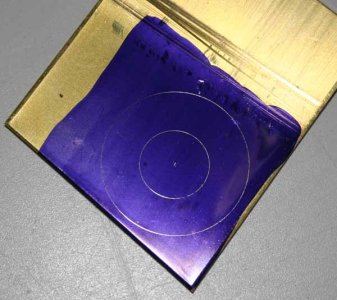
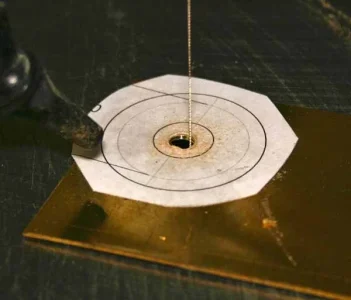
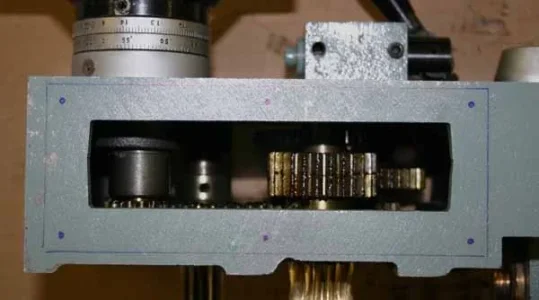
That led me to realize the brass helix gear that engages the worm & drives the carriage also has to be exactly centered to the worm gear. The gear is kind of a saddle profile so if it’s displaced in or out just a bit, the teeth engagement will bind up. So measured it out & made a shim washer to ensure it stayed aligned.
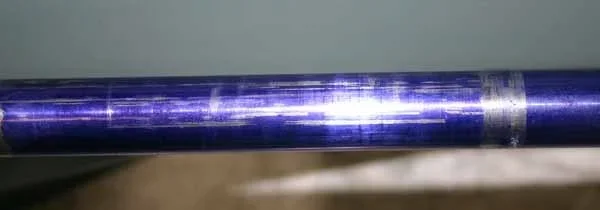
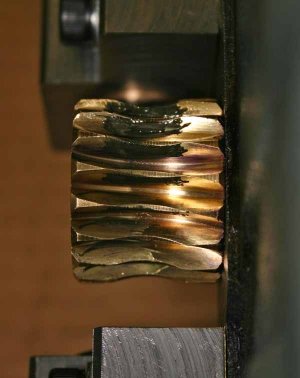
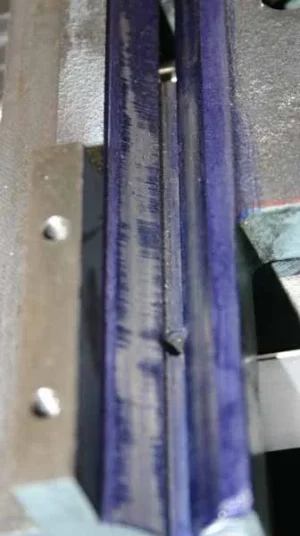
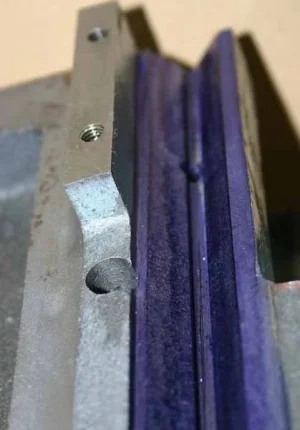
Everyone still awake? 🙂 Now it’s Dec & re-assembly again (I’m getting good at this). New clutch springs, new PT bushing blocks, new brass helix gear, and new alignment. After some careful power traversing & monitoring… It seems happy-happy now. After a couple hours rotating I could still see my rod bluing slowly rubbing off indicating the bushings are sliding nicely & doing their job. The clutch set screws are now set much more conservative than ever which indicates to me the feed power is using its energy traversing vs. overcoming binding & friction.
I’ll bang some pictures in. If you have any questions just ask. Aside from the headache factor, at least I now know a lot more about my lathe.
The problem started under power feeding. Nothing excessive, 0.025-.035” DOC in steel. My clutch started clicking, then complained louder, then finally disengaged altogether. I removed the clutch springs & balls, stretched them a bit, no improvement. By hand I could feel the power feed bar was binding so something was amiss in the apron. I was very fortunate to meet John Conroy on this forum who owns same lathe different name & he helped me through the initial disassembly when he was in town. Thanks John!
After teardown & apron removed I saw the worm gear had worn away at the cast iron C bracket that retains it. Rather disturbing because this machine has seen relatively light duty up until a few years ago. Fortunately the (hardened) worm gear was not damaged. FYI there is an excellent 12-part Keith Fenner YouTube series called Lets Look Under The Old Girls Apron where he rebuilds a distant Taiwan 14x40 cousin of my lathe & he had this exact same issue. Newer lathes have a different layout improvement. I milled a flat in the bracket correcting the wear & John turned me a bronze spacer ring from a Princess Auto bronze bushing that acted as a glorified thrust washer.
After reassembly it was slightly better but clutch still disengaged. Bummer. If I rotated the PF rod by hand it turned ¾ turn free then frictioned up. But this is also where the worm uses up its backlash & starts to engage & pull so the problem could be elsewhere. This began the journey of WTF 10 possible things that might cause friction. I removed the carriage top & cleaned up the <cough> ‘scraping’ so it slid better on the ways. I checked all the carriage gears & shafts, they run smooth on the bench. I fiddled with the alignment of the C bracket because it’s a loosey-goosey bolt-on design that can rub on the shaft with the bolt pattern tolerance. I removed the helix gear & its shaft from the apron. Gear was worn but hard to know if sufficiently bad. Every time I made an attempted fix or adjustment I had to re-assemble the lathe to see if it worked.
Finally I had the overdue thought to just check the PF rod runout itself by putting it back in the lathe supported by the clutch cup & tailstock bearing block. Then DTI mapping down the rod length. Sure enough it was bent, max 0.075” at about 1/3 length from headstock. Predominantly in the same plane as the keyway slot. I’ve heard that the shaft can stress relieve itself over time on the keyway, or maybe it got distorted when the bracket wore? Or maybe it was not true to begin with & the wear aggravated it?
My options were straighten or replace, so I pursued both. I could find a similar (19mm OD x 5mm keyway) from Chinese lathe which would need to be modified, about $200 & a couple months delivery. I wasn’t too concerned about the tailstock turndown mod. But the thing you come to realize about Asian iron is they do some bizarre things when it comes to drilling roll pins in these rotating parts. Like off center & at ‘hand drill’ angles. So matching that off-geometry to other parts like clutch cup wasn’t too appealing. Enter Modern Tool who went out of their way to source me parts from Taiwan including new helix gear (which engages worm) & some other spares. Unfortunately my shaft was no longer available. New shafts are very expensive. Milling an IMP (7/8”) shaft keyway is do-able, but I was told it would probably warp more than what I had.
So I took my PF rod to a local place called Driveline Experts where they do that kind of straightening press work. Unfortunately it just wasn’t getting done so after 4 months of patient waiting & polite phone calls I took it back. I then contacted Keith Fenner. He has a lot of talents but shaft straightening is his forte. Plus he is a super nice guy. I shipped it down & he had done within a week within 0.005”. I’ll attach a link where I’m now semi-famous (inside joke).
Now with a perfectly straight shaft this baby is finally going together! Not so fast. Again, better but not still not right. WTF. More email exchanges with John. What could be different? I started to get the sense by elimination maybe it always was a bit out of alignment but basically ran despite itself. The driveline will overcome a certain amount of resistance by brute force. I noticed the bracket holes were oversize but shiny on one side (read bowing the bar into submission). There is also no datum, pins or contact registry of apron to carriage, just 2 bolts holding the apron on. That carries the bracket & worm along for the ride. Another potential misalignment?
So I decided to replace the C-bracket & make 2 independent steel blocks, each with longer bronze bushings. This allowed me to float the blocks into position using the rod to dictate concentricity. I made them undersize so that I could shim the blocks to however they fit on apron & match the bolt pattern. The bronze gives me longer sleeve area & also have bushing boss material on either side of worm. This is desirable because when you power feed carriage in either direction or PF cross slide, the worm thrusts to opposite sides & contacts this.
That led me to realize the brass helix gear that engages the worm & drives the carriage also has to be exactly centered to the worm gear. The gear is kind of a saddle profile so if it’s displaced in or out just a bit, the teeth engagement will bind up. So measured it out & made a shim washer to ensure it stayed aligned.
Everyone still awake? 🙂 Now it’s Dec & re-assembly again (I’m getting good at this). New clutch springs, new PT bushing blocks, new brass helix gear, and new alignment. After some careful power traversing & monitoring… It seems happy-happy now. After a couple hours rotating I could still see my rod bluing slowly rubbing off indicating the bushings are sliding nicely & doing their job. The clutch set screws are now set much more conservative than ever which indicates to me the feed power is using its energy traversing vs. overcoming binding & friction.
I’ll bang some pictures in. If you have any questions just ask. Aside from the headache factor, at least I now know a lot more about my lathe.