• Scam Alert. Members are reminded to NOT send money to buy anything. Don't buy things remote and have it shipped - go get it yourself, pay in person, and take your equipment with you. Scammers have burned people on this forum. Urgency, secrecy, excuses, selling for friend, newish members, FUD, are RED FLAGS. A video conference call is not adequate assurance. Face to face interactions are required. Please report suspicions to the forum admins. Stay Safe - anyone can get scammed.

When Conditions Become Pressing!!

carrdo

Active Member
HI All,

I think that only I could do it this way. When conditions become pressing! All of the following for only one operation.

How to turn a standard bench arbor press into something else.

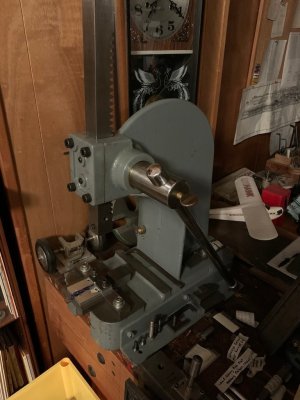
Anyway, the story. I purchased this used bench arbor press some decades ago now and slowly have been transforming it into my go to tool for things it was never designed to do. It seems that this is a situation which repeats itself over and over again.

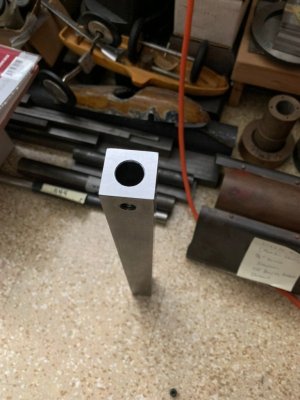
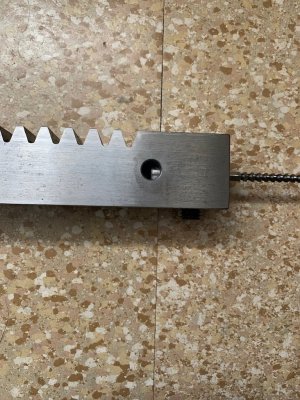
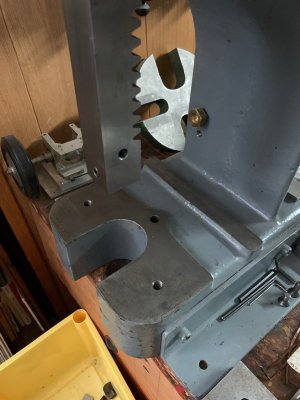
This press came with a few non standard features which I guess had been added by the previous owner(s). Chief among these was the ram, which had been modified to accept a precision 5/8" diameter reamed centre hole in the pressing end which would allow one to insert various other tools and a drilled and threaded base which would allow one to attach numerous fixtures to the base of the press. This turned out to be extremely useful in my case.

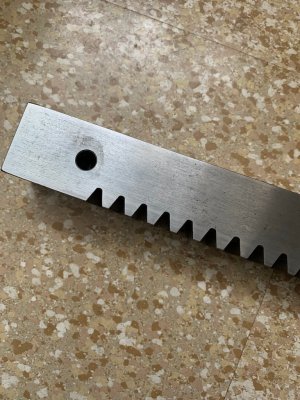
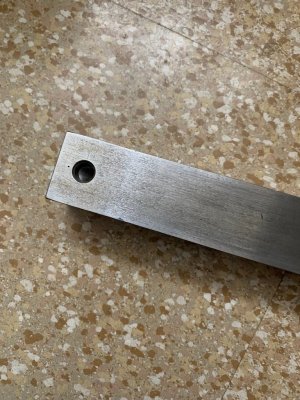
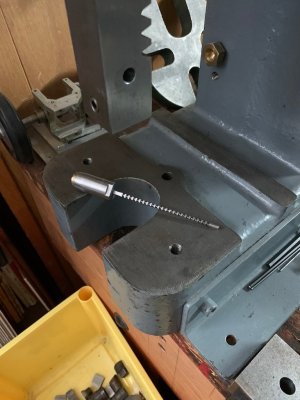
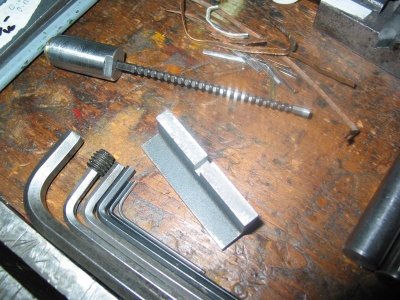
I added some additional modifications of my own namely I drilled and reamed a new access hole in the side of the ram as seen in photos 665 and 667. In certain high pressure broaching situations, the broach head steady as seen in photo 669, despite being tapered at one end would lock itself in the centre hole in the ram so I needed to be able to insert a non metallic drift to mechanically free the broach assembly after use.

The broach seen in photo 669 is a 1/8" square DuMont. These small broaches are obscenely expensive and quite delicate so you need to do everything humanly possible to align the broach straight and square to the work and prevent any off centre or sideways slippage/bending when broaching.

What is to follow is what I do to achieve the above and it approaches the insane.

To be continued.
 

Attachments

  • 663 The Bench Arbor Press.jpg
    663 The Bench Arbor Press.jpg
    124.8 KB · Views: 30
  • 664 The Pressing End of the Arbor Press Ram.jpeg
    664 The Pressing End of the Arbor Press Ram.jpeg
    110.3 KB · Views: 26
  • 665 The Pressing End of the Ram.jpg
    665 The Pressing End of the Ram.jpg
    183.1 KB · Views: 14
  • 666 The Pressing End of the Ram.jpg
    666 The Pressing End of the Ram.jpg
    193.8 KB · Views: 13
  • 667 The Pressing End of the Ram.jpg
    667 The Pressing End of the Ram.jpg
    219 KB · Views: 12
  • 668 The Arbor Press Base.jpg
    668 The Arbor Press Base.jpg
    116.7 KB · Views: 16
  • 669 The Arbor Press Base.jpg
    669 The Arbor Press Base.jpg
    122.8 KB · Views: 30
HI All,

I think that only I could do it this way. When conditions become pressing! All of the following for only one operation.

How to turn a standard bench arbor press into something else.

Anyway, the story. I purchased this used bench arbor press some decades ago now and slowly have been transforming it into my go to tool for things it was never designed to do. It seems that this is a situation which repeats itself over and over again.

This press came with a few non standard features which I guess had been added by the previous owner(s). Chief among these was the ram, which had been modified to accept a precision 5/8" diameter reamed centre hole in the pressing end which would allow one to insert various other tools and a drilled and threaded base which would allow one to attach numerous fixtures to the base of the press. This turned out to be extremely useful in my case.

I added some additional modifications of my own namely I drilled and reamed a new access hole in the side of the ram as seen in photos 665 and 667. In certain high pressure broaching situations, the broach head steady as seen in photo 669, despite being tapered at one end would lock itself in the centre hole in the ram so I needed to be able to insert a non metallic drift to mechanically free the broach assembly after use.

The broach seen in photo 669 is a 1/8" square DuMont. These small broaches are obscenely expensive and quite delicate so you need to do everything humanly possible to align the broach straight and square to the work and prevent any off centre or sideways slippage/bending when broaching.

What is to follow is what I do to achieve the above and it approaches the insane.

To be continued.
Wow! You're doing a lot of what is on my list for my 3 Ton. That project (#42) was also going to add a small XY motion assembly to hold sheet metal so I could punch holes for metal boxes. One of my ELS units would have the software modified to read a list of positions and prompt the operator to both insert a new tool and/or pull on the handle.

Looking forward to more on your project.
 
Hi All,

I agree with Ironman that, whenever possible, I would broach the way he has done it and I have done it this way in the past also but there are situations where one has to present the broach to the work in a certain geometric orientation or the shape of the work does not allow for "free" broaching and in such cases both the work and the broach have to be fixtured to the ying-yang. This was the case here as you are soon going to see.
 
Hi All,

To continue,

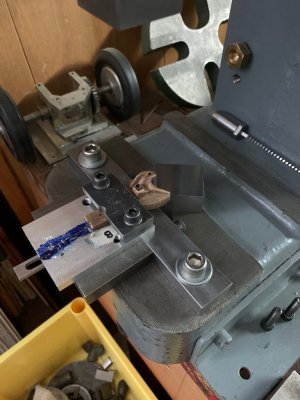
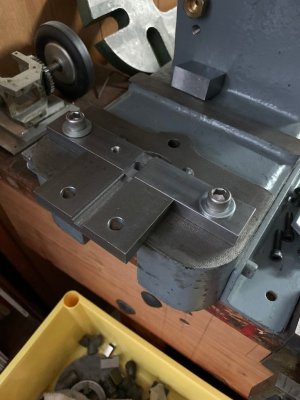
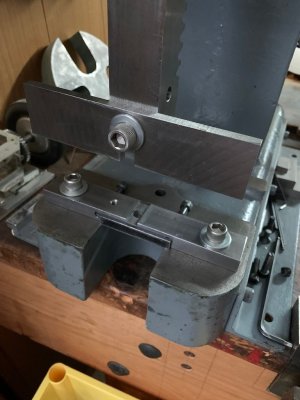
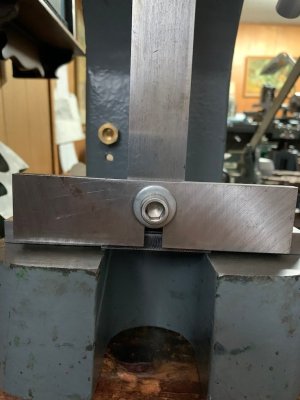
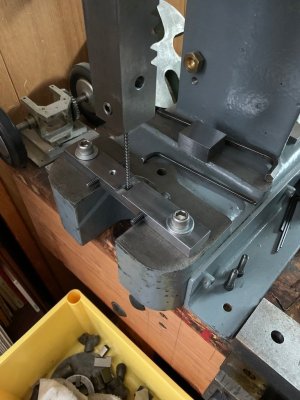
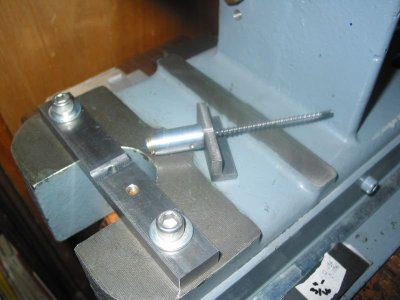
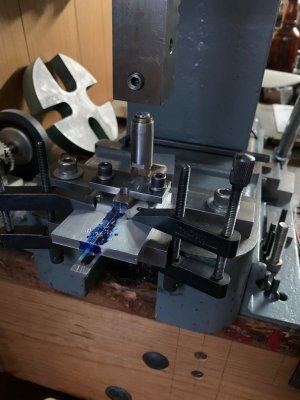
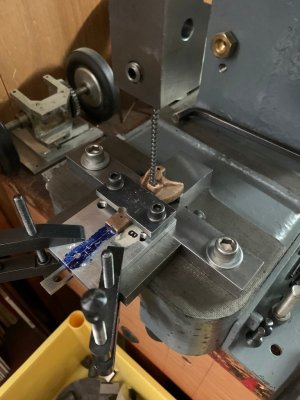
For the part holding fixture which was used in this case, the first operation was to set the first part of the fixture dead square to the front face of the arbor press ram. The photos show how this was done and the progressive additions to the fixture to produce a complete part holding unit. All of the locating slots were made a push fit. I like to use a very sharp, but undersized, square cornered end mill for such operations as one can remove the majority of the material first and then shave down each side wall to get whatever slot fit one desires. This way, the slots will also be truly parallel, straight and square (and not tapered depthwise) vs what one will get if you try and produce a slot with a new end mill in one or two passes.
 

Attachments

  • 674 The Locating Part Holding Fixture with Front Support Block.jpg
    674 The Locating Part Holding Fixture with Front Support Block.jpg
    127.6 KB · Views: 13
  • 673 Additional Parts to the Part Pressing Fixture.jpg
    673 Additional Parts to the Part Pressing Fixture.jpg
    116.9 KB · Views: 4
  • 672 Part Pressing Fixture Set Square to the Arbor Press Ram.jpg
    672 Part Pressing Fixture Set Square to the Arbor Press Ram.jpg
    106.4 KB · Views: 5
  • 671 Setting the Part Pressing Fixture Square to the Arbor Press Ram.jpg
    671 Setting the Part Pressing Fixture Square to the Arbor Press Ram.jpg
    103.9 KB · Views: 9
  • 670 Part Pressing Fixture.jpg
    670 Part Pressing Fixture.jpg
    135.5 KB · Views: 12
Last edited:
Hi All,

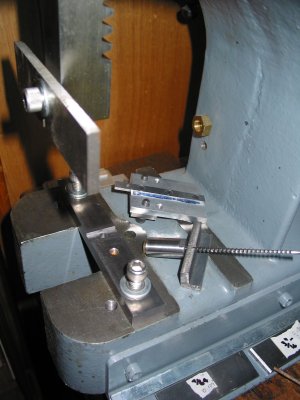
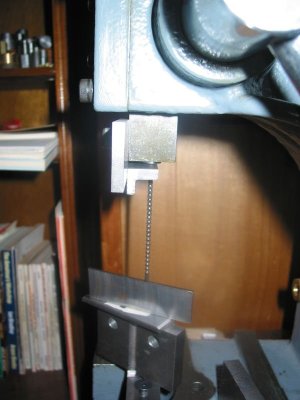
The next operation was to precisely align the broach square to the front face of the ram. To accomplish this I machined a stout squared angle piece with a central slot which precisely fit the top end square on the broach (photos 675, 676). This was then set against the ground extended horizontal plate attached to the front face of the arbor press ram as seen in photos 677 and 678.
 

Attachments

  • 675 Closeup of the Broach Head Steady and the Ram Aligning Piece.jpeg
    675 Closeup of the Broach Head Steady and the Ram Aligning Piece.jpeg
    118.8 KB · Views: 8
  • 676 The Square Broach Inserted into the Aligning Piece.jpg
    676 The Square Broach Inserted into the Aligning Piece.jpg
    60.9 KB · Views: 5
  • 677 The Tools and Clamping Aligning Fixtures Used to Broach a Bottom Coupler Half Casting #30 ...jpg
    677 The Tools and Clamping Aligning Fixtures Used to Broach a Bottom Coupler Half Casting #30 ...jpg
    346.6 KB · Views: 4
  • 678 Aligning the One Eighth Inch Square Broach Square to the Arbor Press Ram.jpg
    678 Aligning the One Eighth Inch Square Broach Square to the Arbor Press Ram.jpg
    54.5 KB · Views: 5
Hi All,

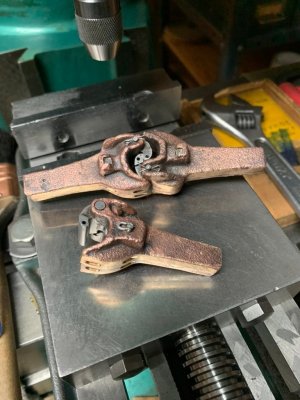
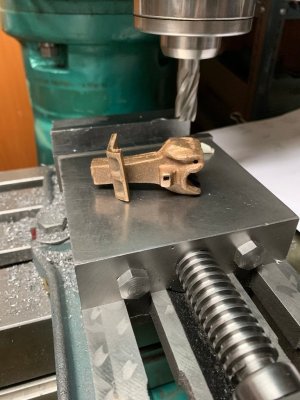
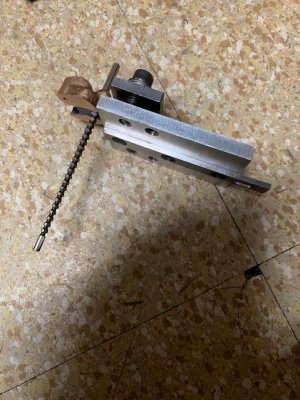
To finally finish this off. The full locating fixture in photo 679. Everything shown was needed to ensure total alignment and that NOTHING moved. All of the above just for one operation.

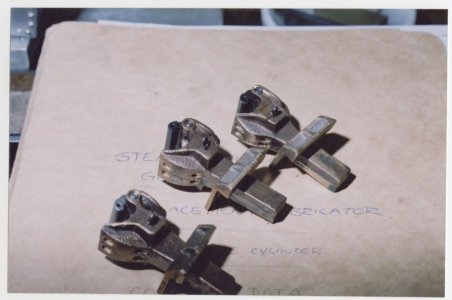
PS: I have over 80 pages of machining instructions for the making of these couplers which includes a detailed description, with photos, of every setup used and machining step taken, the production of all of the special fixtures, templates and special tools used but I won't bore you with all of that.
 

Attachments

  • 2 Some New Al. Grigg Couplers Made by Me in 3:4%22 Scale.jpeg
    2 Some New Al. Grigg Couplers Made by Me in 3:4%22 Scale.jpeg
    142.9 KB · Views: 11
  • 682 The One Eighth Inch Square Broached Hole in Silicon Bronze Coupler Casting.jpg
    682 The One Eighth Inch Square Broached Hole in Silicon Bronze Coupler Casting.jpg
    129.9 KB · Views: 9
  • 681 After Pressing Through.jpg
    681 After Pressing Through.jpg
    182.6 KB · Views: 4
  • 680 After Pressing Through.jpg
    680 After Pressing Through.jpg
    115.2 KB · Views: 6
  • 679 The Full Monty.jpg
    679 The Full Monty.jpg
    128.1 KB · Views: 8
  • 1 Al. Grigg's Original Three Quarters Inch Scale Couplers.jpg
    1 Al. Grigg's Original Three Quarters Inch Scale Couplers.jpg
    65.7 KB · Views: 8
Back
Top