• Scam Alert. Members are reminded to NOT send money to buy anything. Don't buy things remote and have it shipped - go get it yourself, pay in person, and take your equipment with you. Scammers have burned people on this forum. Urgency, secrecy, excuses, selling for friend, newish members, FUD, are RED FLAGS. A video conference call is not adequate assurance. Face to face interactions are required. Please report suspicions to the forum admins. Stay Safe - anyone can get scammed.

Making a Thingamajiggy

thestelster

Ultra Member
Premium Member
I have to make some doodads, dohickeys, and whatchamacallits, which all get assembled into a Thingamajiggy.

Here are the doodads. But I forgot to take pictures of splitting them and drill/tap for screws.
 

Attachments

  • 20240625_172619.jpg
    20240625_172619.jpg
    681.3 KB · Views: 22
  • 20240625_175113.jpg
    20240625_175113.jpg
    472.8 KB · Views: 22
  • 20240625_165852.jpg
    20240625_165852.jpg
    478.8 KB · Views: 23

thestelster

Ultra Member
Premium Member
These are the whatchamacallits. Stainless 17-4PH.
 

Attachments

  • IMG_20240703_150242.jpg
    IMG_20240703_150242.jpg
    360.2 KB · Views: 26
  • 20240703_150558.jpg
    20240703_150558.jpg
    377.5 KB · Views: 23
  • 20240703_151605.jpg
    20240703_151605.jpg
    366.6 KB · Views: 22
  • IMG_20240703_151844.jpg
    IMG_20240703_151844.jpg
    341 KB · Views: 22
  • IMG_20240703_152019.jpg
    IMG_20240703_152019.jpg
    270.9 KB · Views: 20
  • IMG_20240703_152243.jpg
    IMG_20240703_152243.jpg
    314.4 KB · Views: 21
  • IMG_20240703_152411.jpg
    IMG_20240703_152411.jpg
    350.6 KB · Views: 21
  • IMG_20240703_153107.jpg
    IMG_20240703_153107.jpg
    315.5 KB · Views: 22
  • IMG_20240703_154447.jpg
    IMG_20240703_154447.jpg
    298.8 KB · Views: 22
  • IMG_20240703_160800.jpg
    IMG_20240703_160800.jpg
    316 KB · Views: 23
  • IMG_20240703_162713.jpg
    IMG_20240703_162713.jpg
    273.1 KB · Views: 27
  • IMG_20240703_163028.jpg
    IMG_20240703_163028.jpg
    395.3 KB · Views: 26

thestelster

Ultra Member
Premium Member
Nice @thestelster. Always love your work.......

Wondering why you used a center drill instead of a spot drill in the third photo of post #3.
Well, the truth is that my 1/4" spotting drill got dull a while ago, so I attempted to sharpen it to include a split point, and, well, it ain't the sharpest bit in the tool box. In fact, its pretty dull. I'll get to it again sooner or later.
 

Susquatch

Ultra Member
Administrator
Moderator
Premium Member
Well, the truth is that my 1/4" spotting drill got dull a while ago, so I attempted to sharpen it to include a split point, and, well, it ain't the sharpest bit in the tool box. In fact, its pretty dull. I'll get to it again sooner or later.

Ya, that explains that. Just order a new one on Ali or Amazon or even MCarr. It isn't worth the work.
 

LenVW

Process Machinery Designer
Premium Member
The factory ones have a ‘design’ life.
Companies like to maintain a ‘revenue stream’ after-sales.

Your ’robust steel’ ones would never need replacements.
 

PeterT

Ultra Member
Premium Member
Nice work whatever they are, LOL. Maybe I asked you this already but on your regular V thread inserts, are you modifying point to suit the larger sizes? I noticed when I was drawing them in CAD using Machineries Handbook root calculation, they are surprisingly wide. I know they categorize the inserts by pitch range which should ?be the average or the minimum? But I am guilty of using a generic sharpy for bigger threads & they would have quite a pointed root. I know you mentioned the other style of insert you like which terminates on the OD or something. Maybe that was the buttress thread project. My memory is great, just very short span haha

1720053187469.png
 

thestelster

Ultra Member
Premium Member
Nice work whatever they are, LOL. Maybe I asked you this already but on your regular V thread inserts, are you modifying point to suit the larger sizes? I noticed when I was drawing them in CAD using Machineries Handbook root calculation, they are surprisingly wide. I know they categorize the inserts by pitch range which should ?be the average or the minimum? But I am guilty of using a generic sharpy for bigger threads & they would have quite a pointed root. I know you mentioned the other style of insert you like which terminates on the OD or something. Maybe that was the buttress thread project. My memory is great, just very short span haha

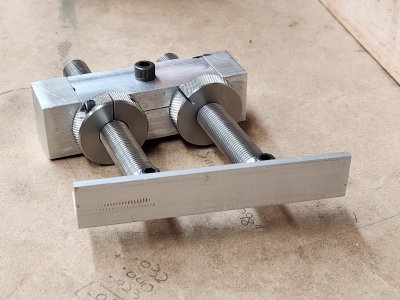
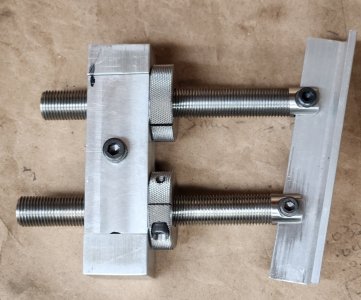
View attachment 49336
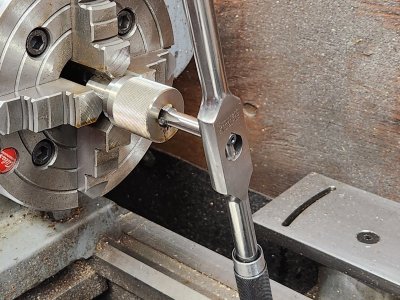
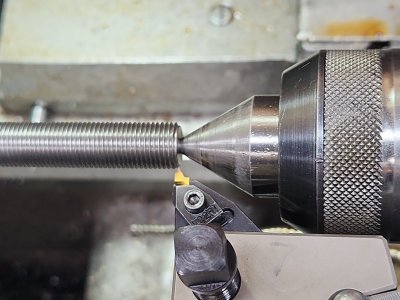
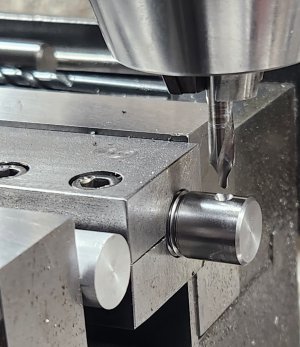
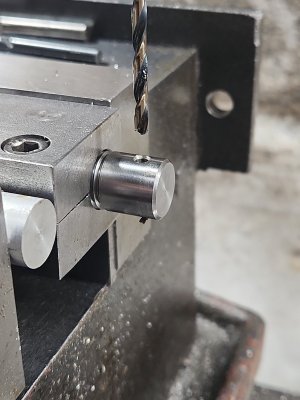
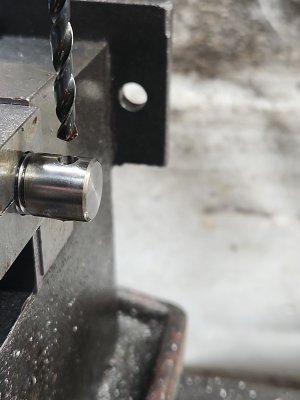
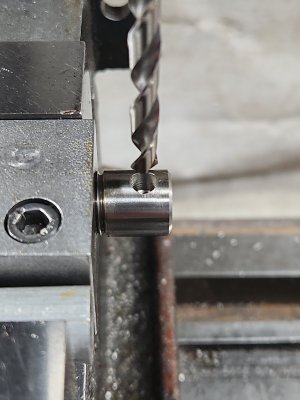
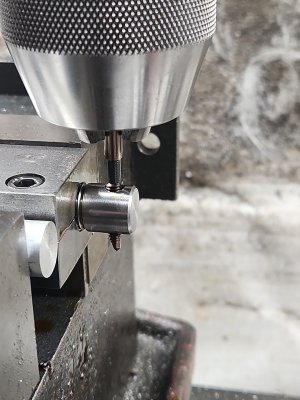
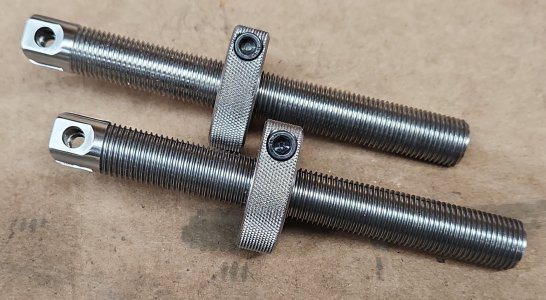
This thread is 1/2"-20 UNF. Therefore the depth of the thread is 0.027", and the root width is 1/4 x P = 0.0125".

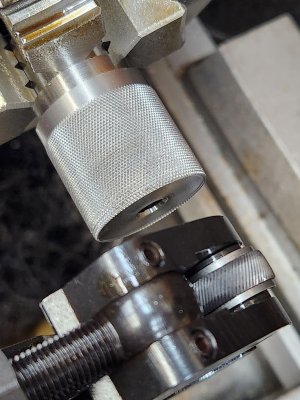
The threading insert I used, shown above, has a tip width of approximately 0.004".

So I plunge thread the screw with the cross-slide until I get to the required depth of 0.027". But the root is only as wide as the threading insert tip width, in this case 0.004". So to get the proper root width of 0.0125", I make more passes at full depth, 0.027", but I advance the compound axially 0.001" or 0.002" with each successive pass until I've gone 0.009", (required root with: 0.0125"- threading insert tip width: 0.004") (I set the compound so that it is at 0°, its travel is parallel to the bed ways.)
 

thestelster

Ultra Member
Premium Member
Here's the dohickey that holds the whatchamacallits and the doodads for the Thingamajiggy.

Not finished yet! Quite a bit to go yet.
 

Attachments

  • 20240704_132152.jpg
    20240704_132152.jpg
    687.7 KB · Views: 11
  • 20240704_151243.jpg
    20240704_151243.jpg
    228.8 KB · Views: 8
  • 20240704_150457.jpg
    20240704_150457.jpg
    251.7 KB · Views: 8
  • 20240704_183504.jpg
    20240704_183504.jpg
    354.8 KB · Views: 8
  • 20240704_194853.jpg
    20240704_194853.jpg
    494.2 KB · Views: 11
  • 20240704_194843.jpg
    20240704_194843.jpg
    284.1 KB · Views: 11

PeterT

Ultra Member
Premium Member
@thestelster just getting back to that threading technique, am I reading you correctly? You make the initial thread to a depth using sharp vee tool (1). Then you increment laterally in steps to position (2) which forms the proper root distance (orange line). I get that part. But at what point do you confirm pitch diameter with wires or mic? I assumed at step 1 & then basically freeze that DOC? But I've never really paid attention to this detail but even the thread calculators have a root flat embedded in the spec which I assume is therefore embedded in PD measurement. Maybe you are checking PD along the way through step 2 & stop when its achieved (and thus root flat ends up being whatever it is? As opposed to 'targeting' a root flat distance which is how I read your comment.

1720148893471.png

1720149541939.png
 

thestelster

Ultra Member
Premium Member
@thestelster just getting back to that threading technique, am I reading you correctly? You make the initial thread to a depth using sharp vee tool (1). Then you increment laterally in steps to position (2) which forms the proper root distance (orange line). I get that part. But at what point do you confirm pitch diameter with wires or mic? I assumed at step 1 & then basically freeze that DOC? But I've never really paid attention to this detail but even the thread calculators have a root flat embedded in the spec which I assume is therefore embedded in PD measurement. Maybe you are checking PD along the way through step 2 & stop when its achieved (and thus root flat ends up being whatever it is? As opposed to 'targeting' a root flat distance which is how I read your comment.

View attachment 49382

View attachment 49383
Hi Peter, yes. That's exactly what I do. I stop advancing the cross-slide once I've achieved the calculated thread depth (.54125 x P). I'll measure pitch diameter at that point with either wires or thread pitch micrometers, then start advancing the compound axially and measuring pitch diameter along the way until I've reached the correct PD, and that my nut threads on nicely.

In your picture you show two orange circles which I guess represents the wires, but you only use the one diameter wire throughout the whole process.
 
Top