-
Scam Alert. Members are reminded to NOT send money to buy anything. Don't buy things remote and have it shipped - go get it yourself, pay in person, and take your equipment with you. Scammers have burned people on this forum. Urgency, secrecy, excuses, selling for friend, newish members, FUD, are RED FLAGS. A video conference call is not adequate assurance. Face to face interactions are required. Please report suspicions to the forum admins. Stay Safe - anyone can get scammed.
You are using an out of date browser. It may not display this or other websites correctly.
You should upgrade or use an alternative browser.
You should upgrade or use an alternative browser.
Darren's active projects
- Thread starter Darren
- Start date
I no longer refer to those as mistakes, since all of my work has one similar irregularity in it somewhere, they're now looked upon as signatures.....
Let's see one of those "wood mongers" recover so well from an errant dovetail.... Oh for the love of metal.
Well done.
Some days it feels like if i didn't screw up at least once, I wouldn't be screwing at all
140mower
Don
When I turned the lower rollers on my excavator, that outside layer with the embedded rock and sand played hell on the tooling. I finally grabbed the biggest brazed carbide bit I have and basically left the grinder running for touch ups. Hss just melted on contact for the most part.I know the feeling.,John.
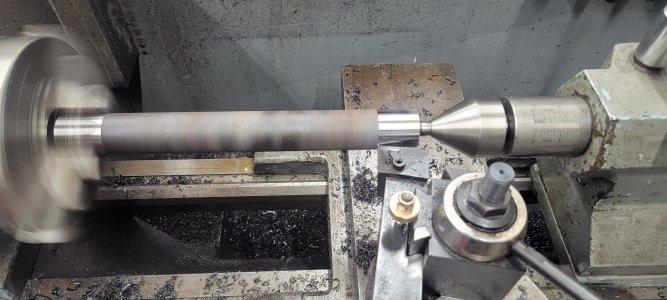
I need the previously mentioned height extensions for my hoist. Got the big pins, wrecked a bunch of carbide trying to turn it and thread it. Figured I'd try the big boy, and it worked great getting through the harder layer.
View attachment 41400
Last edited:
140mower
Don
That's why you put her on top...... Makes the screw ups way more tolerable.Some days it feels like if i didn't screw up at least once, I wouldn't be screwing at all
I have been having a real hard time trying to thread these pins. Its super tough material. I'd get a few passes in and it would snap the tip off the tool every time. Its hard material, yet gummy too. I tried everything. I have several choices of tools in carbide and HSS and nothing worked. As a last ditch effort, i threw a piece of partially threaded rod into the woodstove overnight:
![20231222_190119[1].jpg 20231222_190119[1].jpg](data:image/svg+xml;charset=utf-8,%3Csvg xmlns%3D'http%3A%2F%2Fwww.w3.org%2F2000%2Fsvg' viewBox%3D'0 0 2000 900'%2F%3E)
That took some of the hardness out but still wasn't good. Broke the tip off the inserts every time. I did notice that some spots are harder than others. Being that the pins were forged, i guess it makes sense.
![20231223_022924[1].jpg.png 20231223_022924[1].jpg.png](data:image/svg+xml;charset=utf-8,%3Csvg xmlns%3D'http%3A%2F%2Fwww.w3.org%2F2000%2Fsvg' viewBox%3D'0 0 1363 1722'%2F%3E)
Anyways, I decided to try a different grind on a piece of HSS and see what happened.
![20231223_022847[1].jpg 20231223_022847[1].jpg](data:image/svg+xml;charset=utf-8,%3Csvg xmlns%3D'http%3A%2F%2Fwww.w3.org%2F2000%2Fsvg' viewBox%3D'0 0 900 2000'%2F%3E)
![20231223_023013[1].jpg 20231223_023013[1].jpg](data:image/svg+xml;charset=utf-8,%3Csvg xmlns%3D'http%3A%2F%2Fwww.w3.org%2F2000%2Fsvg' viewBox%3D'0 0 900 2000'%2F%3E)
Surprisingly it cut like butter on a piece that also spent the night in the stove. The chatter marks cleaned up after a spring pass.
So HSS for the win on this material.
![20231222_190119[1].jpg 20231222_190119[1].jpg](/data/attachments/49/49693-84851a41f744d340f69ad3d13bc8e61c.jpg)
That took some of the hardness out but still wasn't good. Broke the tip off the inserts every time. I did notice that some spots are harder than others. Being that the pins were forged, i guess it makes sense.
![20231223_022924[1].jpg.png 20231223_022924[1].jpg.png](/data/attachments/49/49695-80c6a2786a10a56893c039921cbb807a.jpg)
Anyways, I decided to try a different grind on a piece of HSS and see what happened.
![20231223_022847[1].jpg 20231223_022847[1].jpg](/data/attachments/49/49696-198b42c5a47a5811ecfb7f6fc009e574.jpg)
![20231223_023013[1].jpg 20231223_023013[1].jpg](/data/attachments/49/49697-8654fa924f4af421fabcc10c41acd7ad.jpg)
Surprisingly it cut like butter on a piece that also spent the night in the stove. The chatter marks cleaned up after a spring pass.
So HSS for the win on this material.
Surprisingly it cut like butter on a piece that also spent the night in the stove. The chatter marks cleaned up after a spring pass.
Were you plunge cutting or 30 degree?
I almost always use 29.5, and infeed with the compound. My crossfeed has a threading stop for backing out at the end of a cut, so infeeding with the compound is much easier.
I tried both ways with this material. Nothing worked well until I tried the HSS with the positive top rake.
I tried both ways with this material. Nothing worked well until I tried the HSS with the positive top rake.
Dabbler
ersatz engineer
If it was gummy - hard- then it would be worse annealed. I can see why a high-rake HSS tool would work better! Great idea! That one is going into the 'remembrit' bin for future use...Nothing worked well until I tried the HSS with the positive top rake.
I don't think annealing is the right word, more like deep tempering. They say that this C1060 needs to hit dull red, or 1400 F to anneal. I know it was over 1000, where my infrared gun maxes out, but i didn't see any red.
I had first tried my normal HSS threading tool with a flat top rake and it didn't fare well at all. The positive rake cut very very well though.
One problem with breaking carbide is this:
![20231223_150541[1].jpg 20231223_150541[1].jpg](data:image/svg+xml;charset=utf-8,%3Csvg xmlns%3D'http%3A%2F%2Fwww.w3.org%2F2000%2Fsvg' viewBox%3D'0 0 900 2000'%2F%3E)
I had first tried my normal HSS threading tool with a flat top rake and it didn't fare well at all. The positive rake cut very very well though.
One problem with breaking carbide is this:
![20231223_150541[1].jpg 20231223_150541[1].jpg](/data/attachments/49/49709-121ff91c51775618c0c5d9bd7d95d554.jpg)
Dabbler
ersatz engineer
wow. that is suuuper gummy!One problem with breaking carbide is this:
gummy or brittle?wow. that is suuuper gummy!
It was grabbing the carbide and just snapping it. Every friggin time. Tried faster/slower, 0.002- 0.060 doc, etc. Honestly for most threads on mild steel to 4140, etc, i can do it in 4-6 passes. This stuff was extra frustrating. I broke a 5/8" shank brazed carbide tool.wow. that is suuuper gummy!
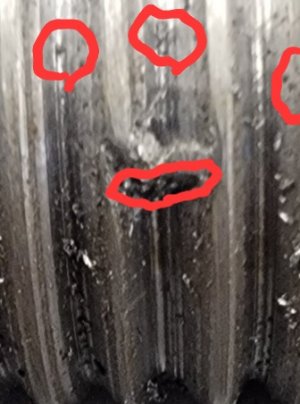
However, that last pic actually showed me what was happening. The tool pressure moved the material into the chuck. You can see the two tracks from the tip. I couldn't see it before. More trials are needed.
gummy or brittle?
both. It turns like stainless or chromo...long chips, birds nesting. Only way to avoid was super aggressive cuts. Not good when threading. If it wasn't free i would have tossed it in the scrap bin
However, that last pic actually showed me what was happening. The tool pressure moved the material into the chuck. You can see the two tracks from the tip. I couldn't see it before. More trials are needed.
Of course you have the parts and you did the turning. But I think I see something different.
The main chunk that separated seems to be twisted AWAY from the chuck. That makes sense if the tip of the tool broke and the broken piece dug in and then rolled away from the chuck as the tool passed. There does not appear to be two tracks before the break, only afterward. Therefore, I think the two tracks might be just the profile of the broken tool.
The break itself also looks odd. To me, it looks like a hard inclusion was embedded in the steel and the tool hit the edge of the inclusion and pushed it out of the metal as it passed by. Judging by the tracks, that's when the tool broke too. But the inclusion got pushed into the thread groove on the next pass. Looking at the black shard, the left side would have been down and the right side up before it got pushed out. As it was pushed it smooshed out some normal steel and the whole gob got pushed into the trailing thread behind it. This also makes sense given that you do the 29.5 degree thing like I do.
We have all seen cast iron with inclusions. Steel is much less likely to have them but it isn't impossible.
In the photos below, I magnified the black inclusion and also highlighted several other possible inclusions.
![20231223_150541[1].jpg 20231223_150541[1].jpg](/data/attachments/49/49720-088a2f54d51bc53461c82440c296d516.jpg)

Free or not, I'd trash that bar.
Last edited:
To me it looks like you made a pass, the very tip broke and embedded into the steel. You didn't notice, took the next pass and the tool hit the embedded tip and completely shattered and destroyed the rest of the thread.....or not
To me it looks like you made a pass, the very tip broke and embedded into the steel. You didn't notice, took the next pass and the tool hit the embedded tip and completely shattered and destroyed the rest of the thread.....or not
This makes sense too.
I think it is very hard to tell much from this picture. The part it covered in chips and fluid. The part is partially out of focus and light blasted in some areas. Though many people seem to be able to see things in photographs that I can't.
The photo does show that instead of cutting the metal, the tool tore out a chunk. I suppose that a broken tool could do that, but it seems more likely that tearing the chunk out broke the tool. Possibly there was an accumulation of material on the edge - changing the geometry to something like negative rake - or you hit an inclusion or void. Anyways, 'sticky' seems like the most apt description of this material. It could be work / strain hardening too. That process generates 'pockets' or 'bubbles' in the metal that cause all of these symptoms - chatter, sticky, and radical differences in hardness.
As an aside, I did a heat treatment yesterday. I live in the city (Toronto) so fire is mostly prohibited. I'm sure if they could figure out how to ban it outright, they would - but it turns out that it's just so darn useful for things like heat, hot water and cooking, that somehow it is still allowed. So I rigged up a barbeque with map gas and got some 1/4" ball bearings to glow red. Today I machined the softened balls into a Christmas present for the wife - and who says I leave things to the last minute. I planned 1 day in advance!
Dabbler
ersatz engineer
I couldn't help the laugh icon.... My friend Fred got ultra-precision ballscrews on his 10X50 mill, and he doe curse them from time to time. He had slowed down using it these days, so it is more frequent that he forgets to lock Y.... He and I laugh when it happens!
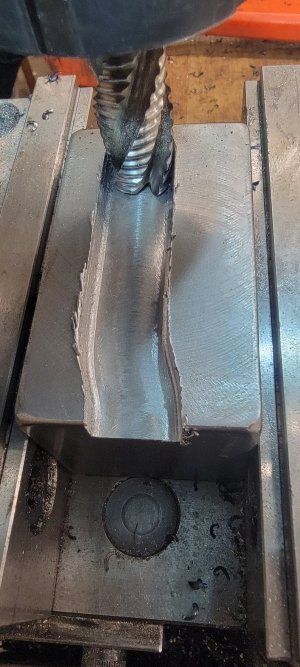
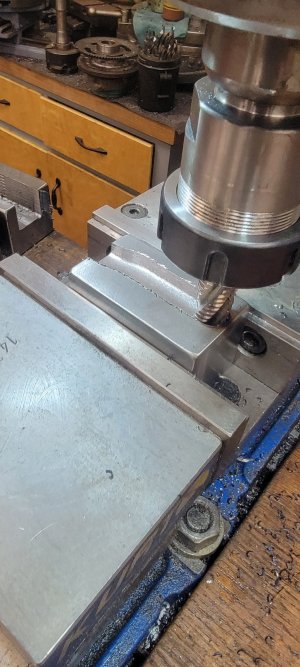
Nice that you managed the save! That is one powerful machine!
Nice that you managed the save! That is one powerful machine!


