• Scam Alert. Members are reminded to NOT send money to buy anything. Don't buy things remote and have it shipped - go get it yourself, pay in person, and take your equipment with you. Scammers have burned people on this forum. Urgency, secrecy, excuses, selling for friend, newish members, FUD, are RED FLAGS. A video conference call is not adequate assurance. Face to face interactions are required. Please report suspicions to the forum admins. Stay Safe - anyone can get scammed.

Part for Ken

Janger

(John)
Vendor
Premium Member
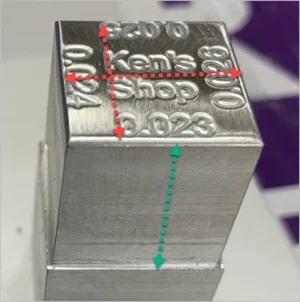
my buddy Ken who is a woodworking expert needed a block for measuring saw blade offsets for dovetail making. He had a design which I executed today. I got it to within a thou or so on each side of the block. The idea is the step down is 0.023 on one side 0.024” on the next etc. The results are ok but i would have been happier with 2 tenths accuracy not a thou.

I milled it vertical in the vise with a 3/4EM milling off the sides to depth. Question if I instead laid the part sideways and face milled the depth would it be more accurate? How could I mill this more accurately?

557A1A72-A230-4EFC-A548-A773B9379516.jpeg
 
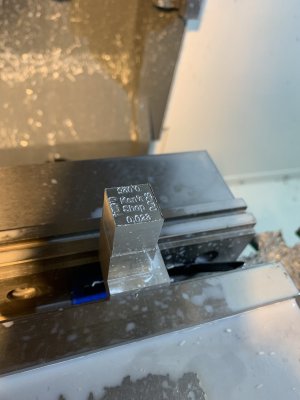
Part in progress. Here i was milling the sides with the 3/4 EM.
 

Attachments

  • 0CA88F0F-0D7B-4C03-8727-5876B44BE2EC.jpeg
    0CA88F0F-0D7B-4C03-8727-5876B44BE2EC.jpeg
    237.1 KB · Views: 9
Can you elaborate on the datum direction you are measuring against?
 

Attachments

  • EDT-2021-08-15 5.28.35 PM.webp
    EDT-2021-08-15 5.28.35 PM.webp
    18.8 KB · Views: 1
Question if I instead laid the part sideways and face milled the depth would it be more accurate? How could I mill this more accurately?

93A9BA51-7BD9-469A-AD77-6D9087EAA3D2.jpeg


Yes, that should be a better approach. Step one is to deck off the surface A with a cutter (face mill or end mill). That is your reference 0. Now either move the quill down by 0.023” or the knee up 0.023” (whichever you know gives the greater accuracy) and machine the step. You eliminate tool deflection for the most part doing it that way. Flip the part 90* in the vise and deck off surface B to create its ref 0 and then machine the step.

If I understand the part correctly, the only critical dimension is the size of the step and that the two created planes be parallel to each other.

Side milling causes larger tool deflection than face milling and thus make dimension control much harder. The surfaces may also not be parallel because of the tool deflection.

The only way to do better than your HAAS, is to machine oversized by a couple of thou and then surface grind the flats.
 
Someone needs 2 tenths of a thou accuracy in their wood working tools and I'm still aiming to get .001" consistency in my metal work. Ha ha. Nice work man.
 
Rudy's got it. That is the approach I was thinking would be better. More accurate at a cost of 6 setups instead of 2. The way I was doing it I can reach 5 sides at once and then flip it over to mill off the excess.

>>The surfaces may also not be parallel because of the tool deflection.
Yes that also appears to be an issue, the part thickness varies over the face. Less than a thou but it's measurable.

Thanks for the feedback.
 
I see it now. Yup exactly as RH suggests. You are easily in DOC range of a 3-5 insert face mill, take it off in one pass with mirror finish. Only downside is repeat Z position zero & then Z position target for each face, but this is probably the best accuracy. You probably chance deviation by re-clamping if you tried to flatten the faces of a batch in one run & make the target DOC in another run.
 
Back
Top