Not that long ago, my 10 year old lathe needed new switchgear, as all the plastic fell apart. It had a latching on/off switch which was wired through a safety switch on the chuck guard and a rotary switch for forward/reverse.
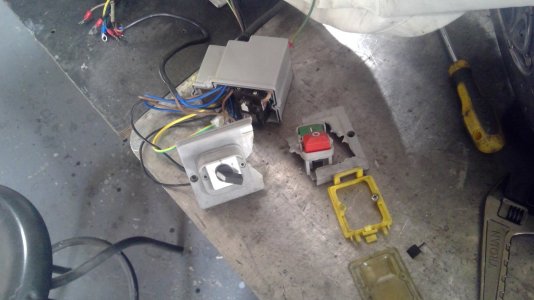
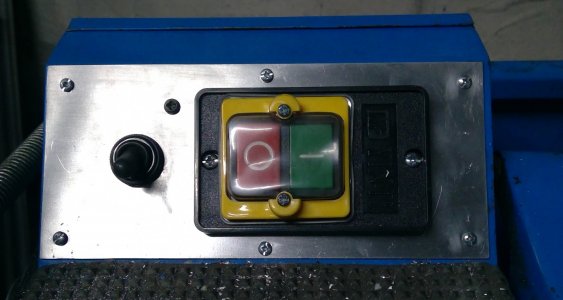
I rang around to a few industrial ectrician shops who specialised in machinery, but they woudn't help as I didn't have any schematics, so, with no choice I had to do it myself. Rather than trying to get replacement switches, I opted to replace the switchgear with generic type switches. I pulled the back off the electrical housing and there were cables everywhere, the rotary switch by far the worst, something like a dozen and a half connections +++, simply too complex to understand, so I replaced that with a simple two position toggle switch, the on/off latching switch with a non latching switch and by passed the chuck guard safety switch.
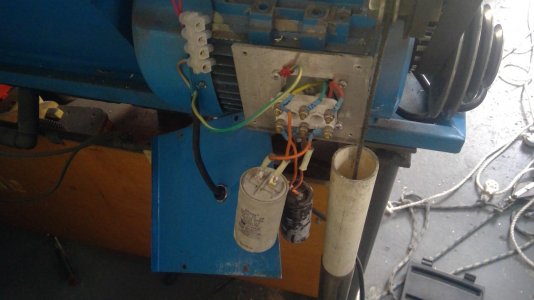
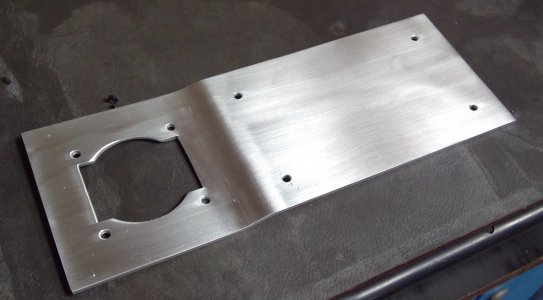
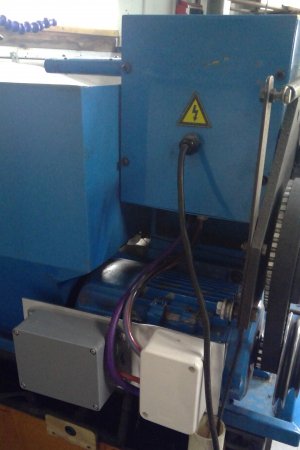
I connected a multimeter to the motor wiring to sort out the windings, identified the start and run windings and went from there, drawing up a schematic to include the toggle switch for forward/reverse and the simple on/off switch. I had to also replace the capacitor storage box as that was starting to crack, made a bracket for it, made a faceplate for the switchgear and put it all back together and then tackled the wiring. Once done, I switched on and lo and behold it all worked.
While I was at it, I gave the lathe a birthday party, stripped it down, cleaned and inspected everything and put it back together.
I rang around to a few industrial ectrician shops who specialised in machinery, but they woudn't help as I didn't have any schematics, so, with no choice I had to do it myself. Rather than trying to get replacement switches, I opted to replace the switchgear with generic type switches. I pulled the back off the electrical housing and there were cables everywhere, the rotary switch by far the worst, something like a dozen and a half connections +++, simply too complex to understand, so I replaced that with a simple two position toggle switch, the on/off latching switch with a non latching switch and by passed the chuck guard safety switch.
I connected a multimeter to the motor wiring to sort out the windings, identified the start and run windings and went from there, drawing up a schematic to include the toggle switch for forward/reverse and the simple on/off switch. I had to also replace the capacitor storage box as that was starting to crack, made a bracket for it, made a faceplate for the switchgear and put it all back together and then tackled the wiring. Once done, I switched on and lo and behold it all worked.
While I was at it, I gave the lathe a birthday party, stripped it down, cleaned and inspected everything and put it back together.
Attachments
-
 WIN_20201024_16_15_56_Pro.jpg252.1 KB · Views: 16
 -
 WIN_20201024_16_16_27_Pro.jpg222.4 KB · Views: 10
 -
 WIN_20201031_11_41_24_Pro.jpg246.5 KB · Views: 10
 -
 WIN_20201031_11_42_34_Pro.jpg149.6 KB · Views: 8
 -
 WIN_20201031_16_40_22_Pro.jpg244.4 KB · Views: 6
 -
 WIN_20201031_19_47_16_Pro.jpg244.3 KB · Views: 8
 -
![IMG20210403120543[1].jpg](/data/attachments/37/37484-f84c3d53785287c33e74731e0a644932.jpg) IMG20210403120543[1].jpg218 KB · Views: 9
IMG20210403120543[1].jpg218 KB · Views: 9 -
![IMG20210403120558[1].jpg](/data/attachments/37/37485-d68bca6220badd8f3fede2b00bc8fa0b.jpg) IMG20210403120558[1].jpg195.9 KB · Views: 9
IMG20210403120558[1].jpg195.9 KB · Views: 9 -
![IMG20210403120603[2].jpg](/data/attachments/37/37486-4ae3e8d7e4efbc52dc8f5503c8c89790.jpg) IMG20210403120603[2].jpg200.9 KB · Views: 9
IMG20210403120603[2].jpg200.9 KB · Views: 9 -
![IMG20210403120607[1].jpg](/data/attachments/37/37487-cbe30be1525ec47abb53309f903383ec.jpg) IMG20210403120607[1].jpg211.8 KB · Views: 13
IMG20210403120607[1].jpg211.8 KB · Views: 13 -
![IMG20210403120548[1].jpg](/data/attachments/37/37488-946940df2c998b7392e79bcee53abf39.jpg) IMG20210403120548[1].jpg175.3 KB · Views: 16
IMG20210403120548[1].jpg175.3 KB · Views: 16