Noltez
Member
Grab your coffee or beer and have a seat, and listen to the story of a rookie gettin' his feet wet.
I finally had free time to start making actual chips with this old lathe (SB 10K). I'd scratched out a few things with some scraps but it was time to learn how to work it. My QCTP was fitted. I've bought a half dozen tool holders. And now I had some CR bar stock (1.5") in 6" lengths to learn on. Chucked one up in the 3 jaw, set middle gear, and faced off the cut. Having 6" sticking out was a little unnerving but there was no drama. Swap end-to-end and face the other side, then unwrap the brand new HSS center drills for setting up the tail stock support. Neat! Now I've got my bar supported.
Up next was actually turning. This lathe has power feeds and a gearbox, and I'm getting a feel for what does what. Tried a many different settings on the gearbox, each at a few different depths of cut. I found a few settings that will cut cleanly between 20 and 30 deep. I previously chucked up a piece of 3/8 scrap rod I had and even played with threading. Although I don't have the right tool bit for it, it was satisfying to see the lathe cut a screw thread. Not a useable one, but until now I've only seen this on the youtubes!
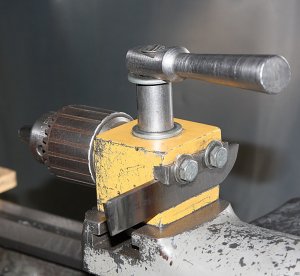
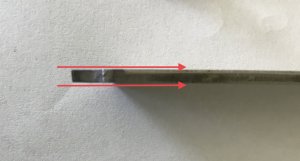
Lastly today I tried parting, and was not what I'd call completely successful. I wanted to part it in the middle. I'd set the lathe on the slowest belt speed plus back gears engaged to turn the 1½" material. I have a new (Amazon) HSS 3/32" x ½" parting blade in an Accusize AXA tool holder. I'd properly aligned it with centerline with a dead center in the chuck, and it lines up with the tailstock live center too. Some light oil and... nothing. It just rode up against the stock. Pushed harder, and it just wouldn't cut. The tool angle is pre-set by the tool holder. I'm definitely on centerline. I'm applying oil. Very weird. The oil is parting like Moses is going for a walk. Watched the Blondiehacks video again, I decided to cut my own angle with my bench grinder. Quinn touts the Tee-shaped carbide tools. I put a slight concave to the underside, and slightly relieve the sides to barely a trapezoidal shape. I also tried 3-in-1 instead of light machine oil. This works much better and starts rolling chips off. I got about a ½" in and it starts chattering. I tighten the gibbs, check I'm sharp, make sure my tool post is square and snug. More chattering, and then it binds. Belt comes off, bit is slightly damaged. Refit & sharpen, a few more rolls and it binds again. And again, and again. Each time the belt is thrown. I walked away. Went for a long hike. I came back to try again. Last straw was when I bound & knocked the stock out of it's live center support. As learned as the cut gets deeper I have to speed up the rotate to keep the surface speed appropriate. VFD folks; I am envious! Also noticed the far side of my cross slide (carriage?) is slightly lifting off the ways when I'm cutting. Adjust those gibbs too. Now the compound mount lock screws aren't strong enough to keep the unit from rotating when I'm tightening the tool post top nut. Tighten those further than I liked. We're okay now.
I finally got down to the last 1/4" and the tool went under the stock. Everything jammed, lost the belt again (10+ times now). Backed off the tail stock, opened the chuck, and the part is jammed onto the parting blade. Used a flat blade driver to wedge it open. No idea how. Rechuck the part but now the 3" section being parted is not inline. I used a soft face mallot to try to center it, but in the end I just grabbed it and worked it until she broke free. I now have two 3" chunks of metal. On the up side; I faced off the left overs with no issues. So I've got that going for me, which is nice. But oh my... what a day.
Questions from today;
What kind of cutting oils are you using for parting, or in general? I was just using light machine oil, then 3-in-1 (which actually worked well at first).
Should I try and find a thinner kerf parting tool? A Tee-shaped profile one? Carbide tipped?
Is it worth paying to have a riser block made to eliminate the compound? I don't need it while I'm learning.
Anyone fit an X-axis DRO to a South Bend 10k?
I would love to hear any practical tips on making this easier. I expect to use HR and CR steel quite a bit. I feel like it shouldn't have been so
Last edited:


