This is a drill sharpening jig I made some time ago. Doesn't get much use, I usually sharpen drill bits by hand, but it was an interesting project.
I didn't have a mill at the time,, so the work was done on a lathe with a ittle help from a linisher.
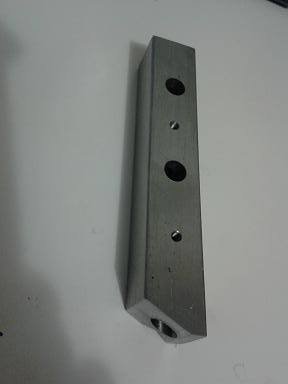
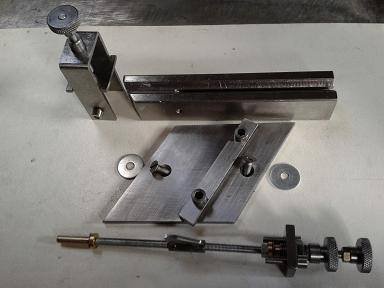
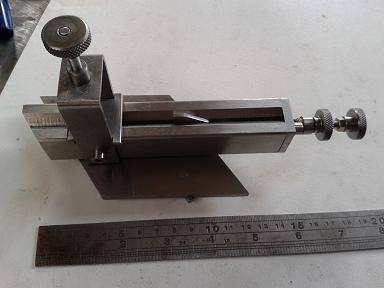
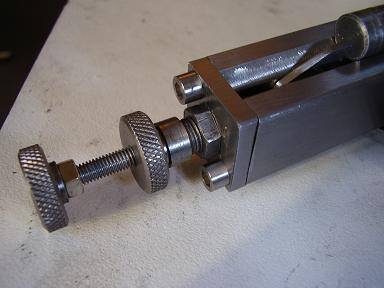
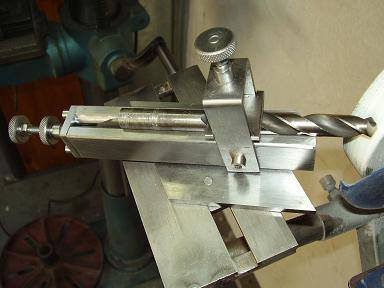
The body is made from 25mm black stock which I linished. The top has a V machined for the drill to sit in and a slit saw was used to cut a slot at the bottom of the V. To keep the drill in place, a U shaped bracket is bolted over the the top of the body in which an H shaped plate sits. The H shape plate sits on top of the drill and is clamped in place by a screw in the U shaped bracket..
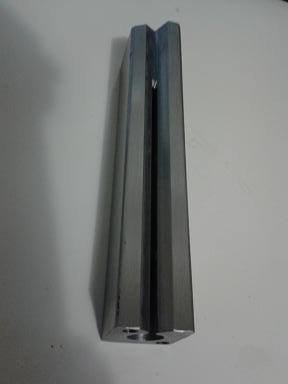
The body is bored for almost the length of the body to fit a length of thread A nut with a fin traverses the length of the thread when the knurled adjusted at the end of the threaded rod is turned. The fin on the nut pokes up through the slot cut in the bottom of the V. This fin advances the drill bit along the V. The end of the body is stoppered by a plate which carries the length of thread. The thread has brass bushes at both ends to act as plain bearings. There is also a backlash adjustment on the plate.. Underneath the body sits a flat plate set at an angle of 118 degrees.
I had to make a guide for the jig to slide in, The guide is a simple plate with a slot down the middle into which the plate under the body fits.
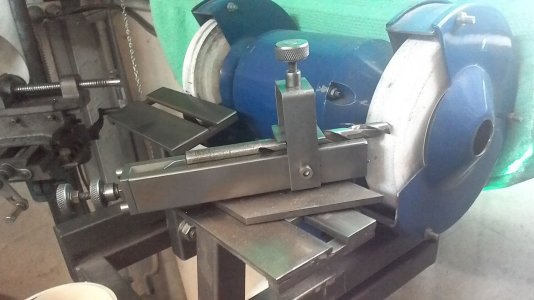
To sharpen, clamp the drill in place and slide the jig across the table, using the adjuster to advance the drill and lock the adjuster off with the knurled lock nut, once done, flip the drill over 180 degrees to grind the other shoulder. I did have an indexer at the front, but found it wasn't necessary, so I deleted it.
Like I said, it hardly ever gets used, I prefer to sharpen by hand. But it is handy if an accurately ground drill bit is needed.
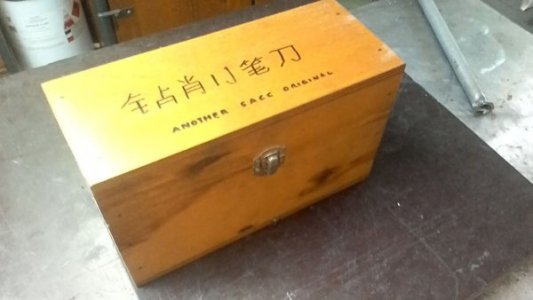
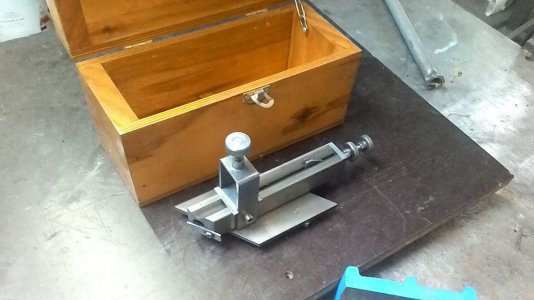
I made a wooden box for storage to stop it going rusty. The Chinese script says 'Drill sharpening jig', at least I hope that's what it says. I added the Chinese script to give the jig a bit of cred, after all, all the best tools come from China, right?
I didn't have a mill at the time,, so the work was done on a lathe with a ittle help from a linisher.
The body is made from 25mm black stock which I linished. The top has a V machined for the drill to sit in and a slit saw was used to cut a slot at the bottom of the V. To keep the drill in place, a U shaped bracket is bolted over the the top of the body in which an H shaped plate sits. The H shape plate sits on top of the drill and is clamped in place by a screw in the U shaped bracket..
The body is bored for almost the length of the body to fit a length of thread A nut with a fin traverses the length of the thread when the knurled adjusted at the end of the threaded rod is turned. The fin on the nut pokes up through the slot cut in the bottom of the V. This fin advances the drill bit along the V. The end of the body is stoppered by a plate which carries the length of thread. The thread has brass bushes at both ends to act as plain bearings. There is also a backlash adjustment on the plate.. Underneath the body sits a flat plate set at an angle of 118 degrees.
I had to make a guide for the jig to slide in, The guide is a simple plate with a slot down the middle into which the plate under the body fits.
To sharpen, clamp the drill in place and slide the jig across the table, using the adjuster to advance the drill and lock the adjuster off with the knurled lock nut, once done, flip the drill over 180 degrees to grind the other shoulder. I did have an indexer at the front, but found it wasn't necessary, so I deleted it.
Like I said, it hardly ever gets used, I prefer to sharpen by hand. But it is handy if an accurately ground drill bit is needed.
I made a wooden box for storage to stop it going rusty. The Chinese script says 'Drill sharpening jig', at least I hope that's what it says. I added the Chinese script to give the jig a bit of cred, after all, all the best tools come from China, right?
Attachments
-
 1.jpg6.2 KB · Views: 19
 -
 jig platform.jpg6.8 KB · Views: 21
 -
 jigs disassembled.jpg15.7 KB · Views: 19
 -
 jig partly assembled.jpg14.3 KB · Views: 21
 -
 jig assembled.jpg13.3 KB · Views: 20
 -
 jig knobs.jpg15.2 KB · Views: 23
 -
 jig on table with drill.jpg17.3 KB · Views: 25
 -
 15578080_220357811748625_5357883484170788874_o.jpg270.1 KB · Views: 24
 -
 30716241_2036449129948456_743359397559795712_n.jpg231.1 KB · Views: 24
 -
 30739205_2036449039948465_7668901528505155584_n.jpg53.8 KB · Views: 23
 -
 four facet drill.jpg6.8 KB · Views: 22
 -
 box.jpg29.6 KB · Views: 19
 -
 jig and box.jpg272.2 KB · Views: 22