Dan Dubeau
Ultra Member
A month or so ago I picked a princess auto 8" buffer on sale. Always wanted one, and really want to make an effort to step up my part finishing game, but it brought an interesting problem. Where to put it. I don't have bench space. I hate having to store things, and get them out to use. So keeping with my shop mantra of having everything out, and ready to go so I can be efficient with projects, I knew I had to find a permanent home for it. I also picked up a 6" grinder in the drywall deal that I've wanted to swap out for one I got from my grandfather many years ago.
I've been rolling this problem around in the brain bucket for a while, and admittedly this took much longer to think about, and figure out than it took to make, but here's where I'm at after an afternoon's worth of work. No cad, no complex equations, just a simple sketch to figure out some dimensions, and a raid of the offcut pile.
Here's my current bench grinder situation. I've never really liked it, but it was a quick solution at the time, and Kinda worked, so I went with it. This is what I started with today. I've never liked having to move the saw to grind drills and toolbits.

Quick cleanup job

Took some measurements, did some more daydreaming and imagineering, made a quick sketch, and then got to cutting.

Parts cut, and marked up for holes, chamfers, and notches.


All the holes drilled, and happy with the fitup, (made a bit of a goof on the top notch, but I can work with it....) I took them out back for a spa day with various grinder treatments on the dirty bench. Nice day to work outside, not much snow left, and going fast. I think we might have had our last day at the skihill on friday night. Had a handfull of good runs after school, but got rained out early. Unless we get a good cold snap where they can make a bunch more or mother nature decides to help out, that may be it. Tough year.

I don't spoil myself with niceties very often, but I splurged and picked up a set of new welding gloves, that WEREN'T the cheapest pair on the shelf. A guy could get used to this luxury....

Tacked up and ready to weld. It went quick, and I forgot to take progress pics, sorry....

And here it is clamped in place, as I decide exactly where to mount it.


I ended up moving it back a bit, and through bolted it to the plywood top with 1/4"-20 bolts.

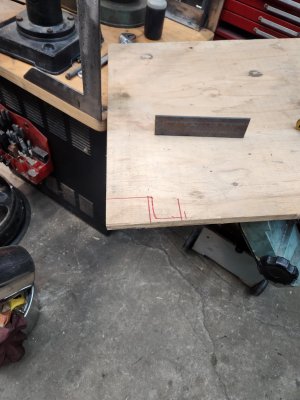
I had this old sheet of 3/4" ply hanging out behind my toolbox, that was already a workable size, so I just trimed out a bit for a custom fit around the feet. It's bolted to the frame with 1/4" bolts also.


Good spot on the drill press side for some small shelves and tool storage also.

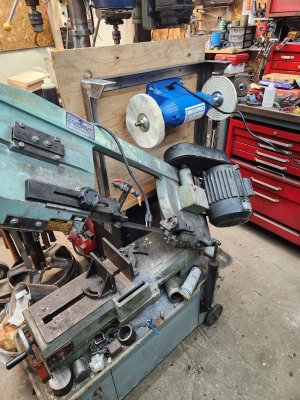
Then it was time to mount my buffer to the plywood, with 5/16" carriage bolts, and check clearances. I love it when something you picture in your brain ends up coming together and working exactly how you planned it. Saw opens up to almost full capacity, and I don't have to move anything to use all the tools. For longer stock, and full sticks, I have to pull the saw out a bit to clear the welding table and get out the garage door, but for most stuff, it works as is where is.

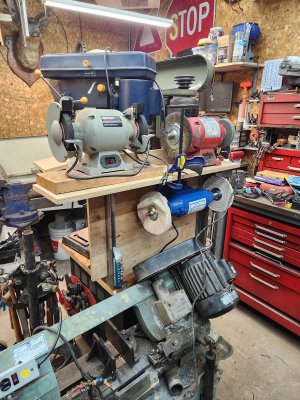
I set the grinders up on top with some scraps of plywood just for now to get an overall picture of how it's going to be. I'm going to cut a 2x8 to sit on top to bolt the grinders to, the plywood is temporary, I need those peices for more shelves somewhere else .
.


This was a fun one, and while seemingly small and unimportant, it makes much better use of the space there and puts a few more tools into operation. With all my big ticket tools in place and functioning, I'm down to storage density projects like this now. I have a few more like this to work through over the next week or so, and I'm really looking forward to them. Ever little bit helps in a small shop.
A few negatives though. The grinders are a bit high. It's 50" to the shelf where they sit. Didn't seem like much on paper, but a bit high in practice. The buffer is a nice height, but I might try and cut another inch or two out of the uprights to bring it down a bit, and shrink the space around the buffer. There is some room for refinement. I'm also going to pick up some showercaps, or something similar to keep grinding dust off the buffing wheels, as I want to keep those clean.
I have an outlet in the ceiling right above tool island so I'll run a drop to it, and mount a heavy duty powerbar to the plywood out the side, and I'll be able to use everything without fiddling with plugs or cords too. Plus it's nice to be able to walk around it without the cords in the way.
I've been rolling this problem around in the brain bucket for a while, and admittedly this took much longer to think about, and figure out than it took to make, but here's where I'm at after an afternoon's worth of work. No cad, no complex equations, just a simple sketch to figure out some dimensions, and a raid of the offcut pile.
Here's my current bench grinder situation. I've never really liked it, but it was a quick solution at the time, and Kinda worked, so I went with it. This is what I started with today. I've never liked having to move the saw to grind drills and toolbits.
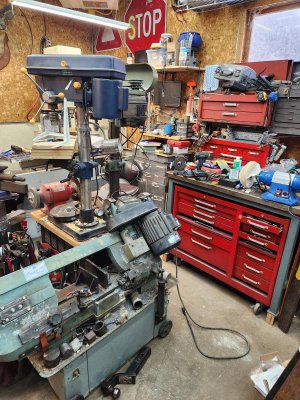
Quick cleanup job
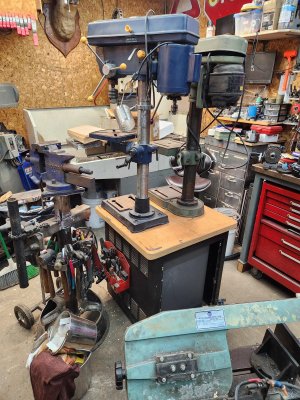
Took some measurements, did some more daydreaming and imagineering, made a quick sketch, and then got to cutting.
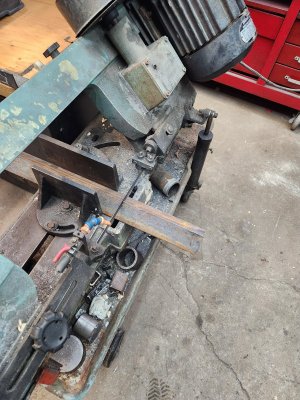
Parts cut, and marked up for holes, chamfers, and notches.
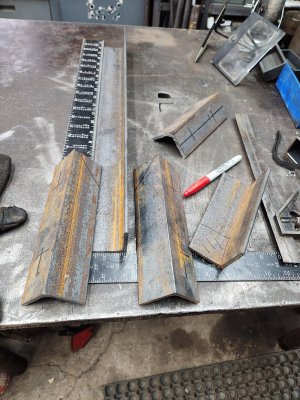
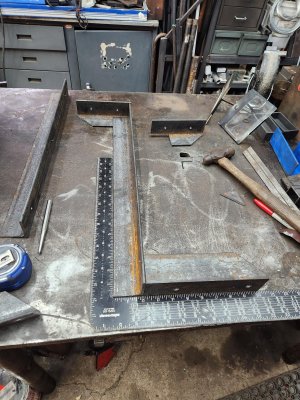
All the holes drilled, and happy with the fitup, (made a bit of a goof on the top notch, but I can work with it....) I took them out back for a spa day with various grinder treatments on the dirty bench. Nice day to work outside, not much snow left, and going fast. I think we might have had our last day at the skihill on friday night. Had a handfull of good runs after school, but got rained out early. Unless we get a good cold snap where they can make a bunch more or mother nature decides to help out, that may be it. Tough year.
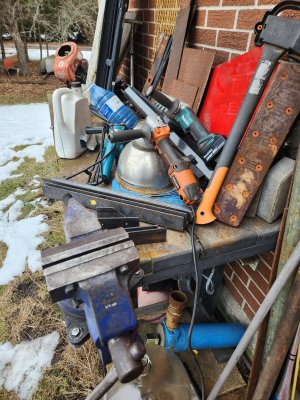
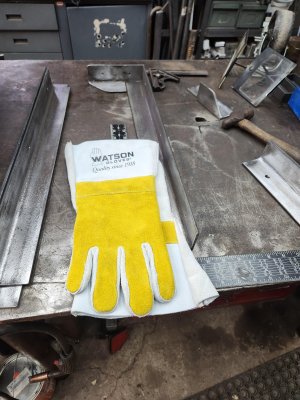
I don't spoil myself with niceties very often, but I splurged and picked up a set of new welding gloves, that WEREN'T the cheapest pair on the shelf. A guy could get used to this luxury....
Tacked up and ready to weld. It went quick, and I forgot to take progress pics, sorry....
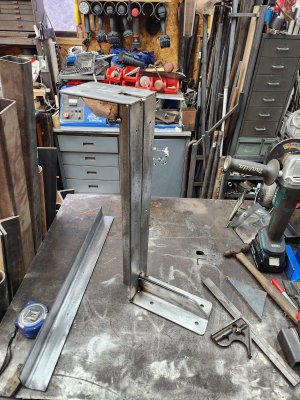
And here it is clamped in place, as I decide exactly where to mount it.
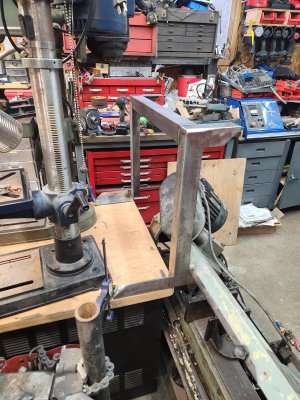
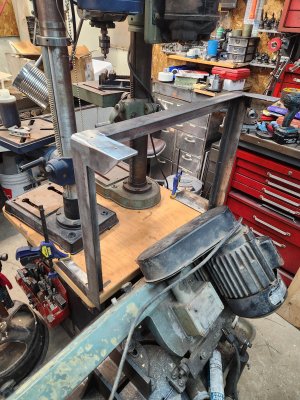
I ended up moving it back a bit, and through bolted it to the plywood top with 1/4"-20 bolts.
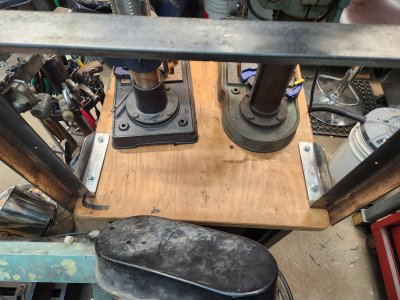
I had this old sheet of 3/4" ply hanging out behind my toolbox, that was already a workable size, so I just trimed out a bit for a custom fit around the feet. It's bolted to the frame with 1/4" bolts also.
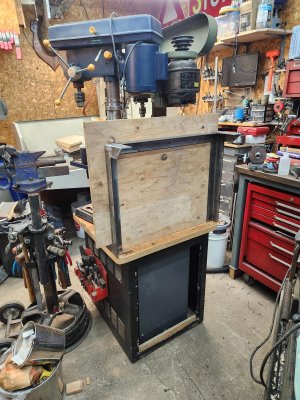
Good spot on the drill press side for some small shelves and tool storage also.
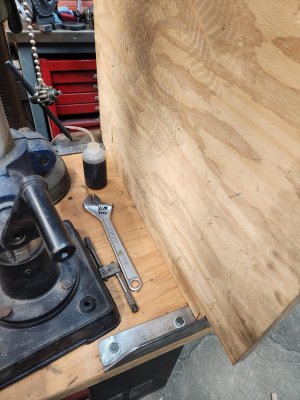
Then it was time to mount my buffer to the plywood, with 5/16" carriage bolts, and check clearances. I love it when something you picture in your brain ends up coming together and working exactly how you planned it. Saw opens up to almost full capacity, and I don't have to move anything to use all the tools. For longer stock, and full sticks, I have to pull the saw out a bit to clear the welding table and get out the garage door, but for most stuff, it works as is where is.
I set the grinders up on top with some scraps of plywood just for now to get an overall picture of how it's going to be. I'm going to cut a 2x8 to sit on top to bolt the grinders to, the plywood is temporary, I need those peices for more shelves somewhere else
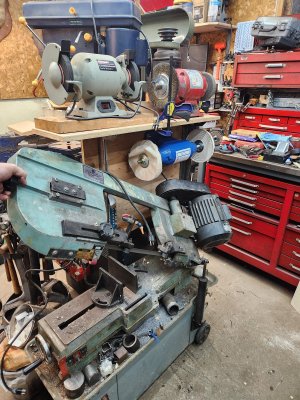
This was a fun one, and while seemingly small and unimportant, it makes much better use of the space there and puts a few more tools into operation. With all my big ticket tools in place and functioning, I'm down to storage density projects like this now. I have a few more like this to work through over the next week or so, and I'm really looking forward to them. Ever little bit helps in a small shop.
A few negatives though. The grinders are a bit high. It's 50" to the shelf where they sit. Didn't seem like much on paper, but a bit high in practice. The buffer is a nice height, but I might try and cut another inch or two out of the uprights to bring it down a bit, and shrink the space around the buffer. There is some room for refinement. I'm also going to pick up some showercaps, or something similar to keep grinding dust off the buffing wheels, as I want to keep those clean.
I have an outlet in the ceiling right above tool island so I'll run a drop to it, and mount a heavy duty powerbar to the plywood out the side, and I'll be able to use everything without fiddling with plugs or cords too. Plus it's nice to be able to walk around it without the cords in the way.
Last edited:
